14 by 2 dots rangoli is one of the most beautiful kolam designs you can draw at home.
Step by step muggulu designs is one of the most beautiful and easy-to-follow kolam designs you can draw at home. Want to draw a vibrant kolam using a long dot grid?
This 14 by 2 dots colourful rangoli is simple, elegant, and explained step by step.
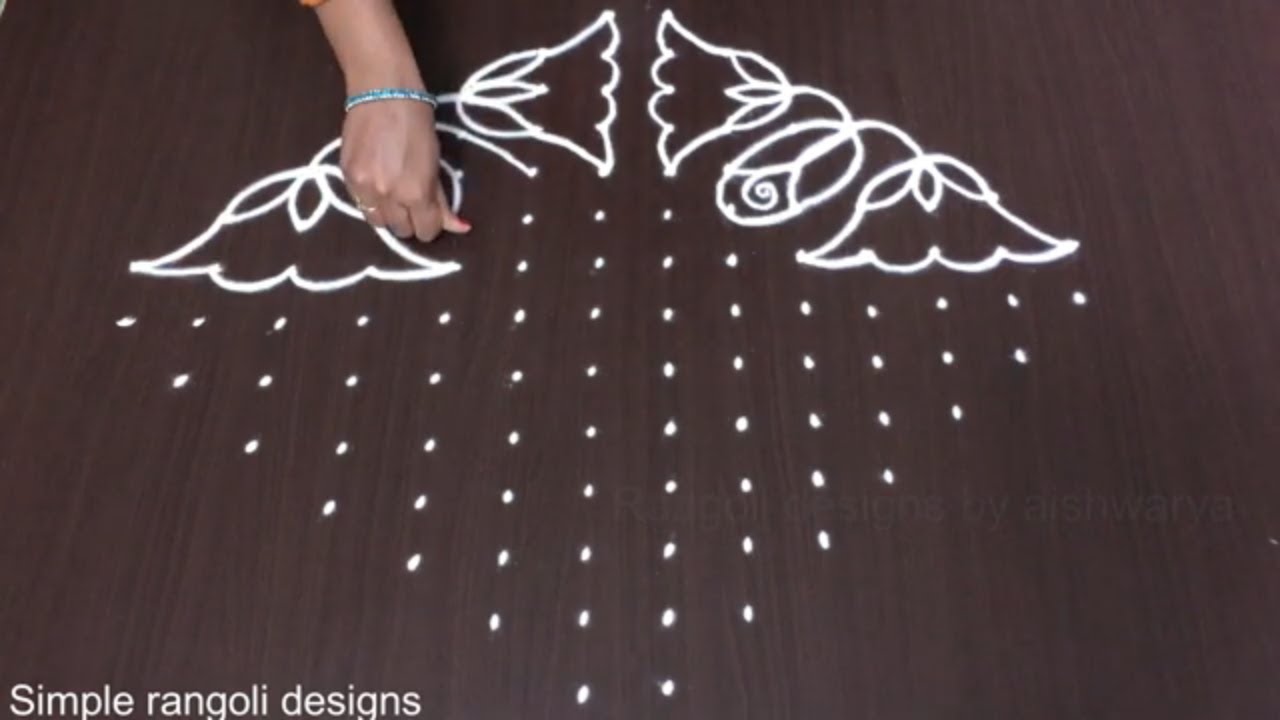
In this video, I guide you through creating a 14×2 straight dot grid kolam that is perfect for narrow entrances and compact spaces. The rectangular layout gives the design a clean and structured appearance, while the colourful detailing adds a bright and festive touch. This is what makes the step by step muggulu designs so popular among kolam lovers of all skill levels.
We begin by placing a neat 14 by 2 straight dot structure, carefully aligned to maintain proper spacing and symmetry. Then, the outer framework is formed by smoothly connecting the dots into a balanced and attractive pattern. As the design develops, inner detailing enhances the structure and gives the kolam a refined finish. Finally, colours are added thoughtfully to highlight each section and bring the design to life.
✨ What You’ll Learn:
• How to construct a proper 14–2 straight dot grid
• How to maintain symmetry in narrow rectangular kolams
• How to connect dots smoothly for a clean look
• Colour filling techniques for a vibrant finish
The step by step muggulu designs belongs to the tradition of rangoli and kolam designs that have been drawn at doorsteps across South India for centuries. Explore more in our 14 to 2 dots Rangoli Designs collection. According to Wikipedia, rangoli is an art form using coloured rice, flour, and petals believed to bring good luck.
This step by step muggulu designs tutorial has earned 5,790 views and 31 likes from our community of rangoli enthusiasts, making it one of the most loved designs on our channel.
step by step muggulu designs — Step by Step Guide
In this video tutorial you will learn step by step how to create a beautiful step by step muggulu designs. Follow along carefully and recreate this 14 to 2 dots Rangoli Designs design at home with ease.
What You Will Learn
- 14 by 2 dots rangoli
- Amazing colour kolam 14×2
- Step by step 14 2 muggulu
- 14 by 2 dots kolam design
- 14 2 chukkala muggulu
- Straight dot grid rangoli
- Symmetrical 14 by 2 kolam
- Narrow rectangular dot kolam
Frequently Asked Questions
How do I make a step by step muggulu designs?
To make a step by step muggulu designs, start by marking the dots in the correct grid pattern on a clean, flat surface. Use chalk or rice flour to place your dots evenly. Then follow the curves and lines shown in the video, connecting dots in the pattern shown. Take your time with each loop — the key to a neat step by step muggulu designs is even spacing between dots.
Is this 14 to 2 dots Rangoli Designs suitable for beginners?
Yes! This 14 to 2 dots Rangoli Designs design is designed to be clear and easy to follow even if you are new to kolam or muggulu. The step-by-step video guide makes it simple to pause, rewind, and practice at your own pace. Most learners can complete this step by step muggulu designs on their first or second try.
What materials do I need?
You will need rice flour or rangoli powder in your chosen colours, a flat surface such as a clean floor or courtyard, and optionally a dot grid stencil to help you get started. For a coloured step by step muggulu designs, prepare your colour powders in small bowls before you begin so you can work smoothly.
How long does it take to draw?
The full tutorial video is 4 minutes 11 seconds long. In practice, drawing this step by step muggulu designs takes most people between 10 and 20 minutes depending on your experience level. With practice it becomes faster and more fluid.
Whether you are preparing for a festival, a daily ritual, or simply enjoying the art of kolam, this step by step muggulu designs is a wonderful addition to your rangoli collection. Watch the video above, follow along, and share your finished design with us. We love seeing your creativity!