Whether you are decorating for a festival or your daily morning ritual, How To Draw Rangoli is an excellent design to keep handy.
How to draw Beautiful & Creative kolam | Rangoli designs 9×5 Easy aaru deepala muggulu | RamRangoli Thank you so much for watching Channel
My Ram Rangoli Channel Contains : Rangoli Designs Sankranthi Muggulu
Diwali Rangoli Ratham Muggulu Kolam Designs
Muggulu Designs Chukkala Muggulu Easy Rangoli
Simple Rangoli Easy Rangoli Designs Dhanurmasam Muggulu
Melikala Muggulu Geethala Muggulu Sivarathri Muggulu
Tip: Use chalk to lightly mark your dot grid first — it wipes away cleanly once your rangoli is finished.
Creating a 9-dot rangoli design can be a delightful experience, especially during festive occasions. The simplicity of the 9×5 grid allows beginners to explore their creativity while keeping it manageable. This design often features intricate patterns that can incorporate floral motifs, making it perfect for celebrations like Pongal or Diwali. If you’re looking for inspiration, you can check out other designs such as the Latest Flower Rangoli Designs 9 Dots to enhance your artistic repertoire.
To draw this rangoli, start by marking out the 9 dots in a grid format, ensuring they are evenly spaced. From there, you can create various shapes and patterns, adding colors as you go. The key to mastering this design is practice and experimentation with different styles. For a festive touch, consider combining it with a Simple Pongal Pot Kolam that beautifully complements the rangoli. For more information on this traditional art form, visit Rangoli on Wikipedia.
About this design: How To Draw Rangoli is a beginner-friendly pattern that comes together in just a few minutes. Once you have practised the how to draw rangoli dot grid, you can scale it up for festival mornings or scale it down for a daily doorstep. Many learners on our channel make this how to draw rangoli their go-to design once they get the rhythm of the curves.
How To Draw Rangoli — Step by Step Guide
Below is the step-by-step breakdown. The video covers the same sequence in real time.
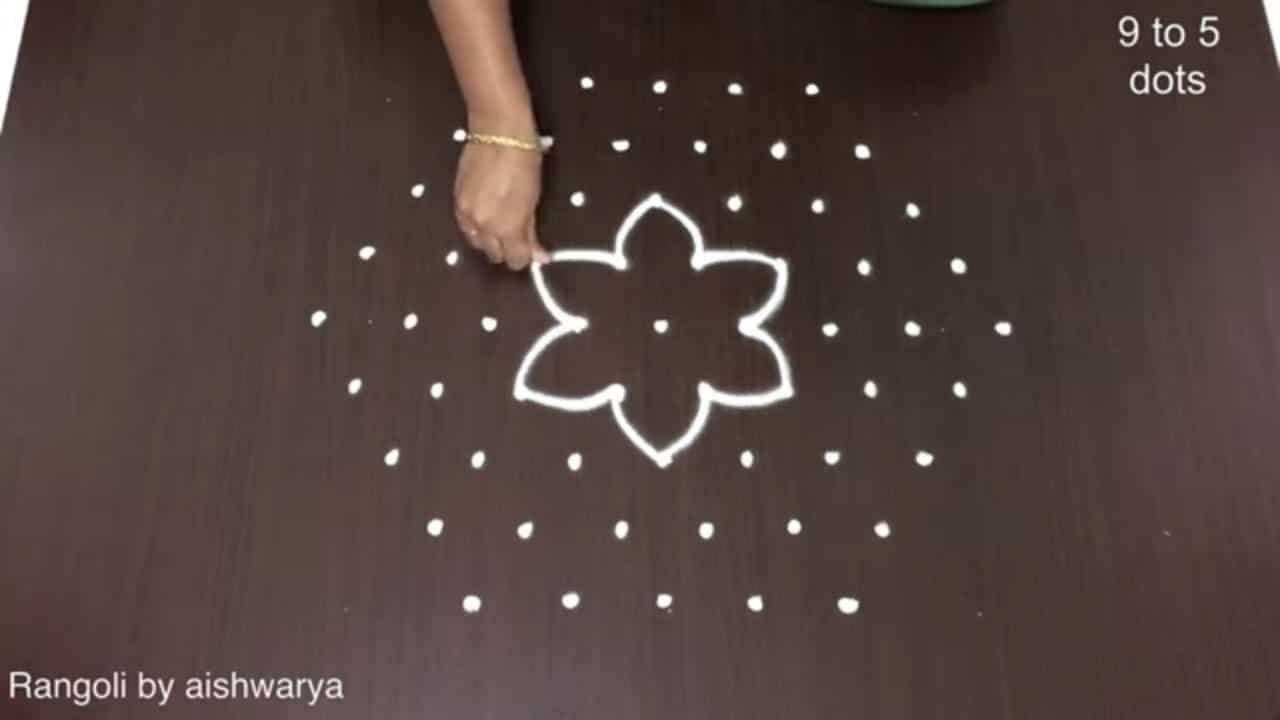
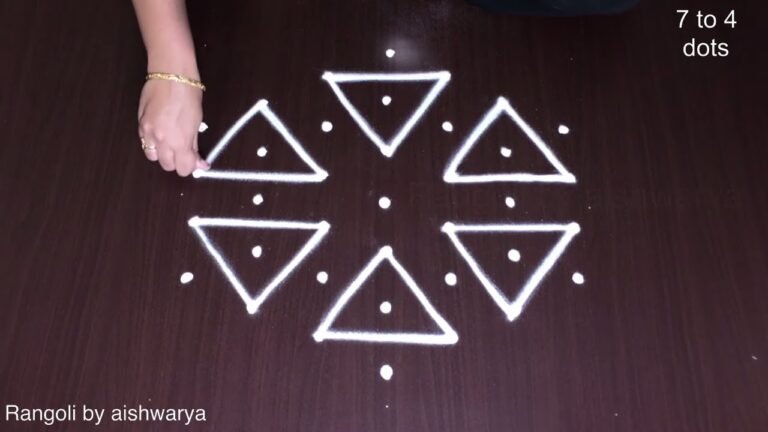
- Mark a 9-to-5 dot grid (widest row of 9 dots in the middle, tapering to 5 at the top and bottom).
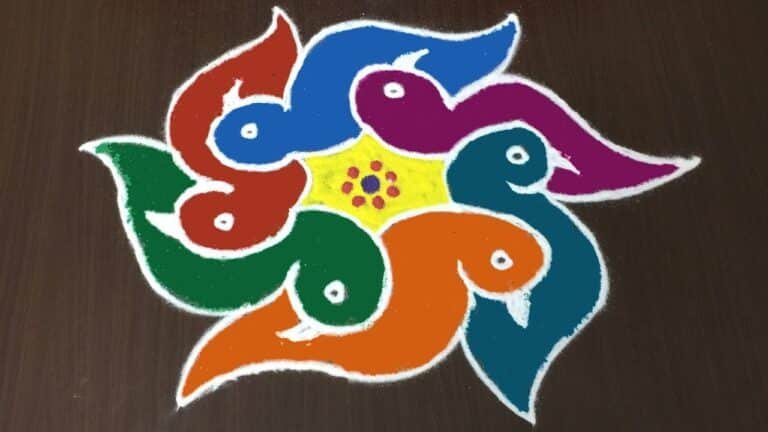
- Draw the central rose: circle a small four-petal bud around the middle dot, then wrap two or three larger rings of overlapping curved petals so the centre opens like a blooming rose.
- Around the rose, weave interlocking pointed loops between the surrounding dots to build the diamond-lattice ring that frames the flower.
- At the four corners draw mango-leaf motifs — a pointed leaf with a centre vein and short eyelash strokes along its edges, finished with a small curl at the stem.
- Set a diya (oil lamp with a flame) at the top centre and small lotus buds at the bottom, then fill the side gaps with S-curls and tiny spirals.
- Trace the whole rangoli in white line — the design is monochrome white on the dark floor.
What You Will Learn
- Simple Rangoli Designs
- Rangoli
- Muggulu
- Rangoli Designs
- Rangoli Kolam
- Kolam
Frequently Asked Questions
How do I draw this rangoli?
Set down the dot grid in pencil or chalk, then follow the loops one petal at a time. If a curve goes off, wipe it and retry — kolam is forgiving.
Is this suitable for beginners?
Absolutely. You can pause and rewind the video at every step. The pattern is straightforward once you have the grid down.
What materials do I need?
Just three things: powder (white plus any colours you want), a flat dry surface, and a few minutes of focus. A small bowl per colour helps keep things tidy.
How long does it take?
About 4 min 21 sec on screen, perhaps 15 minutes for a relaxed first attempt. By the second try most people are noticeably quicker.
Beginners often ask which design to start with. Honestly, this one. It is small enough to finish in a sitting and the curves teach you the basics of dot kolam.
Leave a Reply