This 9 into 5 dots tutorial walks you through every step from the dot grid to the final pattern.
For another beginner-friendly variation, try Happy New Year 21 To 11 Beautiful Rangoli.
Learn more about the tradition of Rangoli on Wikipedia.
How To Draw 9 is the kind of design that looks intricate but is genuinely beginner-friendly once you follow the dot grid.
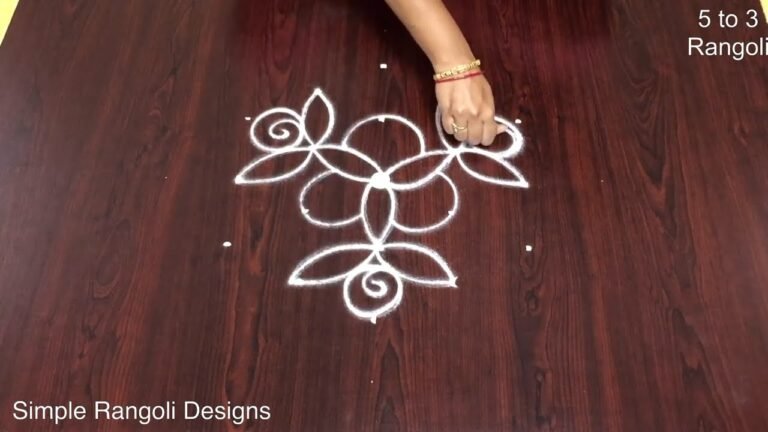
Want to learn how to draw a clean and symmetrical 9 to 5 dots rangoli step by step? This easy apartment-friendly kolam design is perfect for beginners and quick entrance decoration. In this video, we demonstrate how to draw a 9 to 5 dots simple rangoli, starting from proper dot placement to the final finishing touches. The 9-5 decreasing grid creates a naturally balanced structure that makes it easier to maintain symmetry while forming smooth curves.
Correct placement of the 9 to 5 decreasing dot grid How to connect the outer lines evenly Maintaining symmetry across the center
Simple finishing techniques for a neat look The 9 to 5 dot format is ideal for apartment entrances and compact spaces because it offers a detailed appearance without taking up too much area. Once you understand the structure, you can confidently experiment with variations and creative patterns. This step-by-step approach makes the process relaxing and beginner-friendly. Even if you are new to dot kolam, following the grid structure will help you improve your curve control and spacing.
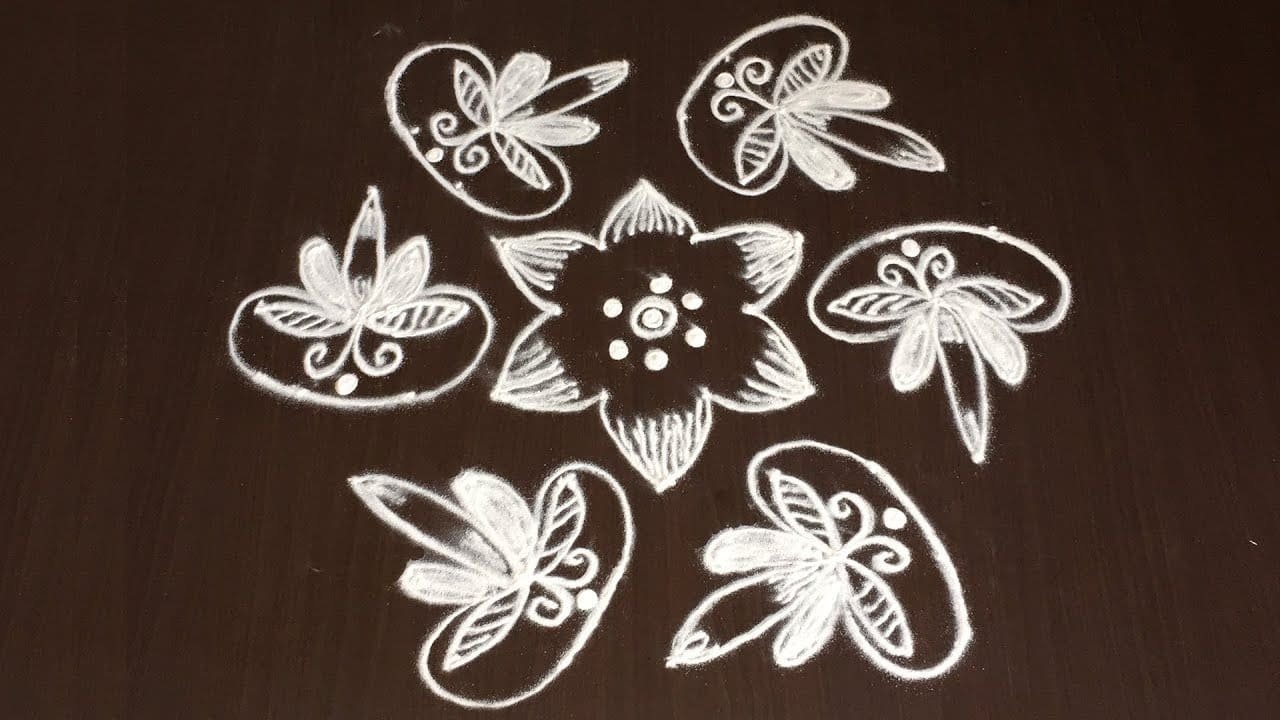
Watch till the end to see the full symmetrical reveal — the final result shows how structured dots transform into an elegant and balanced kolam design. If you enjoy 9 to 5 dot rangoli tutorials, explore other instructional grids like 7-4 and 11-6 to expand your skills and build a strong dot-series foundation. Save this design and try it at your entrance today.
Tip: Keep your powder bowl close to your dominant hand. Small movements give cleaner curves.
About this design: 9 Into 5 Dots is a beginner-friendly pattern that comes together in just a few minutes. Once you have practised the 9 into 5 dots dot grid, you can scale it up for festival mornings or scale it down for a daily doorstep. Many learners on our channel make this 9 into 5 dots their go-to design once they get the rhythm of the curves.
9 Into 5 Dots — Step by Step Guide
Pace yourself through the steps — kolam rewards patience more than speed.
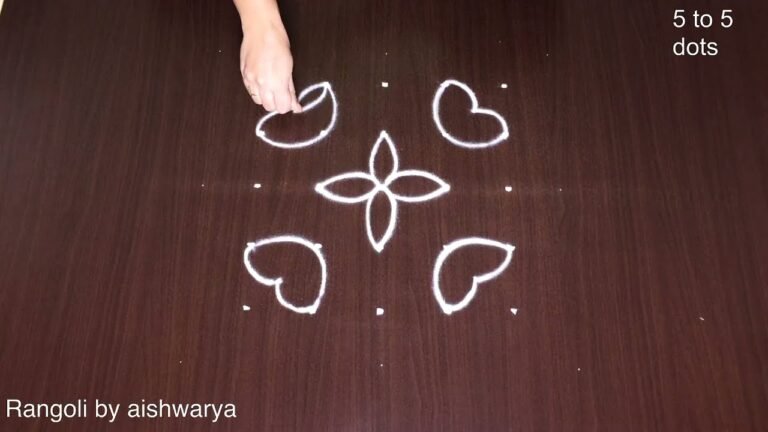
- Clear a flat surface and set down your dot grid using rice flour or chalk.
- Confirm the dot spacing is even — uneven dots are the biggest cause of wobbly curves.
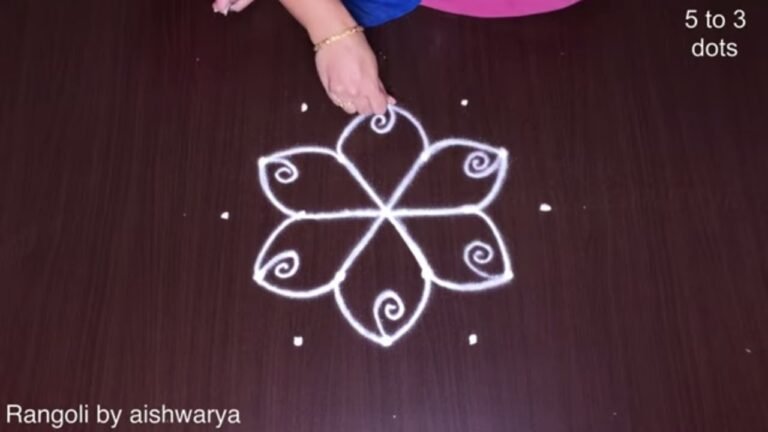
- Begin tracing from the centre outward, following the curves shown in the video above.
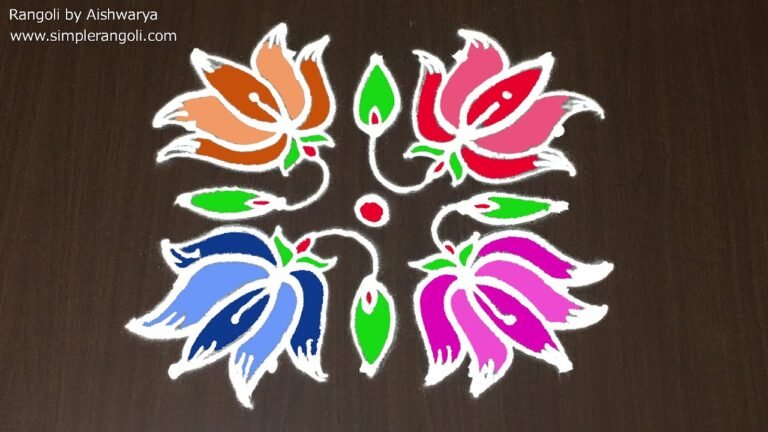
- Fill the petals and sections with your chosen colours, working one area at a time.
- Finish the edges with a fine line for a sharp, photograph-ready result.
What You Will Learn
- How To Draw 9 To 5 Dots Rangoli
- 9-5 Dots Simple Kolam
- Easy Apartment Kolam 9-5
- 9 To 5 Dots Rangoli Tutorial
- Simple 9-5 Muggulu Design
- 9 To 5 Pulli Kolam
Frequently Asked Questions
How do I draw this rangoli?
Start by marking an even dot grid on a flat, clean surface. Once the grid is in place, connect the dots following the curves shown in the video. Even spacing between dots is the single biggest factor for a clean finish.
Is this suitable for beginners?
Yes — this design is shaped specifically with newcomers in mind. The dot grid is small enough to manage, and the curves are gentle. Most learners get it right by the second try.
What materials do I need?
Rice flour, coloured rangoli powders, and a clean stretch of floor or paper. Some draw with chalk first to set the grid before powdering over it.
How long does it take?
You will see a 3 min 18 sec walkthrough above. Drawing it yourself is usually a 12–18 minute affair, slightly slower the first time.
There is real pleasure in finishing a kolam at your own doorstep — even more so when the pattern is one you have practised before. Make this one of those.


Leave a Reply