Looking to learn Daily Use Rangoli Design? This step-by-step guide walks you through every line, dot, and curve.
For another beginner-friendly variation, try Easy Pongal Pot Kolam.
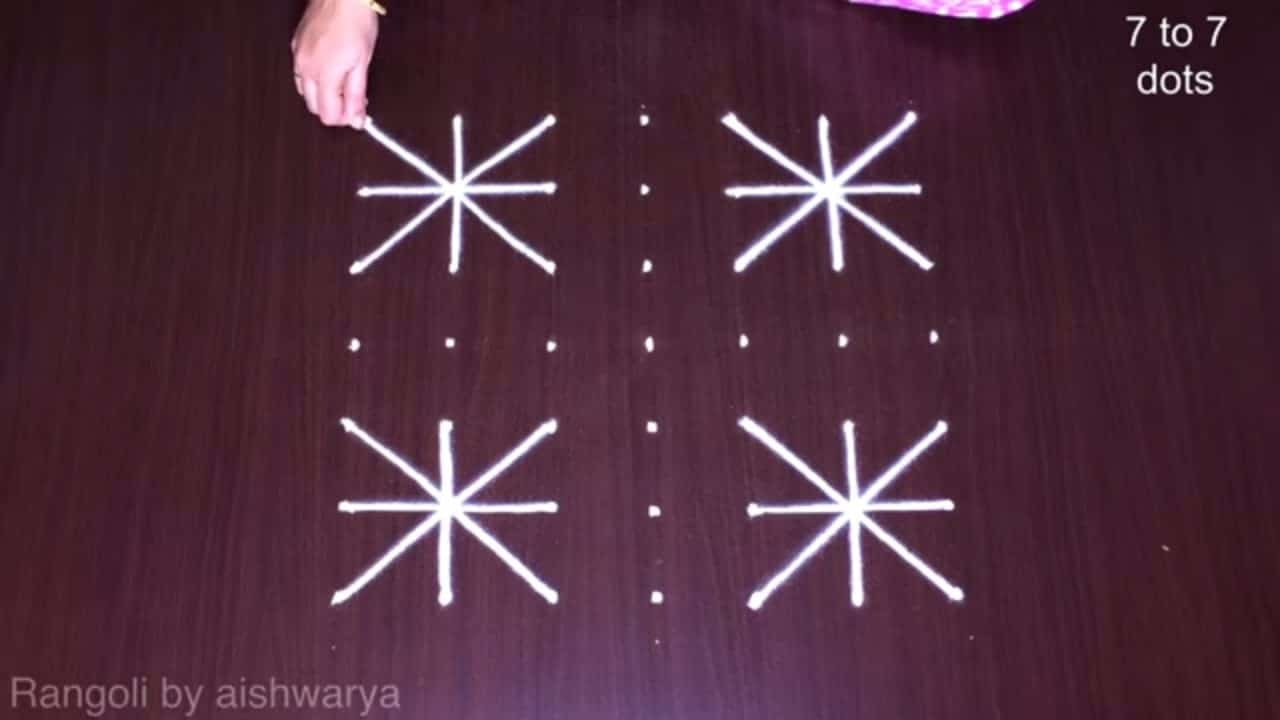
Daily Use Rangoli Design 7 Into 7 | Muggulu With Chukkalu Dotted Kolams Art Thank you so much for watching Channel
My Rangoli Channel Contains : Rangoli Designs Sankranthi Muggulu
Diwali Rangoli Ratham Muggulu Kolam Designs
Muggulu Designs Chukkala Muggulu Easy Rangoli
Simple Rangoli Easy Rangoli Designs Dhanurmasam Muggulu
Melikala Muggulu Geethala Muggulu Sivarathri Muggulu
Tip: Use chalk to lightly mark your dot grid first — it wipes away cleanly once your rangoli is finished.
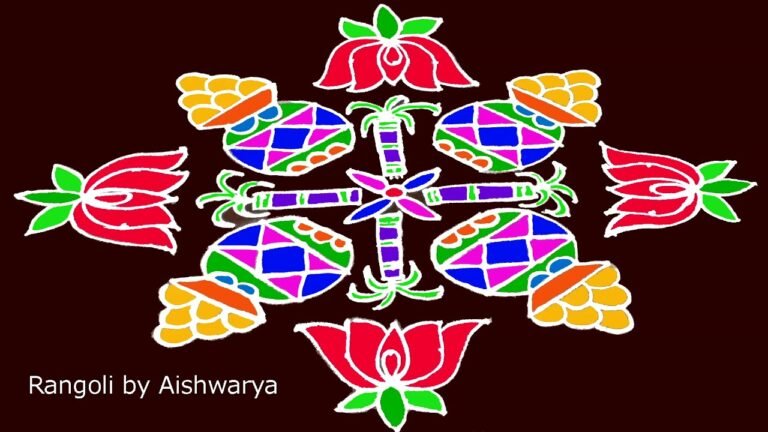
The daily use rangoli design featuring a 7 to 7 dot pattern is both simple and elegant, making it perfect for regular decoration at home. This design often incorporates floral motifs and geometric shapes, allowing for creativity while remaining easy to replicate. Many choose this design to welcome guests or for daily rituals, as its symmetrical appearance brings a sense of order and harmony. For more inspiration, you can explore 16 To 6 Amazing Panduga Pedda Muggulu and 9 Dots Chukkala Muggulu for Festivals.
Traditionally, rangoli serves not just as decoration but as a cultural expression, with deep roots in Indian festivals and daily life. The 7 to 7 design is versatile, making it suitable for various occasions, from welcoming the morning sun to celebrating festivals. The use of vibrant colors enhances its appeal, bringing joy into the space. For those interested in learning more about this beautiful art form, you can visit this Wikipedia page to understand its significance and variations across India.
Daily Use Rangoli Design — Step by Step Guide
Read through the steps before you begin so the sequence feels familiar when you start drawing.
- Mark the 7-to-7 dot grid.
- At the centre draw a small square with a tiny spoked flower inside it.
- On the four sides of the square draw a diamond and fill each with a cross-hatch net, so the four diamonds form a plus/cross.
- In each of the four corners draw a star flower with eight sharp pointed petals radiating from the centre.
- Fill each star-flower centre with a spray of short lines tipped with dots (the burst of stamens).
- Outline everything once more; keep it white with no colour fill.
What You Will Learn
- 7X7 Dots Rangoli
- Daily Use Rangoli With Dots
- Chukkalu Muggulu Designs
- 7 Into 7 Dots Kolam
- Dotted Kolams With Dots
- Rangoli With Dots
Frequently Asked Questions
How do I draw this rangoli?
It looks complex but follows a simple rhythm: dots first, then loops. Mark the grid, take a breath, and trace the curves at a steady pace. The pattern emerges on its own.
Is this suitable for beginners?
Absolutely. You can pause and rewind the video at every step. The pattern is straightforward once you have the grid down.
What materials do I need?
Powder (white for outlines, colours for filling), a flat surface, and a dot stencil if you want absolute precision. Beyond that, just your hand and a steady pace.
How long does it take?
The full demonstration takes 4 min 29 sec. Most people find their own drawing time settles to about 15 minutes once the grid is familiar.
Drawing kolam is as much about the practice as the result. Set aside ten minutes, follow the video, and enjoy the process.
Leave a Reply