If you enjoy dot-grid muggulu, Merry Christmas Candle Rangoli is a satisfying pattern that comes together in just a few minutes.

Merry Christmas Candle Rangoli Design | 8*2 Special Bell Muggulu Kolam | Rangoli Aishwarya Thank you so much for watching Channel
My Rangoli Channel Contains : Rangoli Designs Sankranthi Muggulu
Diwali Rangoli Ratham Muggulu Kolam Designs
Muggulu Designs Chukkala Muggulu Easy Rangoli
Simple Rangoli Easy Rangoli Designs Dhanurmasam Muggulu
Melikala Muggulu Geethala Muggulu Sivarathri Muggulu
Tip: Work from the centre outward. It keeps the symmetry honest and prevents the design from drifting off-balance.
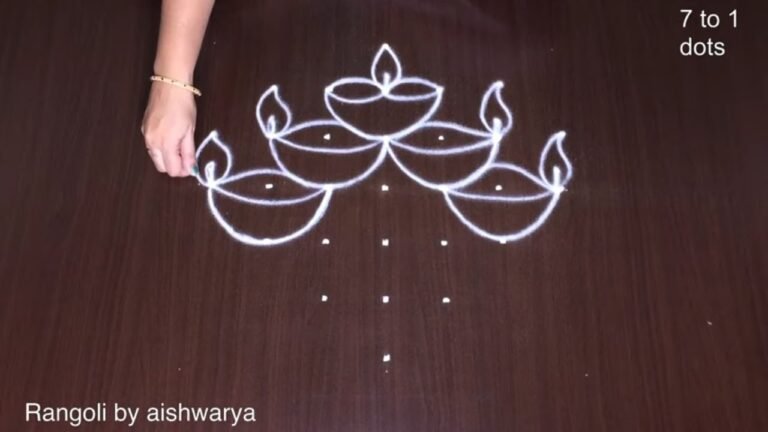
The Merry Christmas Candle Rangoli design, featuring an 8×2 special bell muggulu format, is a delightful way to celebrate the festive season. This intricate design showcases the warmth and joy associated with Christmas, incorporating candles that symbolize light and hope. Beginners can easily follow along, as the design emphasizes simple yet beautiful patterns that can brighten up any home during the holidays. For more festive ideas, you may also explore the Aarti of Rangoli Happy New Year post.
About this design: Merry Christmas Candle Rangoli is a beginner-friendly pattern that comes together in just a few minutes. Once you have practised the merry christmas candle rangoli dot grid, you can scale it up for festival mornings or scale it down for a daily doorstep. Many learners on our channel make this merry christmas candle rangoli their go-to design once they get the rhythm of the curves.
Merry Christmas Candle Rangoli — Step by Step Guide
Here is how to draw it, line by line. Take your time on the corners and the symmetry will take care of itself.
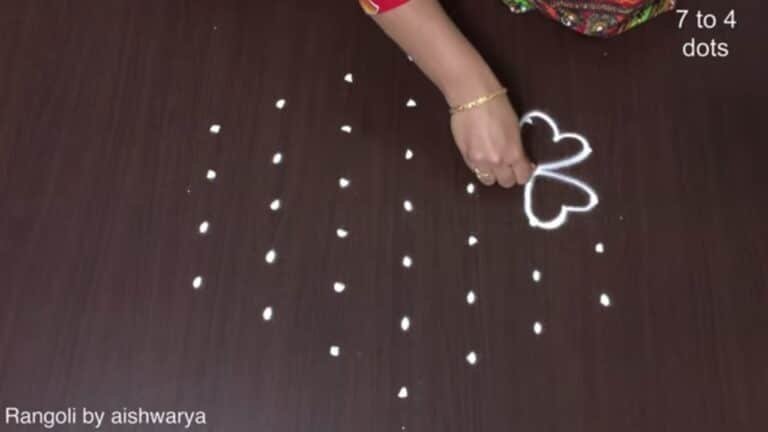
- Mark the 8-to-2 dot grid (rows tapering from 8 down to 2 into a diamond field).
- In the centre draw two candles facing top and bottom — each a tall body wrapped in a twisting spiral stripe and topped with a small teardrop flame.
- On the left and right draw a paisley leaf-twist (a fat comma-leaf with a spiralled inner curl) to balance the candles.
- Fill the four corners with Christmas bells — a fan/bell shape with a hatched, beaded rim and a little clapper loop beneath.
- Edge the bell rims and candle bases with a row of short hatch strokes and dots for the decorative trim.
- Link the motifs with light curl scrolls so the whole muggulu reads as one connected wreath.
What You Will Learn
- Simple Rangoli Designs
- Rangoli
- Muggulu
- Rangoli Designs
- Rangoli Kolam
- Kolam
Frequently Asked Questions
How do I draw this rangoli?
Set down the dot grid in pencil or chalk, then follow the loops one petal at a time. If a curve goes off, wipe it and retry — kolam is forgiving.
Is this suitable for beginners?
Yes, and it is one we recommend to first-timers. The small grid keeps the design manageable while still teaching the core technique.
What materials do I need?
Rice flour, coloured rangoli powders, and a clean stretch of floor or paper. Some draw with chalk first to set the grid before powdering over it.
How long does it take?
The video runs 3 min 17 sec. In practice, most learners take between 10 and 20 minutes — a little longer the first time, faster as the pattern becomes familiar.
Once this design feels familiar, switch the colours or rotate the grid by a step. Small tweaks keep daily kolam practice interesting.

Leave a Reply