Whether you are decorating for a festival or your daily morning ritual, Kunda Muggulu Sankranthi is an excellent design to keep handy.

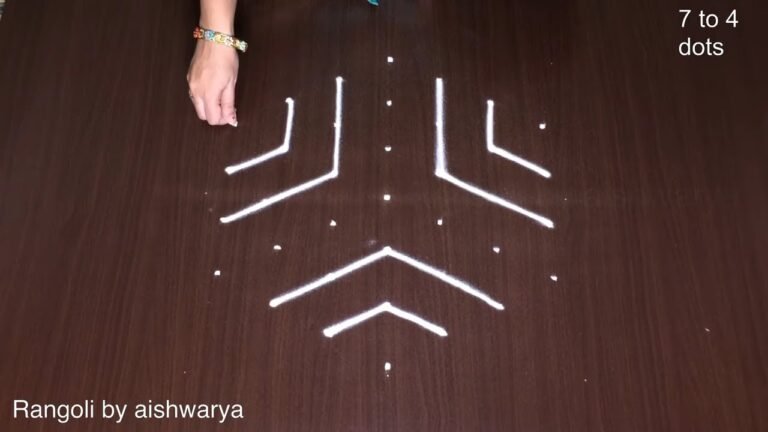
This tutorial will show you how to draw Pot Rangoli Designs patterns using materials such as dry rice flour, colored sand or flower petals Rangoli designs by Aishwarya. Simple rangoli Pulli Kolam pattern is created on the floor in living rooms or courtyards. Draw the Lines step by step as it is shown in this video and will be awesome Rangoli Design. 😲 The Kunda Muggulu Sankranthi pattern here is one of the amazing latest kolam designs. Simple Rangoli Designs and 9 to 9 Kolam by Aishwarya with dots for beginners and intermediate.
1. Sankranthi Rangoli Designs 2. Pongal Kolam 2025 3. Sankranti Rangoli Designs
4. Pongal Kolam Rangoli 5. New Year Special Rangoli 6. Pongal Kolam
7. Radham Muggulu 8. Sankranthi Special Rangoli 9. Bhogi Muggulu
10. Pongal Kolam With Dots 11. Sankranthi Muggulu 12. Thipkyanchi Rangoli Designs
13. Mattu Pongal Kolam 14. Sankranthi Muggulu 2025 15. ठिपक्यांची रांगोळी
Tip: A slightly damp brush along the edges gives a sharper finish, especially for festival photographs.
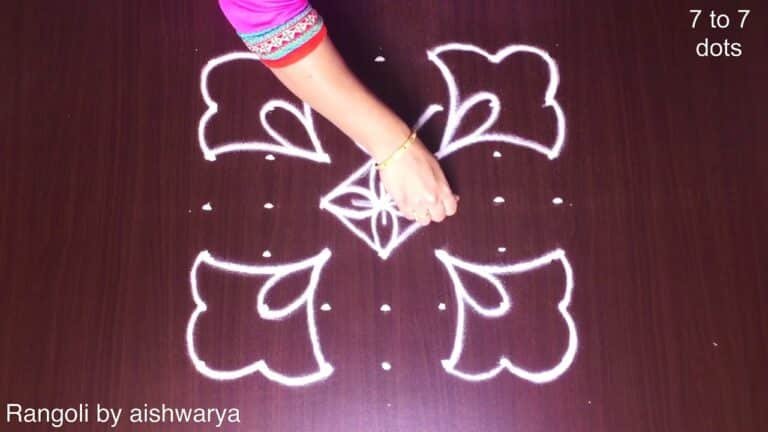
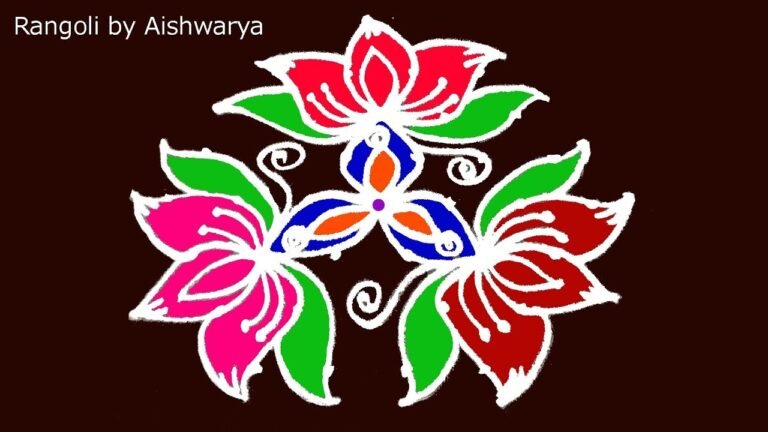
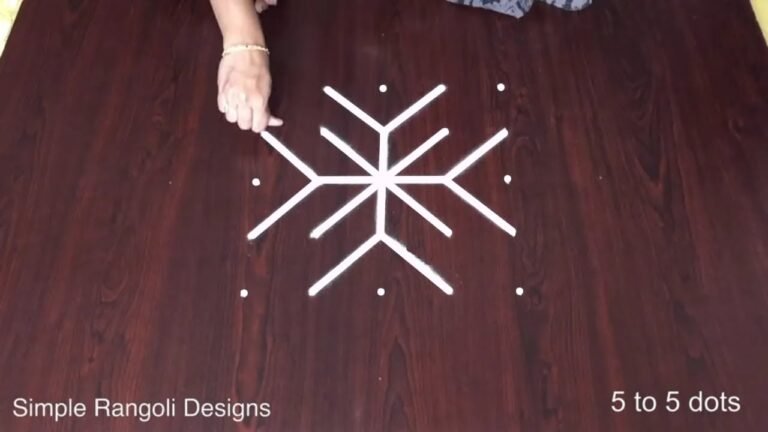
The Kunda Muggulu Sankranthi design is a delightful representation of the festive spirit associated with Sankranthi, created using a grid of 9 to 9 dots. This intricate kolam features floral and geometric patterns that symbolize prosperity and joy, making it ideal for welcoming guests during the celebrations. Beginners can take inspiration from this design to explore other festive themes, such as the Pongal Pot Rangoli Designs, which also celebrate the harvest season in a vibrant way.
Incorporating elements of traditional art, the Kunda Muggulu Sankranthi is not just about beauty but also about cultural significance. The use of rice flour or colored powders enhances its visual appeal while ensuring that it is eco-friendly. For those looking to expand their repertoire, exploring designs like the Amazing Big Peacock Muggulu can add a touch of creativity to their Rangoli collection. To learn more about the history and significance of Rangoli, you can visit this link.
Kunda Muggulu Sankranthi — Step by Step Guide
Each step takes only a moment. The whole design comes together in just a few minutes once the grid is in place.
- Clear a flat surface and set down your dot grid using rice flour or chalk.
- Confirm the dot spacing is even — uneven dots are the biggest cause of wobbly curves.
- Begin tracing from the centre outward, following the curves shown in the video above.
- Fill the petals and sections with your chosen colours, working one area at a time.
- Finish the edges with a fine line for a sharp, photograph-ready result.
What You Will Learn
- Simple Rangoli Designs
- Rangoli
- Muggulu
- Rangoli Designs
- Rangoli Kolam
- Kolam
Frequently Asked Questions
How do I draw this rangoli?
Start by marking an even dot grid on a flat, clean surface. Once the grid is in place, connect the dots following the curves shown in the video. Even spacing between dots is the single biggest factor for a clean finish.
Is this suitable for beginners?
Beginner-friendly is exactly the right description. The video walks through every line clearly and you can match the pace.
What materials do I need?
You will need rice flour or rangoli powder (white, plus your choice of colours), a flat surface like a clean floor or courtyard, and optionally a dot stencil if you are new to grid-drawing.
How long does it take?
A 3 min 8 sec video shows the complete sequence. On paper or floor, expect to spend around a quarter of an hour from grid to finished pattern.
If you draw this and would like a follow-up design at the same skill level, leave a comment on the video — we read every one and queue up requests.
Leave a Reply