New Year Rangoli With is the kind of design that looks intricate but is genuinely beginner-friendly once you follow the dot grid.
New Year Rangoli With 14 2 Easy Kolam | Art Designs Straight Dots Muggulu. This tutorial will show you how to draw Beautiful Indian traditional art Diwali Rangoli patterns using materials such as dry rice flour, colored sand or flower petals Rangoli designs by Aishwarya. Simple rangoli Kutti Kolam pattern is created on the floor in living rooms or courtyards. Draw the Lines step by step as it is shown in this video and will be awesome Rangoli Design. 😲 The Diwali rangoli pattern here is one of the amazing latest kolam designs. Simple Rangoli Designs and easy rangoli designs by Aishwarya with dots for beginners and intermediate.
1. Diwali Rangoli 2. Pongal kolams 3. Pongal rangoli designs
4. Sankranthi designs 5. Easy rangoli for sankranthi 6. Pongal designs
7. Latest rangoli for sankranthi 8. Marzaghi kolams 9. Best kolangal
10. Easy rangoli designs 11. Rangoli Designs for Bhaubeej 12. Thipkyanchi Rangoli Designs
13. Simple Karthigai Kolam 14. Karthika Masam Chukkala Muggulu 15. Tulasi Kota Muggulu
Tip: Use chalk to lightly mark your dot grid first — it wipes away cleanly once your rangoli is finished.
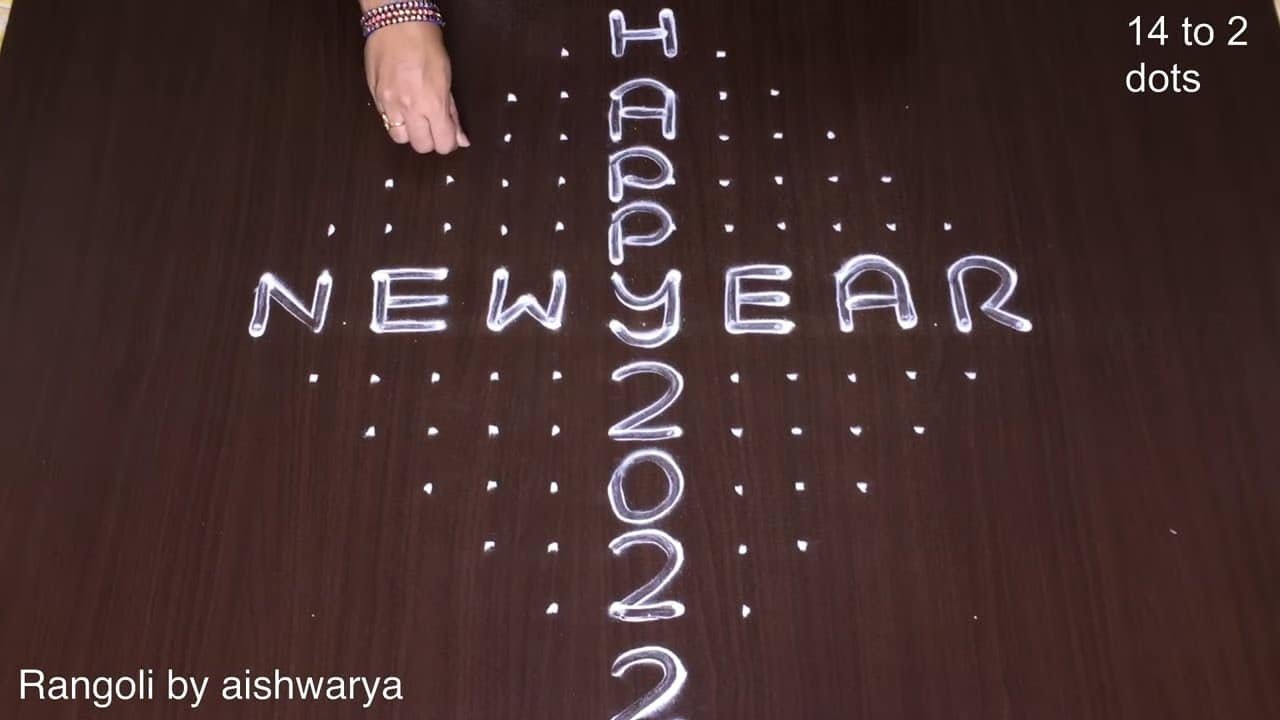
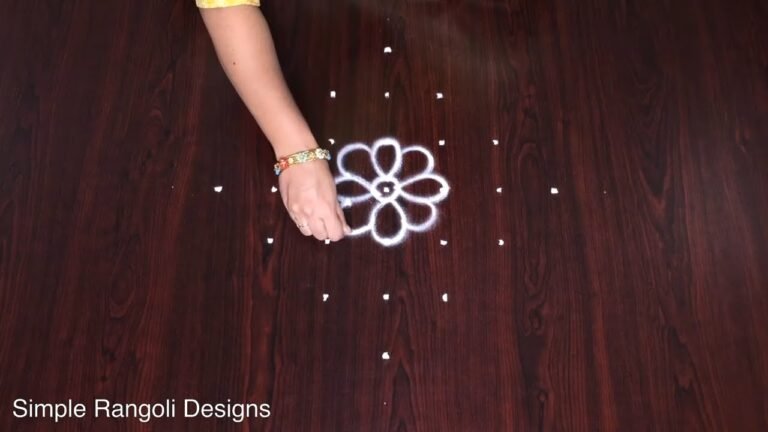
This New Year Rangoli design, created with 14 dots, reflects the joyous spirit of the festival. The intricate patterns can be easily crafted using materials like rice flour, colored sand, or even flower petals. This tutorial provides a step-by-step guide that makes it accessible for beginners, ensuring everyone can bring a touch of traditional art into their homes. For more festive inspiration, you might also enjoy exploring Easy Rangoli Designs for Diwali With 5 to 5 Dots and Friday Designs 6 Into 6 Lakshmi Kolam.
Traditionally, Rangoli serves as a welcoming gesture, symbolizing prosperity and happiness. This particular design, adorned with vibrant colors and geometric shapes, can be a beautiful addition to your living room or courtyard during New Year celebrations. As you create your own version, you might find inspiration from the rich history of Rangoli, which you can learn more about on Wikipedia. Engaging in this art form not only enhances your festive decor but also allows you to express creativity and connect with cultural roots.
About this design: New Year Rangoli With is a beginner-friendly pattern that comes together in just a few minutes. Once you have practised the new year rangoli with dot grid, you can scale it up for festival mornings or scale it down for a daily doorstep. Many learners on our channel make this new year rangoli with their go-to design once they get the rhythm of the curves.
New Year Rangoli With — Step by Step Guide
Pace yourself through the steps — kolam rewards patience more than speed.
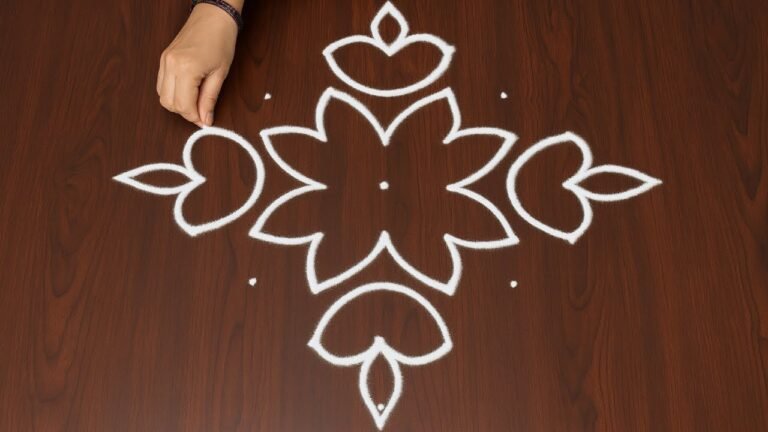
- Mark the 14-to-2 dot grid shown in the frame — a diamond pulli grid running 14 dots down to 2 at the points, sized to hold four corner flowers around a block of lettering.
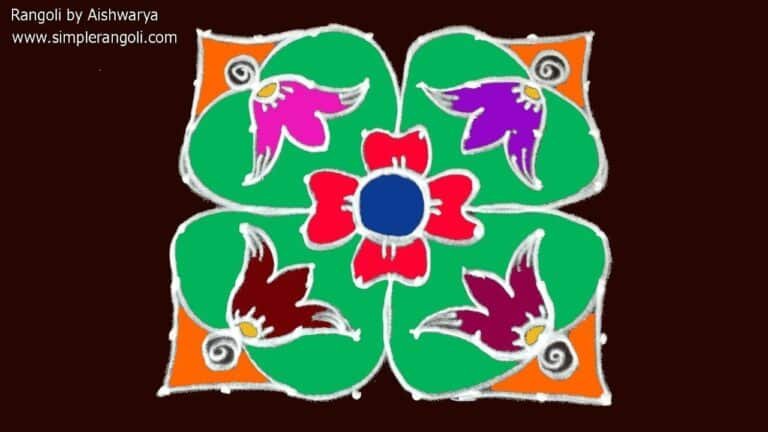
- In each of the four corners draw a large cloud-scalloped flower: a bumpy cloud-like petal ring, then inside it a smaller round flower with a dotted centre and short petals.
- From every corner flower trail a leafy vine of curls and small pointed leaves out toward the edges, mirroring all four corners so they match.
- Reserve the centre for the greeting: letter 'HAPPY' vertically down the middle, with 'NEW' and 'YEAR' reading across on either side of it.
- Below the words write the year '2022' running vertically down the lower-centre.
- Trace every outline once more in clean white/silver rangoli powder — the whole design is monochrome white on the dark floor with no fill colour.
What You Will Learn
- Rangoli
- Kolam
- Muggulu
- Rangoli For New Year
- New Year Rangoli Designs
- Happy New Year Rangoli
Frequently Asked Questions
How do I draw this rangoli?
Start by marking an even dot grid on a flat, clean surface. Once the grid is in place, connect the dots following the curves shown in the video. Even spacing between dots is the single biggest factor for a clean finish.
Is this suitable for beginners?
Yes, and it is one we recommend to first-timers. The small grid keeps the design manageable while still teaching the core technique.
What materials do I need?
White rice flour for the outline, coloured powders for the fill, and a clean dry floor. That is the essentials list — you can add a stencil if you prefer.
How long does it take?
Roughly 5 min 13 sec to watch end-to-end, and 10–20 minutes to draw yourself depending on grid size and how careful you are with the curves.
There is real pleasure in finishing a kolam at your own doorstep — even more so when the pattern is one you have practised before. Make this one of those.

Leave a Reply