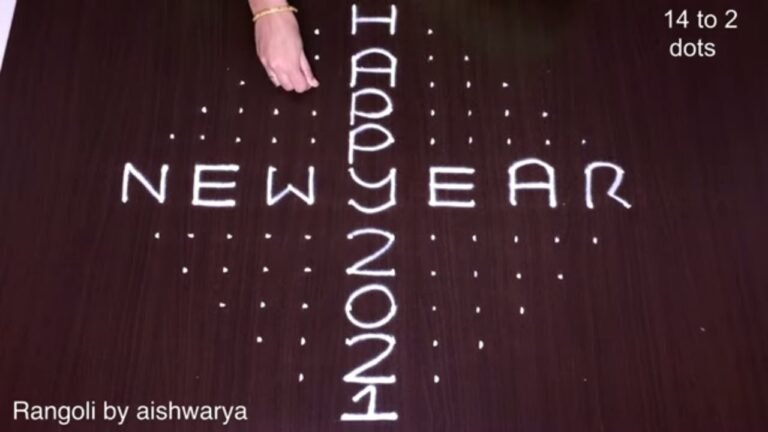
Looking to learn 12 Dots Happy New? This step-by-step guide walks you through every line, dot, and curve.
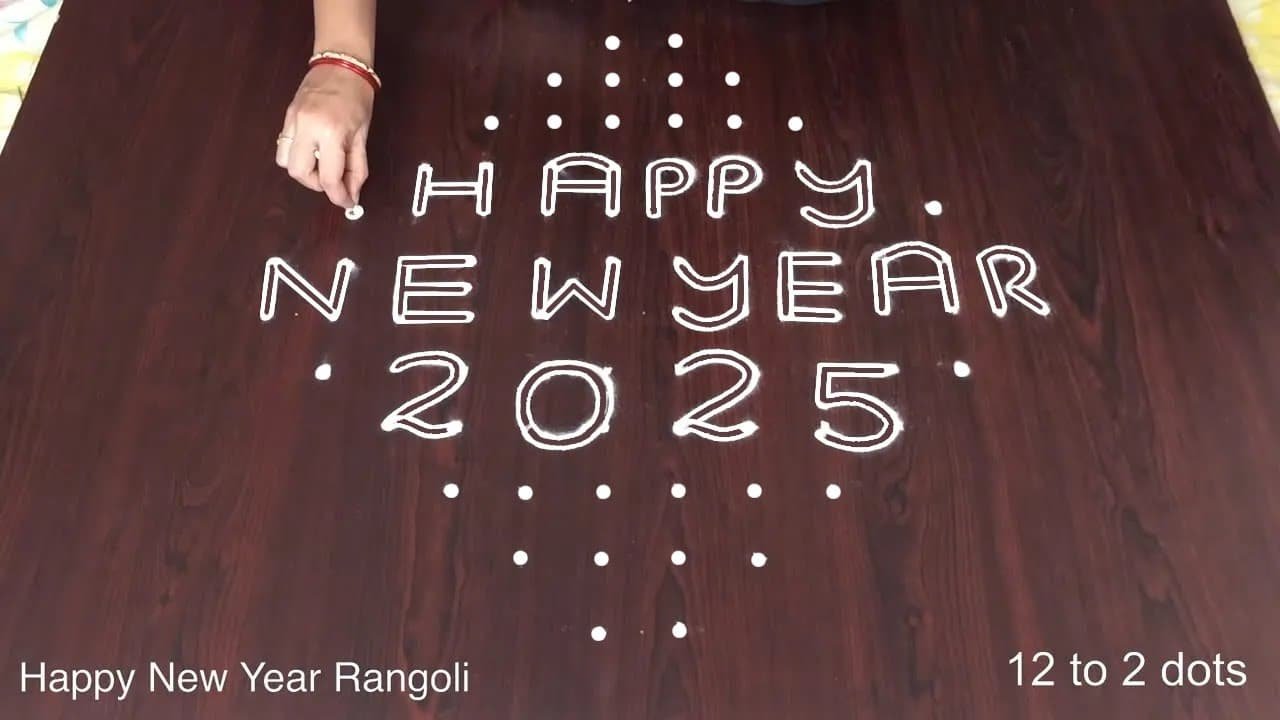
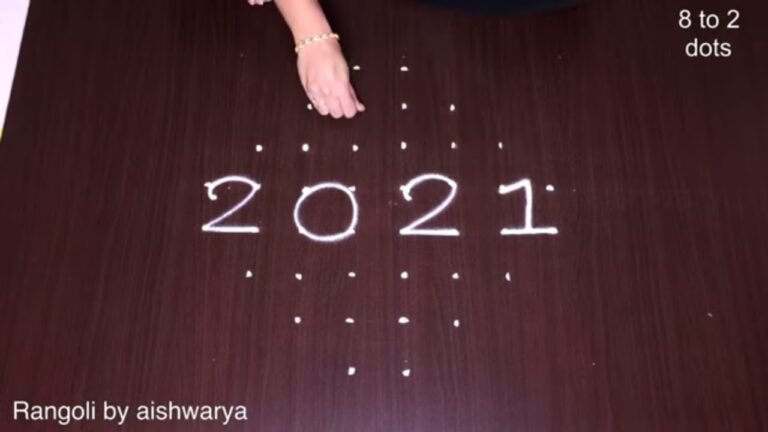
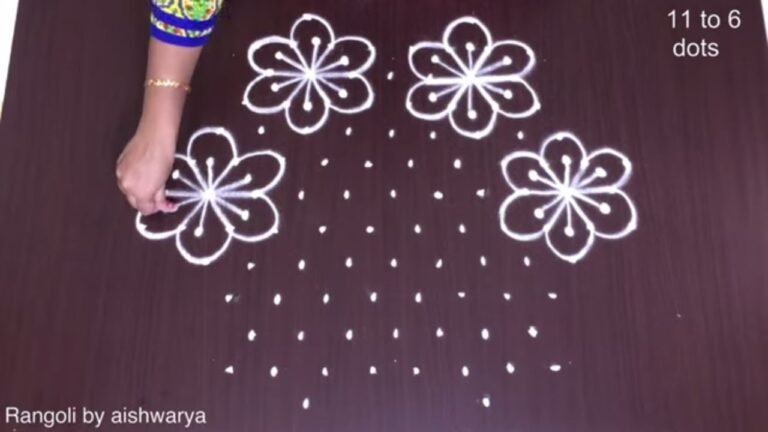
This tutorial will show you how to draw Happy New Year Rangoli Designs 2025 patterns using materials such as dry rice flour, colored sand or flower petals Rangoli designs by Aishwarya. Simple rangoli Pulli Kolam pattern is created on the floor in living rooms or courtyards. Draw the Lines step by step as it is shown in this video and will be awesome Rangoli Design. 😲 The 12 Pulli Kolam With Dots pattern here is one of the amazing latest kolam designs. Simple Rangoli Designs and హ్యాపీ న్యూ ఇయర్ ముగ్గులు by Aishwarya with dots for beginners and intermediate.
1. Simple New Year Rangoli 2. New Year Kolam 2025 3. Easy Rangoli Designs
4. Simple Rangoli 5. New Year Special Rangoli 6. Padi Kolam
7. Ratham Muggulu 8. New Year Kolam 9. Rangoli Designs Simple
10. New Year Muggulu 2025 11. Chukkala Muggulu 12. Thipkyanchi Rangoli Designs
13. Simple Karthigai Kolam 14. New Year Rangoli Designs 2025 15. ठिपक्यांची रांगोळी
Tip: Use chalk to lightly mark your dot grid first — it wipes away cleanly once your rangoli is finished.
The 12 dots happy New Year Rangoli is a delightful way to celebrate the arrival of a fresh year. This design is characterized by its simple yet elegant pulli kolam pattern, making it perfect for beginners. Using materials like rice flour or colored sand, you can create an inviting atmosphere in your home. The symmetrical arrangement and vibrant colors not only add beauty but also symbolize joy and prosperity for the year ahead. For more inspiration, you might explore the Perfect Geometrical Shapes Rangoli or the 12 to 4 Dots Flower Pot Rangoli designs.
This particular Rangoli design is often drawn during New Year celebrations, as it embodies the spirit of new beginnings. The easy-to-follow steps showcased in the tutorial guide you through creating this design effortlessly. Many families enjoy gathering to draw Rangoli together, fostering a sense of community and tradition. If you’re interested in learning more about the cultural significance of Rangoli, you can visit this page for further insights. You may also find joy in exploring other festive designs such as the Traditional Friday Diya Pulli Designs Rangoli.
About this design: 12 Dots Happy New is a beginner-friendly pattern that comes together in just a few minutes. Once you have practised the 12 dots happy new dot grid, you can scale it up for festival mornings or scale it down for a daily doorstep. Many learners on our channel make this 12 dots happy new their go-to design once they get the rhythm of the curves.
12 Dots Happy New — Step by Step Guide
Read through the steps before you begin so the sequence feels familiar when you start drawing.
- Mark the 12-to-2 dot grid to keep the lettering evenly spaced.
- Centre three lines of text on the grid: HAPPY, then NEW YEAR, then 2025.
- Draw each letter and numeral as a double-outline block — write the stroke, then trace a parallel line around it so the letters look tube-like.
- At the top centre draw a rose: a spiral coil wrapped in a scalloped petal, with a leaf on each side.
- Mirror the same rose-with-leaves at the bottom centre.
- Scatter small five-point asterisk-flowers in the gaps beside the words.
What You Will Learn
- Rangoli
- Kolam
- Muggulu
- Rangoli For New Year
- New Year Rangoli Designs
- Happy New Year Rangoli
Frequently Asked Questions
How do I draw this rangoli?
Start by marking an even dot grid on a flat, clean surface. Once the grid is in place, connect the dots following the curves shown in the video. Even spacing between dots is the single biggest factor for a clean finish.
Is this suitable for beginners?
Beginner-friendly is exactly the right description. The video walks through every line clearly and you can match the pace.
What materials do I need?
Rice flour, coloured rangoli powders, and a clean stretch of floor or paper. Some draw with chalk first to set the grid before powdering over it.
How long does it take?
A 4 min 4 sec video shows the complete sequence. On paper or floor, expect to spend around a quarter of an hour from grid to finished pattern.
When you draw this, focus on the first three dots — get those right and the whole pattern follows. The rest is just patience and a steady hand.

Leave a Reply