Add a touch of charm to your doorway with 12 To 4 Kolam — clean lines, balanced symmetry, and easy to scale.

Easy and quick doorstep Christmas tree | 12 to 4 kolam festival muggulu candle designs Thank you so much for watching Channel
My Rangoli Channel Contains : Rangoli Designs Sankranthi Muggulu
Diwali Rangoli Ratham Muggulu Kolam Designs
Muggulu Designs Chukkala Muggulu Easy Rangoli
Simple Rangoli Easy Rangoli Designs Dhanurmasam Muggulu
Melikala Muggulu Geethala Muggulu Sivarathri Muggulu
Tip: Practice on paper first if you are new to dot kolam. The grid is the same; only the surface changes.
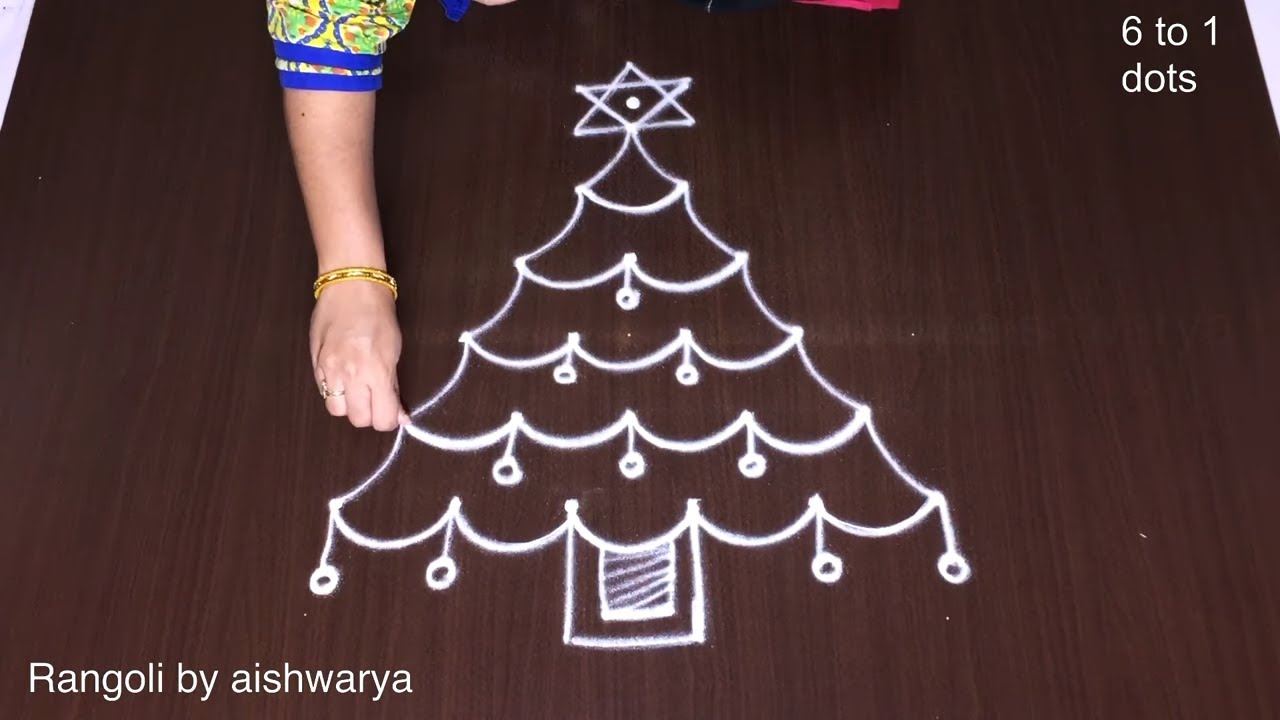
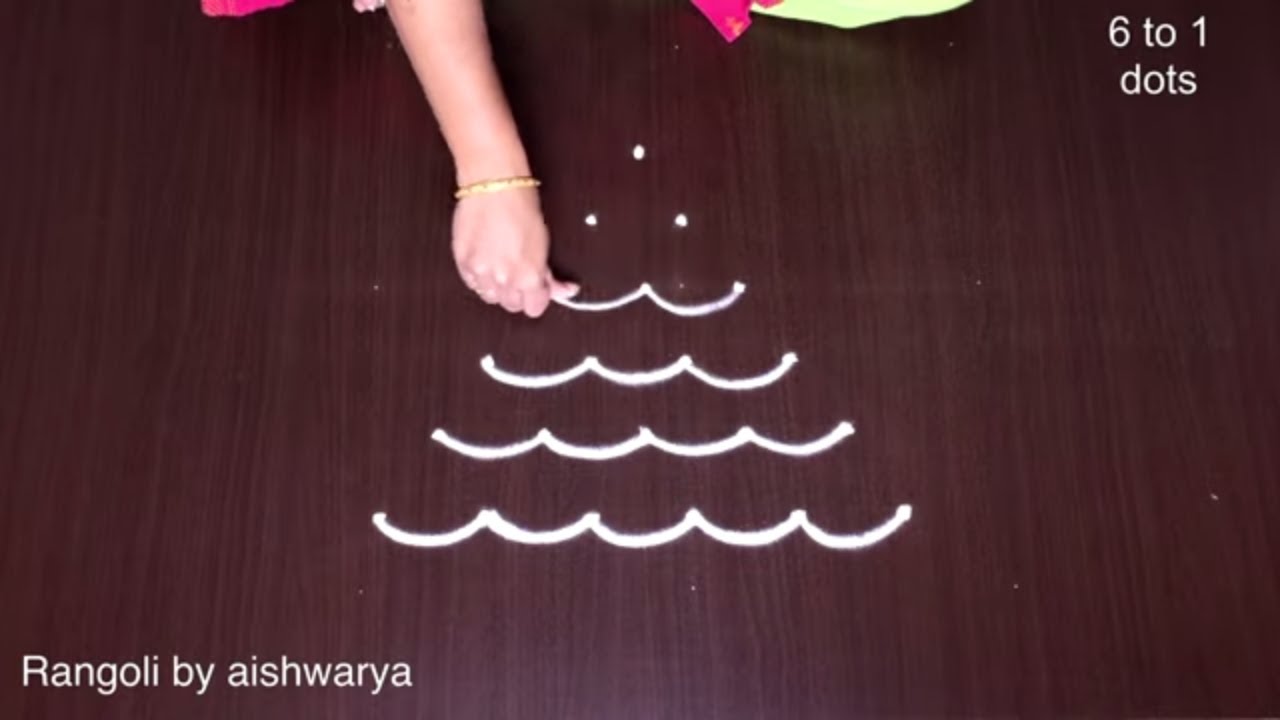
The 12 to 4 kolam is a delightful design often created during festive occasions, adding a vibrant touch to the entrance of homes. This specific kolam features a grid of twelve dots arranged in two rows, making it ideal for beginners who are just starting to explore the art of rangoli. Its symmetrical patterns can be embellished with colored powders or flowers, creating a visually stunning display that is perfect for celebrations like Diwali. For more inspiration, you can check out Traditional Friday Diya Pulli Designs Rangoli.
This design not only serves as a decorative element but also carries cultural significance, symbolizing welcome and prosperity. The 12 to 4 kolam can be easily complemented with traditional motifs and is a wonderful way to engage in the artistic practice of kolam making. If you’re interested in expanding your repertoire, consider exploring How to Draw 12×2 Deepam Rangoli Designs for more intricate patterns. To learn more about the history and significance of this beautiful art form, visit this link.
12 To 4 Kolam — Step by Step Guide
Pace yourself through the steps — kolam rewards patience more than speed.
- Clear a flat surface and set down your dot grid using rice flour or chalk.
- Confirm the dot spacing is even — uneven dots are the biggest cause of wobbly curves.
- Begin tracing from the centre outward, following the curves shown in the video above.
- Fill the petals and sections with your chosen colours, working one area at a time.
- Finish the edges with a fine line for a sharp, photograph-ready result.
What You Will Learn
- Christmas Kolam
- Christmas Muggu
- Xmas Kolam
- Christmas Kolam With Dots
- Christmas Rangoli
- Christmas Kolangal
Frequently Asked Questions
How do I draw this rangoli?
Start by marking an even dot grid on a flat, clean surface. Once the grid is in place, connect the dots following the curves shown in the video. Even spacing between dots is the single biggest factor for a clean finish.
Is this suitable for beginners?
Beginner-friendly is exactly the right description. The video walks through every line clearly and you can match the pace.
What materials do I need?
Rice flour, coloured rangoli powders, and a clean stretch of floor or paper. Some draw with chalk first to set the grid before powdering over it.
How long does it take?
The video clocks in at 5 min 39 sec. Allow about quarter of an hour to draw the design at a comfortable pace.
This is one of those designs that grows on you. The first attempt is for learning; the second is for muscle memory; the third is when it starts to feel like your own.


Leave a Reply