Looking to learn Bhogi Kundala Muggulu Designs? This step-by-step guide walks you through every line, dot, and curve.
Bhogi Kundalu 🌼 15 to 3 dots Rangoli Kolam for Pongal 🌼 Bhogi Kundala Muggulu Designs Thank you so much for watching Channel
My Rangoli Channel Contains : Rangoli Designs Sankranthi Muggulu
Diwali Rangoli Ratham Muggulu Kolam Designs
Muggulu Designs Chukkala Muggulu Easy Rangoli
Simple Rangoli Easy Rangoli Designs Dhanurmasam Muggulu
Melikala Muggulu Geethala Muggulu Sivarathri Muggulu
Tip: Work from the centre outward. It keeps the symmetry honest and prevents the design from drifting off-balance.
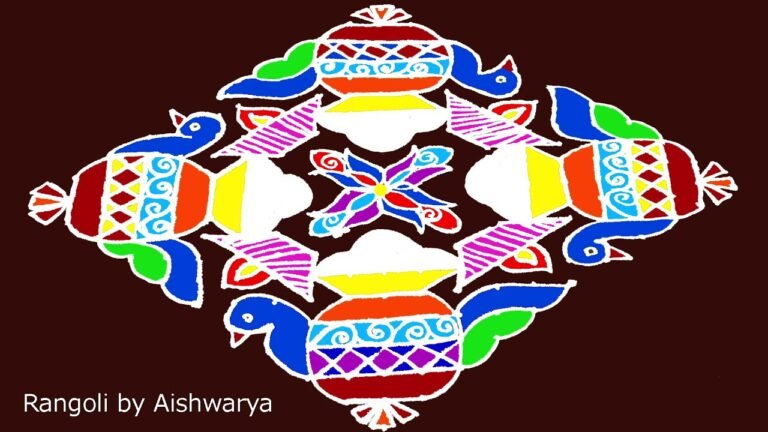
Bhogi Kundala Muggulu designs are a delightful way to celebrate the festival of Pongal, marked by their intricate patterns and vibrant colors. Typically created using 15 to 3 dots, these designs feature motifs that symbolize prosperity and abundance, making them perfect for the auspicious occasion. As you create these beautiful kolams, you can draw inspiration from traditional designs like the Happy Pongal Kolam, which also captures the festive spirit through its elaborate patterns.
These muggulu not only enhance the beauty of your home but also reflect the cultural significance of festivities in South India. The designs often incorporate themes of nature and harvest, reminiscent of the joyous celebrations during Pongal. If you’re interested in exploring more artistic expressions, consider checking out Diwali Festival Muggulu Rangoli, which showcases similar artistic flair during another major festival. To learn more about the rich history and variations of these art forms, you can visit this page on Rangoli.
Bhogi Kundala Muggulu Designs — Step by Step Guide
Here is how to draw it, line by line. Take your time on the corners and the symmetry will take care of itself.
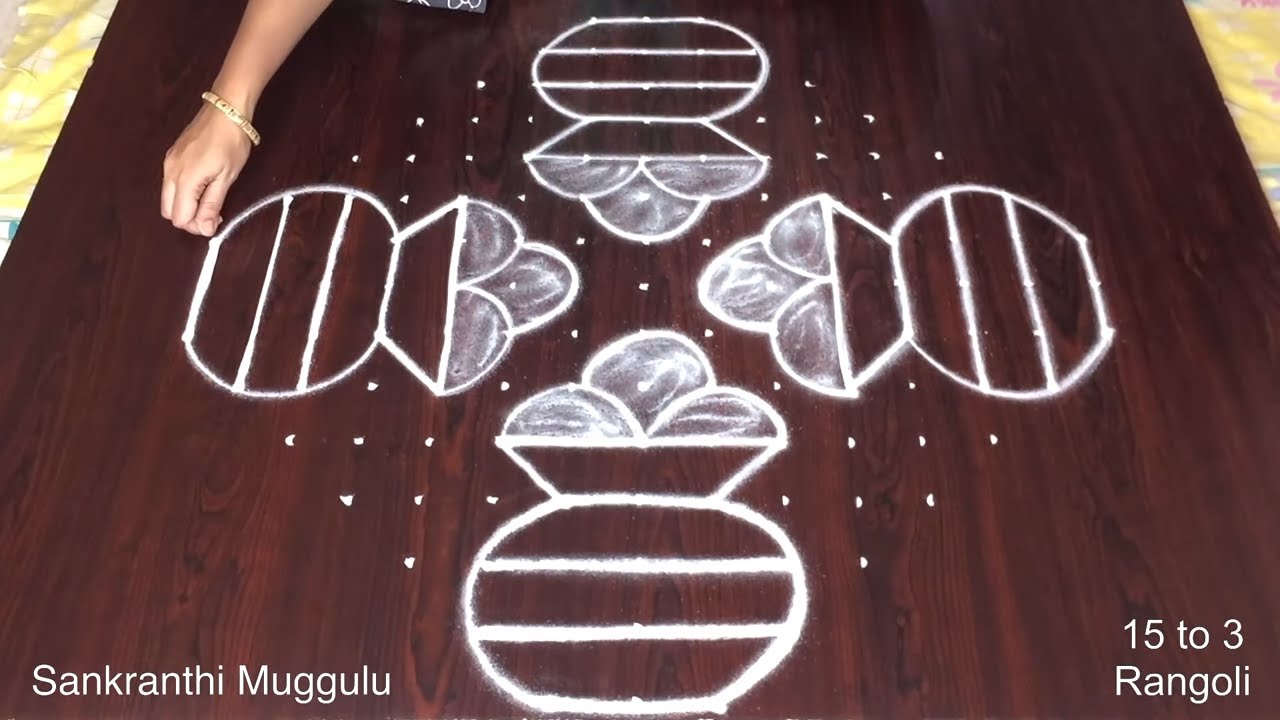
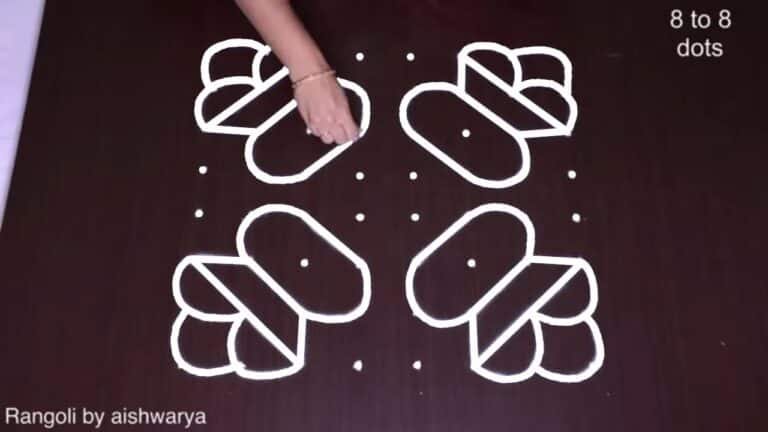
- Mark the 15-to-3 dot grid (a large Sankranthi field, 15 dots across the middle tapering to 3).
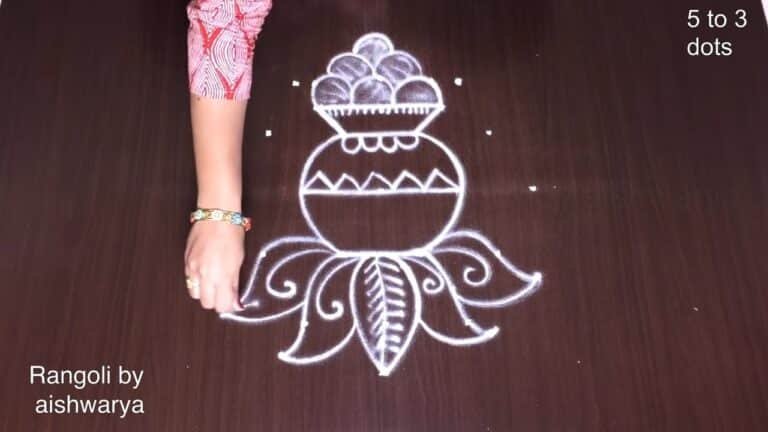
- Through the centre draw two sugarcane stalks crossing in an X – long stalks ruled with segment lines and topped with leafy fronds.
- At the top and bottom centre draw a Pongal pot (paanai / kunda): a rounded pot with a banded, net-patterned body and a mound of overflowing Pongal rice on top.
- At the four sides draw four round kundalu (pots), fill each body with a criss-cross net, and top each with a small mound of Pongal.
- In the four corners add sugarcane fronds – fanned palm-like leaves – spreading outward.
- Outline all the pots and stalks cleanly and leave the muggu in white, traditional Sankranthi style.
What You Will Learn
- Bhogi Muggulu
- Pongal Muggulu
- Pongal Pot Rangoli
- Bhogi Kolam
- Bhogi Rangoli Designs
- Bhogi Rangoli
Frequently Asked Questions
How do I draw this rangoli?
The grid comes first. Use a soft chalk to dot the surface, count twice to confirm the spacing, then start connecting them following the video. Work from the centre outward.
Is this suitable for beginners?
Beginner-friendly is exactly the right description. The video walks through every line clearly and you can match the pace.
What materials do I need?
White rice flour for the outline, coloured powders for the fill, and a clean dry floor. That is the essentials list — you can add a stencil if you prefer.
How long does it take?
About 6 min 17 sec on screen, perhaps 15 minutes for a relaxed first attempt. By the second try most people are noticeably quicker.
Drawing kolam is as much about the practice as the result. Set aside ten minutes, follow the video, and enjoy the process.
Leave a Reply