15 Chukkala Muggulu For Pongal Festival

Beginner ⏱ 4 min Updated May 3, 2026

15 to 3 dots Rangoli Designs · August 10, 2025

15 Chukkala Muggulu For is a beautiful kolam pattern you can draw right at your doorstep — perfect for beginners and seasoned rangoli artists alike.

15 Chukkala Muggulu For Pongal Festival
15 Chukkala Muggulu For Pongal Festival — step-by-step video tutorial

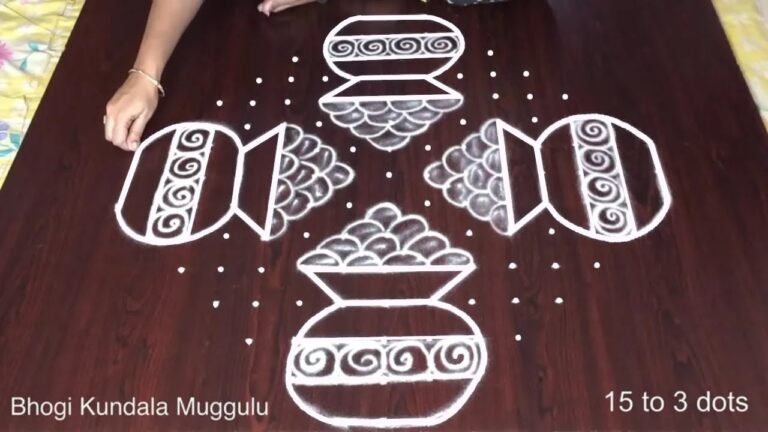
This tutorial will show you how to draw Bhogi Kolam Designs patterns using materials such as dry rice flour, colored sand or flower petals Rangoli designs by Aishwarya. Simple rangoli Pulli Kolam pattern is created on the floor in living rooms or courtyards. Draw the Lines step by step as it is shown in this video and will be awesome Rangoli Design. 😲 The 15 to 3 Chukkala Muggulu pattern here is one of the amazing latest kolam designs. Simple Rangoli Designs and Rangoli for Pongal Festival by Aishwarya with dots for beginners and intermediate.

1. Sankranthi Rangoli Designs 2. Pongal Kolam 2025 3. Sankranti Rangoli Designs

4. Pongal Kolam Rangoli 5. New Year Special Rangoli 6. Pongal Kolam

7. Radham Muggulu 8. Sankranthi Special Rangoli 9. Bhogi Muggulu

10. Pongal Kolam With Dots 11. Sankranthi Muggulu 12. Thipkyanchi Rangoli Designs

13. Mattu Pongal Kolam 14. Sankranthi Muggulu 2025 15. ठिपक्यांची रांगोळी

Tip: Work from the centre outward. It keeps the symmetry honest and prevents the design from drifting off-balance.

The 15 chukkala muggulu design is a delightful way to celebrate the Pongal festival, showcasing intricate patterns that are both vibrant and inviting. This design typically incorporates a series of dots, which serve as the foundation for creating beautiful geometric shapes and floral motifs. Beginners will find this particular style accessible, as it allows for creativity while honing their skills. For those interested in similar designs, exploring Chukkala Muggulu for Sankranthi can provide additional inspiration.

Traditionally, chukkala muggulu is created using rice flour, which symbolizes prosperity and sustenance. During Pongal, families often gather to draw these kolams in their courtyards, welcoming the festive spirit. The 15-dot pattern offers a unique blend of simplicity and elegance, making it a popular choice among beginners. To expand your rangoli repertoire, you might also enjoy checking out Latest Flower Rangoli Designs for more colorful variations. For further reading about the significance of rangoli, visit this link.

About this design: 15 Chukkala Muggulu is a beginner-friendly pattern that comes together in just a few minutes. Once you have practised the 15 chukkala muggulu dot grid, you can scale it up for festival mornings or scale it down for a daily doorstep. Many learners on our channel make this 15 chukkala muggulu their go-to design once they get the rhythm of the curves.

15 Chukkala Muggulu — Step by Step Guide

The video above shows the full sequence; the steps below summarise each stage so you can glance back as you draw.

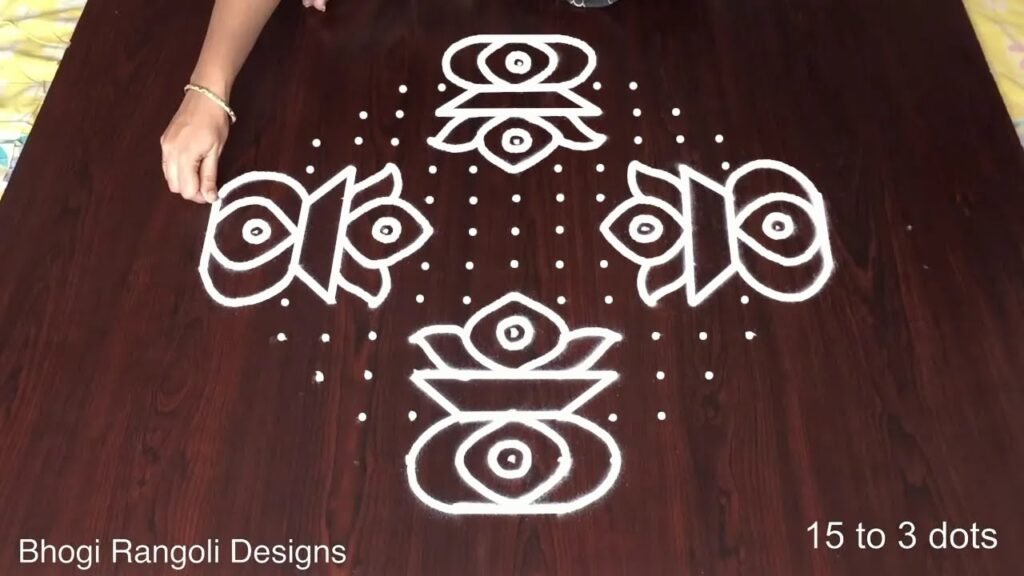
  1. Mark the 15-to-3 interlaced dot grid — a diamond of rows tapering from 15 dots across the middle down to 3 at the top and bottom.
  2. At the very centre draw an eight-petal pointed star-flower (a lotus-star) around the middle dot.
  3. Frame the centre with four short curved brackets to form a square core, and set a small round bud with a centre dot directly above and below it.
  4. At the four corners draw a round eye motif — a small dotted circle inside a larger ring — and tuck a loose spiral rose-curl beside each.
  5. Fill the diagonals with paired mango-leaf shapes (a pointed leaf with a centre vein) pointing outward from the corners.
  6. Cap the top with a crown-bud of two out-turned spiral curls under a small flower, and anchor the bottom with a rounded pot/diya holding a small eye motif.

What You Will Learn

  • Bhogi Kolam Designs 15 To 3 Dots
  • 15 To 3 Chukkala Muggulu
  • Bhogi Muggulu 15 To 3 Dots
  • Pongal Rangoli 15 To 3 Dots
  • Bhogi Kolam 15 To 3 Dots
  • 15 To 3 Dots Bhogi Rangoli

Frequently Asked Questions

How do I draw this rangoli?

The grid comes first. Use a soft chalk to dot the surface, count twice to confirm the spacing, then start connecting them following the video. Work from the centre outward.

Is this suitable for beginners?

Yes — this design is shaped specifically with newcomers in mind. The dot grid is small enough to manage, and the curves are gentle. Most learners get it right by the second try.

What materials do I need?

Powder (white for outlines, colours for filling), a flat surface, and a dot stencil if you want absolute precision. Beyond that, just your hand and a steady pace.

How long does it take?

The full demonstration takes 3 min 39 sec. Most people find their own drawing time settles to about 15 minutes once the grid is familiar.

Pin this for later or share with a friend learning kolam — and let us know in the comments which design you would like next.

Leave a Reply

Your email address will not be published. Required fields are marked *