Whether you are decorating for a festival or your daily morning ritual, Flower Rangoli Designs With is an excellent design to keep handy.
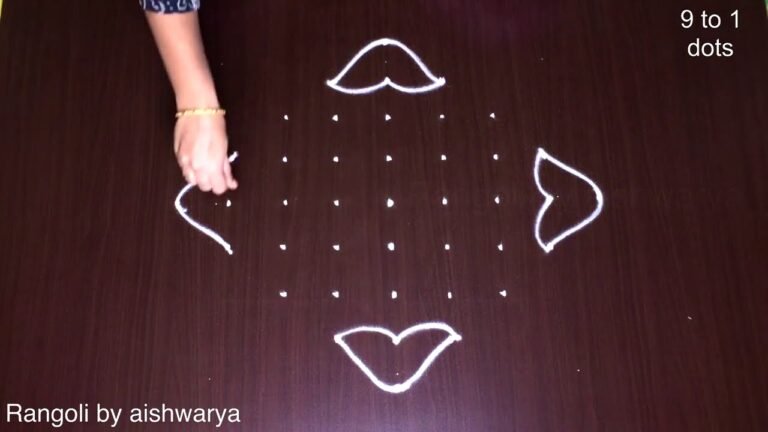
This tutorial will show you how to draw beautiful flower rangoli designs with 7 dots patterns using materials such as dry rice flour, colored sand or flower petals Rangoli designs by Aishwarya. Simple rangoli designs with dots Kolam pattern is created on the floor in living rooms or courtyards. Draw the Lines step by step as it is shown in this video and will be awesome Rangoli Design. Chapters: 0:00 Intro
0:05 Muggulu Patterns 3:11 Main Door Entrance Kolam 😲 The rangoli design for Diwali pattern here is one of the amazing latest simple kolam designs.
Simple Rangoli Designs and easy rangoli designs by Aishwarya with dots for beginners and intermediate. 1. Unique Rangoli Designs 2. Deepavali Rangoli
6. Diwali Rangoli 7. Rangoli Kolam 8. Rangoli Designs for Diwali
9. Sankranthi Muggulu 10. Rangoli Designs ******************************************************
a) 1 Million Views Crossed Rangoli/Kolam/Muggula dizain: b) Pulli kolam designs with steps: c) New Year rangoli designs:
Tip: Use chalk to lightly mark your dot grid first — it wipes away cleanly once your rangoli is finished.
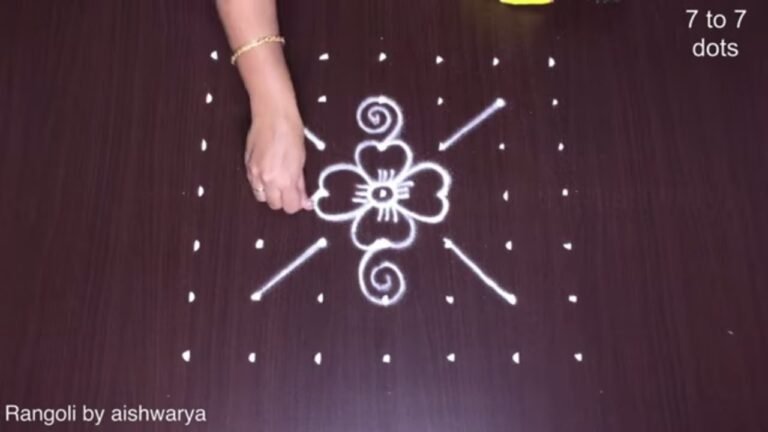
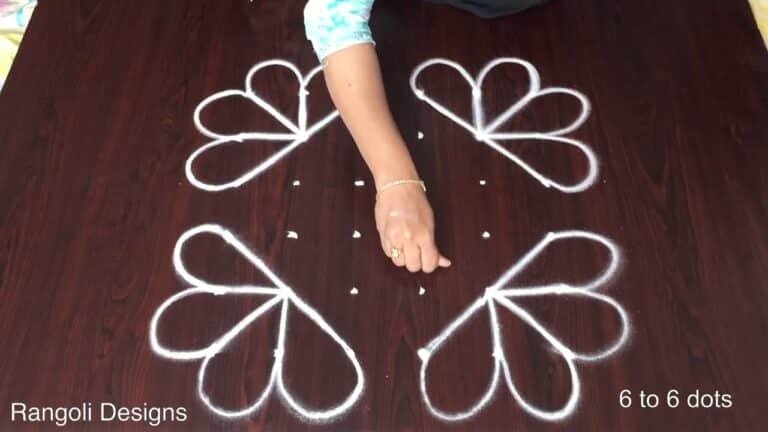
Creating flower rangoli designs with 7 dots is a delightful way to celebrate festivals and adorn your home. This design often features intricate patterns resembling blooming flowers, making it visually appealing and inviting. It is an excellent choice for beginners, as the basic structure allows for creativity while ensuring that the final result remains elegant. Using rice flour or colored sand, you can bring your design to life, adding a personal touch to your home during occasions like Diwali or other festivities. For more inspiration, explore 9 to 1 Prathi Roju Vese Muggulu.
This particular flower rangoli design not only enhances the aesthetics of your entrance but also symbolizes prosperity and joy. The 7-dot arrangement provides a solid foundation for various floral motifs, allowing you to experiment with colors and forms. Adding elements like petals or leaves can further enrich your design, making it a perfect fit for celebrations such as Pongal. To see another beautiful example, check out the Rose Flower Rangoli With 9x5dots for Pongal. For broader insights on rangoli, you can visit this page.
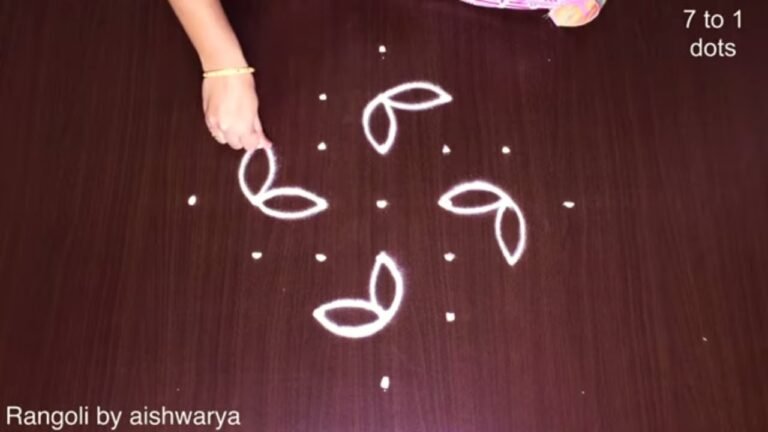
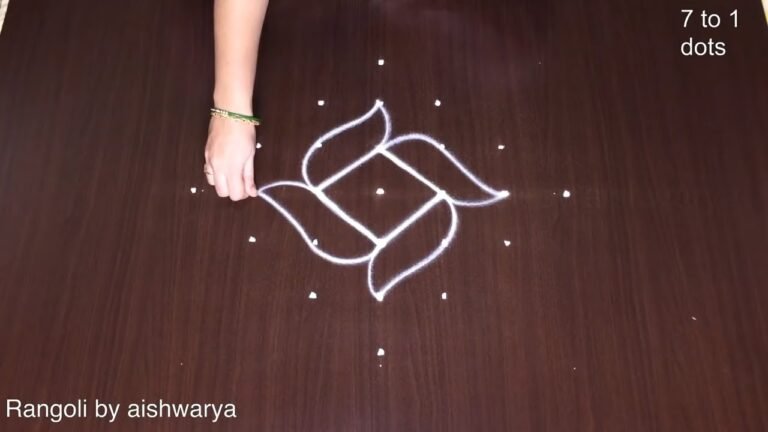
About this design: Designs With 7 Dots is a beginner-friendly pattern that comes together in just a few minutes. Once you have practised the designs with 7 dots dot grid, you can scale it up for festival mornings or scale it down for a daily doorstep. Many learners on our channel make this designs with 7 dots their go-to design once they get the rhythm of the curves.
Designs With 7 Dots — Step by Step Guide
Each step takes only a moment. The whole design comes together in just a few minutes once the grid is in place.
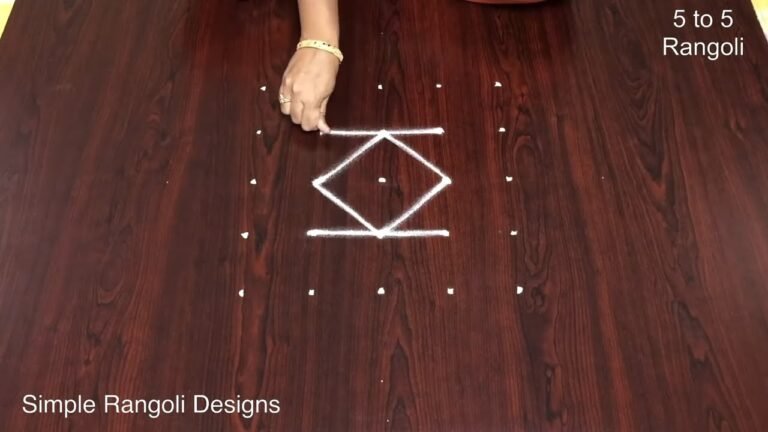
- Clear a flat surface and set down your dot grid using rice flour or chalk.
- Confirm the dot spacing is even — uneven dots are the biggest cause of wobbly curves.
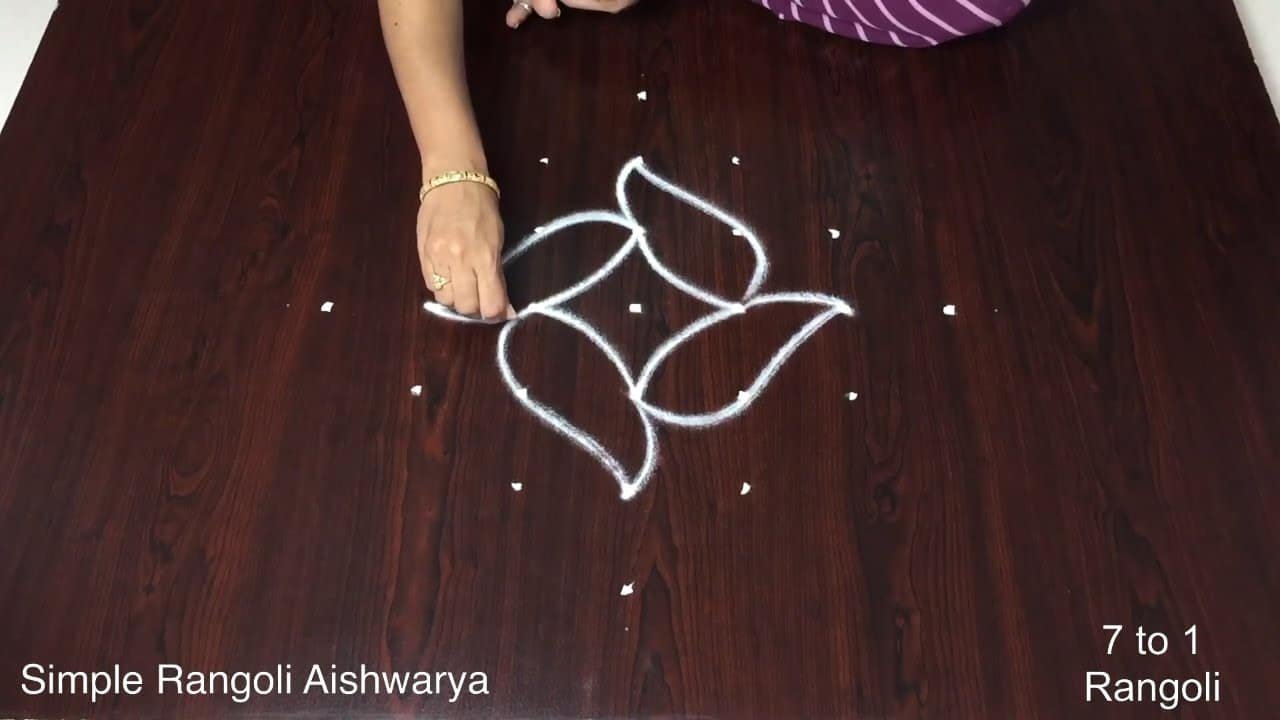
- Begin tracing from the centre outward, following the curves shown in the video above.
- Fill the petals and sections with your chosen colours, working one area at a time.
- Finish the edges with a fine line for a sharp, photograph-ready result.
What You Will Learn
- Simple Rangoli Designs
- Rangoli
- Muggulu
- Rangoli Designs
- Rangoli Kolam
- Kolam
Frequently Asked Questions
How do I draw this rangoli?
Set down the dot grid in pencil or chalk, then follow the loops one petal at a time. If a curve goes off, wipe it and retry — kolam is forgiving.
Is this suitable for beginners?
It is one of the more forgiving designs in our collection. Beginners often pick it as a confidence-builder before moving on to larger grids.
What materials do I need?
Just three things: powder (white plus any colours you want), a flat dry surface, and a few minutes of focus. A small bowl per colour helps keep things tidy.
How long does it take?
A 5 min 56 sec video shows the complete sequence. On paper or floor, expect to spend around a quarter of an hour from grid to finished pattern.
We rotate festival designs through the year — bookmark the homepage and you will find a new pattern every morning.
Leave a Reply