If you enjoy dot-grid muggulu, Simple Rangoli Peacock Kolam is a satisfying pattern that comes together in just a few minutes.
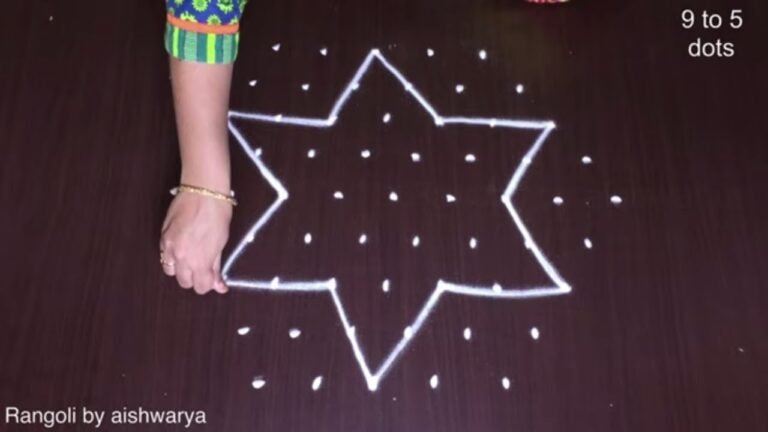
Simple Rangoli Peacock Kolam Nemali Muggulu 9 3 Dots | పండుగ ముగ్గులు. This tutorial will show you how to draw Beautiful Indian traditional art Diwali Rangoli patterns using materials such as dry rice flour, colored sand or flower petals Rangoli designs by Aishwarya. Simple rangoli Kutti Kolam pattern is created on the floor in living rooms or courtyards. Draw the Lines step by step as it is shown in this video and will be awesome Rangoli Design. 😲 The Diwali rangoli pattern here is one of the amazing latest kolam designs. Simple Rangoli Designs and easy rangoli designs by Aishwarya with dots for beginners and intermediate.
1. Diwali Rangoli 2. Pongal kolams 3. Easy rangoli designs
4. Rangoli design 5. Chukkala muggulu 6. Dot rangoli designs
7. Dots rangoli 8. Easy rangoli 9. Easy rangoli designs
10. Kolam designs 11. Kolam with dots 12. Muggulu designs
13. Muggulu designs with dots 14. Small rangoli designs 15. Muggulu chukkala muggulu
Tip: Use chalk to lightly mark your dot grid first — it wipes away cleanly once your rangoli is finished.
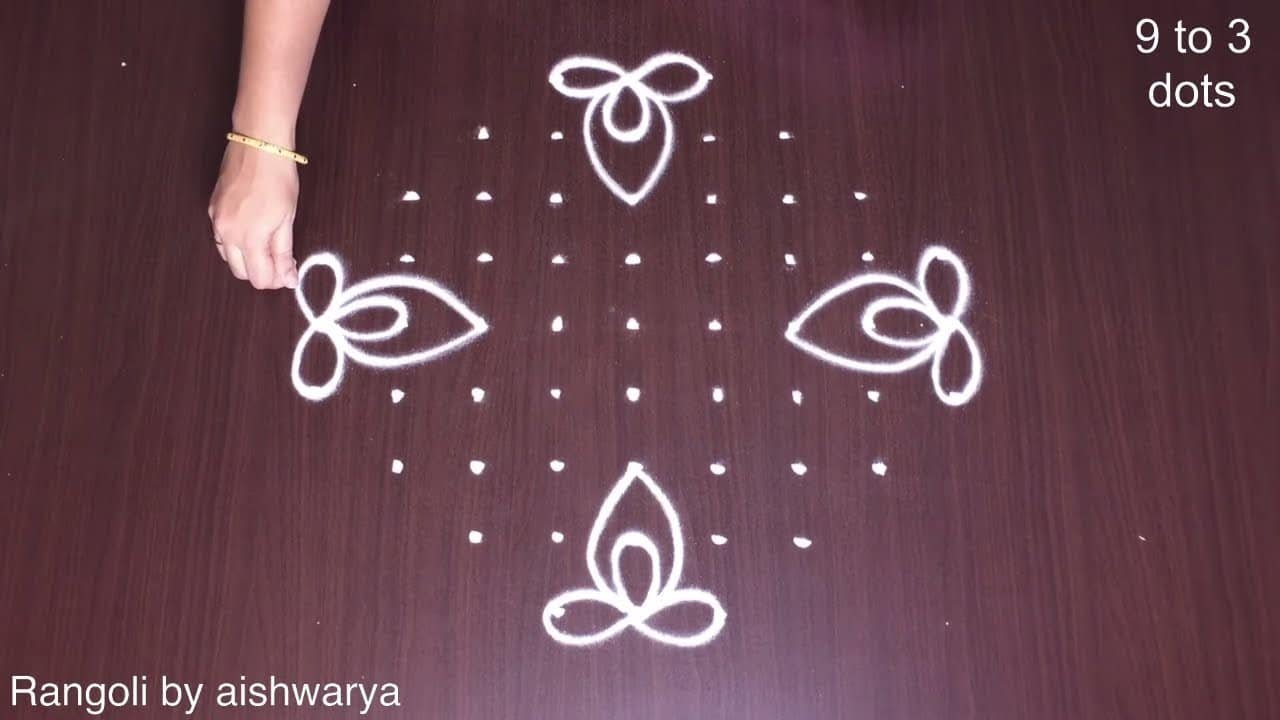
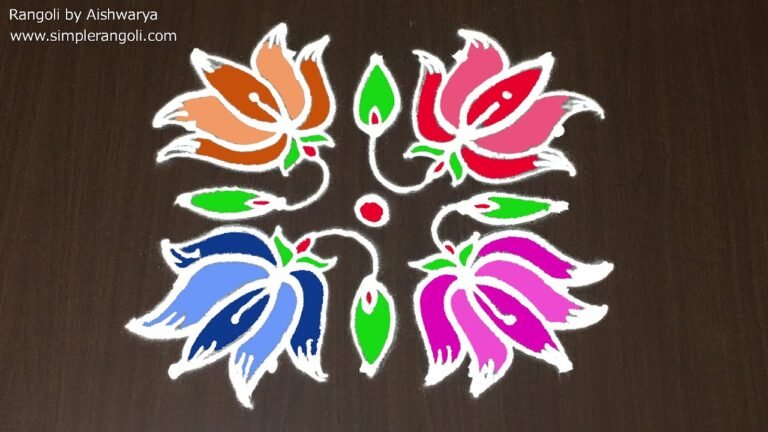
The Simple Rangoli Peacock Kolam, featuring a 9-3 dot pattern, beautifully captures the essence of traditional Indian art. This design is especially popular during festivals like Diwali, where vibrant colors and intricate patterns symbolize joy and celebration. The peacock, a revered bird in Indian culture, adds a touch of elegance to the kolam, making it a delightful addition to any festive setting. For more inspiration, check out our Karthika Masam Deepala Muggulu post.
About this design: Simple Rangoli Peacock Kolam is a beginner-friendly pattern that comes together in just a few minutes. Once you have practised the simple rangoli peacock kolam dot grid, you can scale it up for festival mornings or scale it down for a daily doorstep. Many learners on our channel make this simple rangoli peacock kolam their go-to design once they get the rhythm of the curves.
Simple Rangoli Peacock Kolam — Step by Step Guide
Here is how to draw it, line by line. Take your time on the corners and the symmetry will take care of itself.
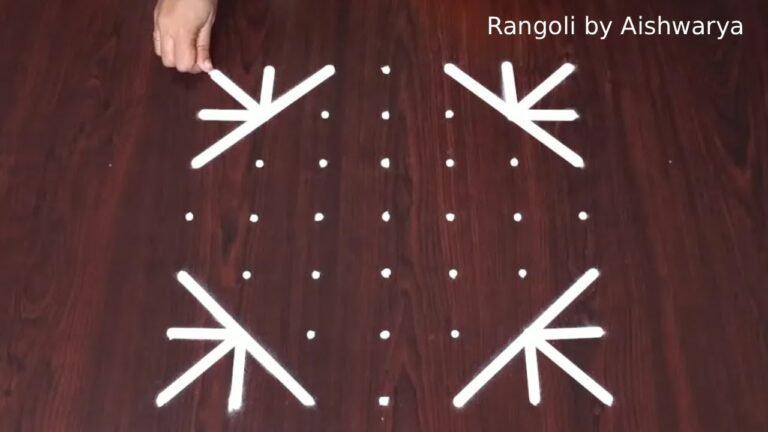
- Clear a flat surface and set down your dot grid using rice flour or chalk.
- Confirm the dot spacing is even — uneven dots are the biggest cause of wobbly curves.
- Begin tracing from the centre outward, following the curves shown in the video above.
- Fill the petals and sections with your chosen colours, working one area at a time.
- Finish the edges with a fine line for a sharp, photograph-ready result.
What You Will Learn
- Simple Rangoli Designs
- Rangoli
- Muggulu
- Rangoli Designs
- Rangoli Kolam
- Kolam
Frequently Asked Questions
How do I draw this rangoli?
Begin with the dot grid — this is the skeleton of the design. With rice flour or chalk, place each dot at equal intervals. Then trace the curves slowly, one section at a time.
Is this suitable for beginners?
Yes — this design is shaped specifically with newcomers in mind. The dot grid is small enough to manage, and the curves are gentle. Most learners get it right by the second try.
What materials do I need?
White rice flour for the outline, coloured powders for the fill, and a clean dry floor. That is the essentials list — you can add a stencil if you prefer.
How long does it take?
A 3 min 54 sec video shows the complete sequence. On paper or floor, expect to spend around a quarter of an hour from grid to finished pattern.
Save this design for your next festival morning. The pattern is small enough to draw quickly but striking enough to make a real impression at the doorstep.
Leave a Reply