Two Butterfly Simple Rangoli is the kind of design that looks intricate but is genuinely beginner-friendly once you follow the dot grid.

Two Butterfly Simple Rangoli Designs | 7by1 Kolam Muggulu Daily Routine Patterns. This tutorial will show you how to draw Beautiful Indian traditional art sankranthi muggulu patterns using materials such as dry rice flour, colored sand or flower petals Rangoli designs by Aishwarya. Simple rangoli designs with dots Kolam pattern is created on the floor in living rooms or courtyards. Draw the Lines step by step as it is shown in this video and will be awesome Rangoli Design. 😲 The rangoli design for diwali pattern here is one of the amazing latest simple kolam designs. Simple Rangoli Designs and easy rangoli designs by Aishwarya with dots for beginners and intermediate.
1. Diwali Rangoli 2. Pongal kolams 3. Easy rangoli designs
4. Rangoli design 5. Chukkala muggulu 6. Dot rangoli designs
7. Rangoli for diwali 8. Rangoli Simple 9. Easy rangoli designs
10. Kolam designs 11. Simple rangoli design 12. Muggulu designs
13. Muggulu designs with dots 14. Small rangoli designs 15. Muggulu chukkala muggulu
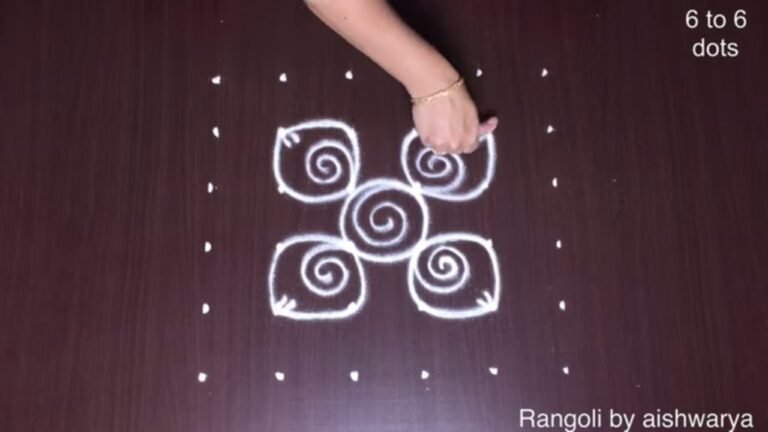
Tip: Work from the centre outward. It keeps the symmetry honest and prevents the design from drifting off-balance.
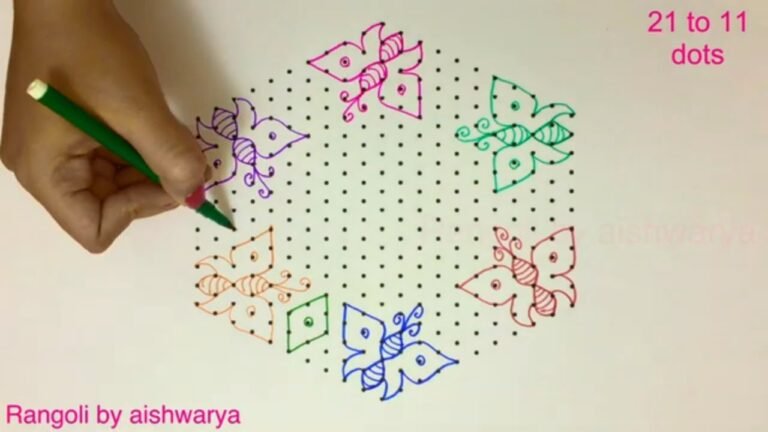
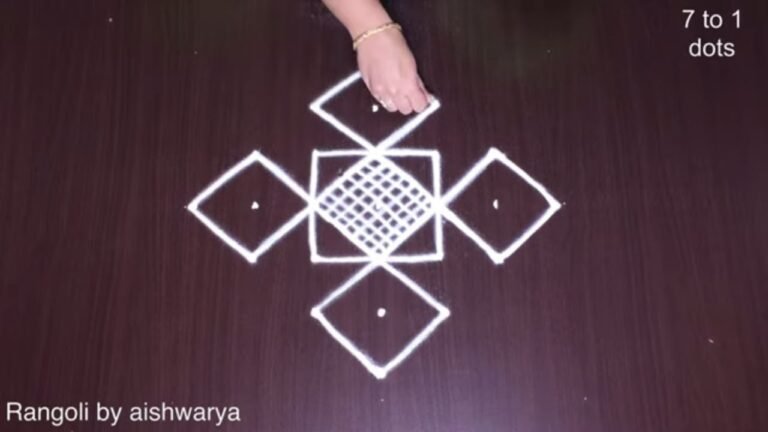
The two butterfly simple rangoli is a delightful design that showcases the beauty of traditional Indian art. Typically created using a 7 by 1 dot grid, this vibrant pattern is particularly popular during festive occasions like Sankranthi. The butterflies, often symbolizing transformation and freedom, can be drawn using rice flour or colored powders to enhance their visual appeal. If you’re interested in similar designs, you might also enjoy exploring Chukkala Muggulu for Sankranthi to add variety to your rangoli repertoire.
This rangoli style is beginner-friendly, making it a great choice for those new to the art of kolam. The step-by-step process allows you to gradually build the design, ensuring that you can create an eye-catching display for your home. These simple yet elegant patterns can also be a wonderful way to engage family and friends during festive gatherings, as everyone can contribute their creativity. For more inspiration, check out Karthika Masam Deepala Muggulu for additional designs that are equally captivating. To learn more about the history and significance of rangoli, visit this page.
Two Butterfly Simple Rangoli — Step by Step Guide
Here is how to draw it, line by line. Take your time on the corners and the symmetry will take care of itself.
- Clear a flat surface and set down your dot grid using rice flour or chalk.
- Confirm the dot spacing is even — uneven dots are the biggest cause of wobbly curves.
- Begin tracing from the centre outward, following the curves shown in the video above.
- Fill the petals and sections with your chosen colours, working one area at a time.
- Finish the edges with a fine line for a sharp, photograph-ready result.
What You Will Learn
- Simple Rangoli Designs
- Rangoli
- Muggulu
- Rangoli Designs
- Rangoli Kolam
- Kolam
Frequently Asked Questions
How do I draw this rangoli?
Start by marking an even dot grid on a flat, clean surface. Once the grid is in place, connect the dots following the curves shown in the video. Even spacing between dots is the single biggest factor for a clean finish.
Is this suitable for beginners?
Yes, and it is one we recommend to first-timers. The small grid keeps the design manageable while still teaching the core technique.
What materials do I need?
Rice flour, coloured rangoli powders, and a clean stretch of floor or paper. Some draw with chalk first to set the grid before powdering over it.
How long does it take?
The full demonstration takes 2 min 29 sec. Most people find their own drawing time settles to about 15 minutes once the grid is familiar.
This is one of those designs that grows on you. The first attempt is for learning; the second is for muscle memory; the third is when it starts to feel like your own.

Leave a Reply