Simple Butterfly Rangoli Designs is the kind of design that looks intricate but is genuinely beginner-friendly once you follow the dot grid.
Simple diya rangoli designs 9 dots | Chukkala muggulu dotted kolangal easy Thank you so much for watching Channel
My Rangoli Channel Contains : Rangoli Designs Sankranthi Muggulu
Diwali Rangoli Ratham Muggulu Kolam Designs
Muggulu Designs Chukkala Muggulu Easy Rangoli
Simple Rangoli Easy Rangoli Designs Dhanurmasam Muggulu
Melikala Muggulu Geethala Muggulu Sivarathri Muggulu
Tip: A slightly damp brush along the edges gives a sharper finish, especially for festival photographs.
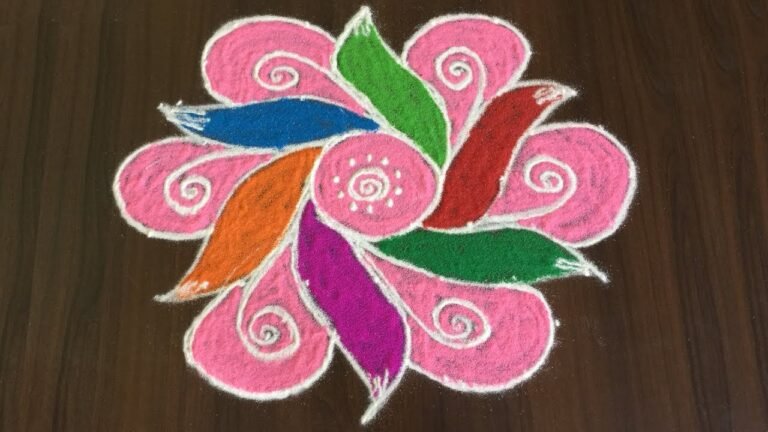
Simple butterfly rangoli designs are perfect for beginners looking to add a touch of creativity to their home decor. These designs typically feature a symmetrical butterfly shape formed with dots, often using a 9-dot grid for easy tracing. The use of vibrant colors enhances the beauty of the design, making it an ideal choice for festivals like Sankranti or Diwali. You may also find inspiration in other designs, such as lotus flowers rangoli designs for Sankranti.
This butterfly kolam is not only visually appealing but also symbolizes transformation and beauty. The gentle curves and flowing lines of the design can be enhanced with additional motifs, allowing for personal touches. If you enjoy exploring various styles, you might want to check out unique doorstep kolams 8×8 that can complement your butterfly rangoli. For a broader understanding of these traditional patterns, you can read more about them on Wikipedia.
About this design: Simple Butterfly Rangoli Designs is a beginner-friendly pattern that comes together in just a few minutes. Once you have practised the simple butterfly rangoli designs dot grid, you can scale it up for festival mornings or scale it down for a daily doorstep. Many learners on our channel make this simple butterfly rangoli designs their go-to design once they get the rhythm of the curves.
Simple Butterfly Rangoli Designs — Step by Step Guide
Pace yourself through the steps — kolam rewards patience more than speed.
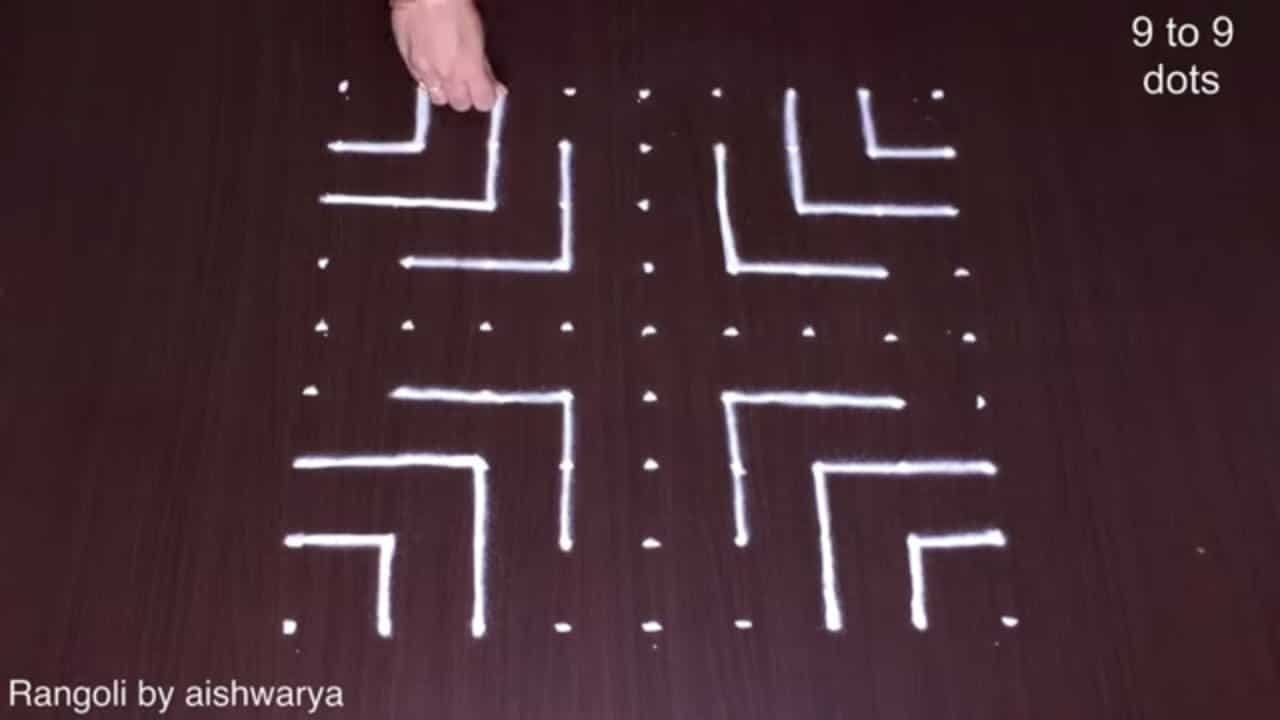
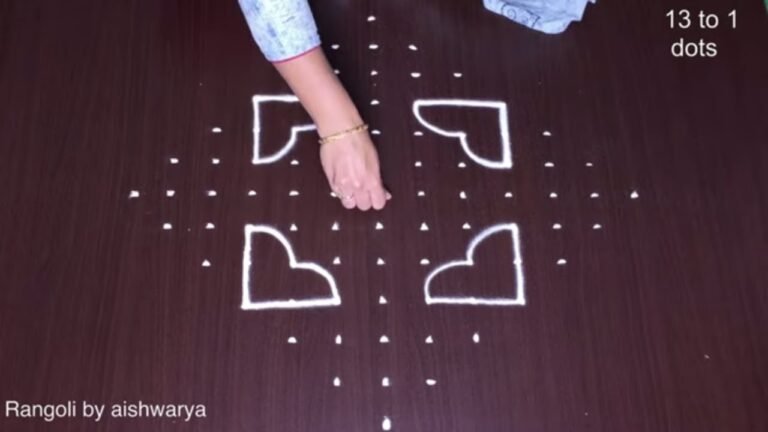
- Mark a 9-to-9 (9×9) dot grid.
- In the four quadrants draw four angular L-shaped hook arms (squared hook/heart shapes) arranged as a pinwheel around the centre, each with a small leaf at its inner corner.
- At the very centre draw a small ornate knot: two symmetric loops with tiny spiral curls.
- At the top, bottom, left and right midpoints, in the gaps between the hook arms, draw a butterfly with two rounded upper wings and two lower wings.
- Give each butterfly a beaded body, two curled antennae and rows of small dots across the wings.
- Check the four-fold symmetry so all arms and butterflies match.
What You Will Learn
- 9 Dots Rangoli
- Simple Diya Rangoli With Dots
- Chukkala Muggulu Designs
- 9 Dots Kolam
- Dotted Kolangal With Dots
- Rangoli With Dots
Frequently Asked Questions
How do I draw this rangoli?
The grid comes first. Use a soft chalk to dot the surface, count twice to confirm the spacing, then start connecting them following the video. Work from the centre outward.
Is this suitable for beginners?
Yes — this design is shaped specifically with newcomers in mind. The dot grid is small enough to manage, and the curves are gentle. Most learners get it right by the second try.
What materials do I need?
White rice flour for the outline, coloured powders for the fill, and a clean dry floor. That is the essentials list — you can add a stencil if you prefer.
How long does it take?
Plan for roughly 3 min 39 sec to watch and 15 minutes to draw. The second attempt is always cleaner than the first — that is the nature of dot kolam.
A reminder that beautiful art does not need expensive materials — just a steady hand, a clean surface, and a few pinches of rice flour.

Leave a Reply