There is something timeless about 11 To 6 Pongal — the symmetry, the rhythm of the dots, and the soft curves it produces.
For another beginner-friendly variation, try Kolam Pongal Flower.
Learn more about the tradition of Rangoli on Wikipedia.
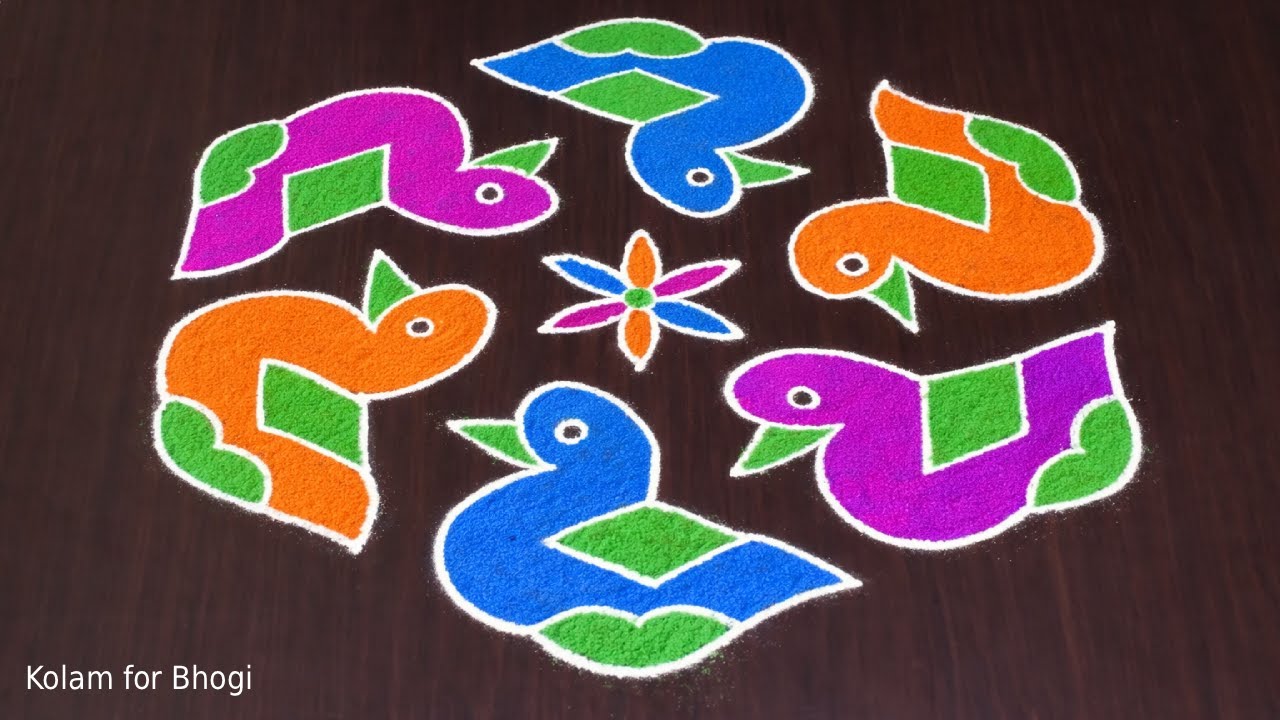
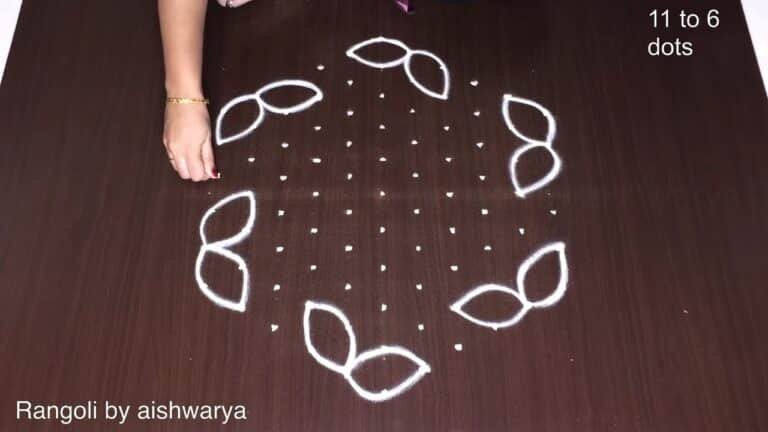
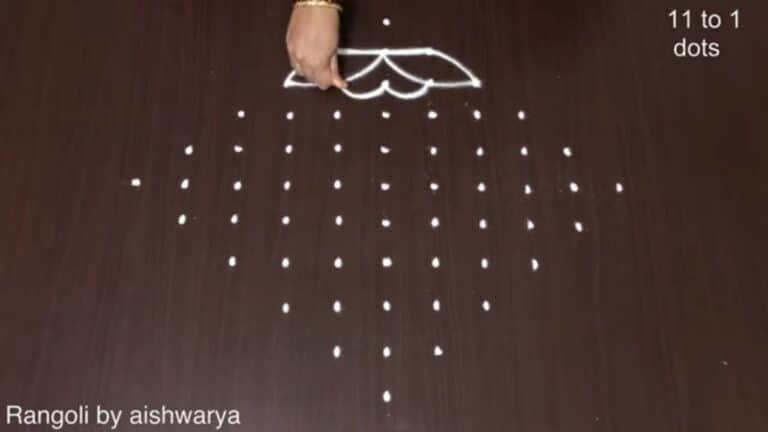
Looking for a beautiful 11 to 6 dots kolam for Bhogi and Pongal? This festive muggulu design is perfect for welcoming the harvest season with symmetry and style. In this video, we create an 11 to 6 dots Bhogi Pongal kolam, built on a structured decreasing grid that forms a wide and balanced layout. The 11-6 format provides enough space for elegant curves and festive detailing while maintaining clean alignment.
🌾 What You’ll Learn Step by Step: Proper placement of the 11 to 6 decreasing dot grid Forming symmetrical curves across the layout
Maintaining balance along the central axis Simple finishing touches to enhance the festive appearance Bhogi and Pongal entrances are traditionally decorated with meaningful and expansive kolam patterns. An 11-6 dot grid creates a bold yet organized structure, making it ideal for apartment entrances and courtyards.
Even though the grid is slightly larger than beginner layouts, the dots naturally guide spacing and proportion. The step-by-step method ensures a neat and satisfying final result. Watch till the end to see the complete symmetrical reveal — the final alignment highlights how the 11-6 dot structure transforms into a graceful harvest festival kolam. If you enjoy festive dot formats, explore other seasonal grids like 9-5 and 13-7 to expand your Pongal rangoli collection.
Save this design and recreate it to brighten your Bhogi and Pongal celebration.
Tip: Practice on paper first if you are new to dot kolam. The grid is the same; only the surface changes.
About this design: 11 To 6 Pongal is a beginner-friendly pattern that comes together in just a few minutes. Once you have practised the 11 to 6 pongal dot grid, you can scale it up for festival mornings or scale it down for a daily doorstep. Many learners on our channel make this 11 to 6 pongal their go-to design once they get the rhythm of the curves.
11 To 6 Pongal — Step by Step Guide
Each step takes only a moment. The whole design comes together in just a few minutes once the grid is in place.
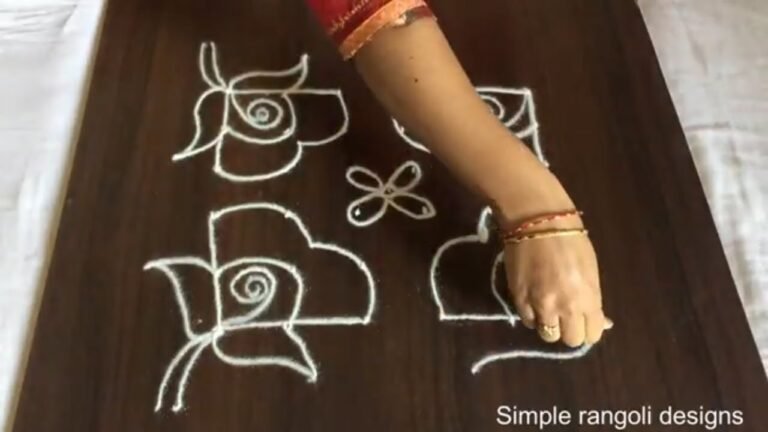
- Mark the 7-to-1 dot grid (the pot in this frame is built on a 7-to-1 grid).
- Draw the pot (paanai): a wide rounded body with its belly filled by a cross-hatched net and a central band of solid diamonds.
- Add the neck and rim at the top with pongal (rice) mounded and boiling over the mouth.
- Fan a row of lotus petals outward from the base so the pot sits on a lotus.
- Decorate the sides with small scroll flourishes and set a little diya (lamp) at the upper left.
- Hang a row of dotted danglers beneath the pot to finish.
- Draw the Pongal pot in white kolam powder.
What You Will Learn
- 11 To 6 Dots Bhogi Kolam
- Pongal Rangoli 11-6 Dots
- Festive Muggulu Design 11-6
- 11-6 Dots Kolam Pattern
- Bhogi Entrance Kolam 11-6
- 11 To 6 Pulli Kolam
Frequently Asked Questions
How do I draw this rangoli?
Begin with the dot grid — this is the skeleton of the design. With rice flour or chalk, place each dot at equal intervals. Then trace the curves slowly, one section at a time.
Is this suitable for beginners?
Yes, and it is one we recommend to first-timers. The small grid keeps the design manageable while still teaching the core technique.
What materials do I need?
You will need rice flour or rangoli powder (white, plus your choice of colours), a flat surface like a clean floor or courtyard, and optionally a dot stencil if you are new to grid-drawing.
How long does it take?
You will see a 3 min 26 sec walkthrough above. Drawing it yourself is usually a 12–18 minute affair, slightly slower the first time.
After you draw this, take a picture before the day blows it away. Kolam is impermanent by design, but a photo lets you revisit the version you drew.

Leave a Reply