This simple festival muggulu 11×6 tutorial walks you through every step from the dot grid to the final pattern.
For another beginner-friendly variation, try Simple 10 2 Dots Rangoli Design.
Learn more about the tradition of Rangoli on Wikipedia.
Looking to learn Simple Festival Muggulu 11 6? This step-by-step guide walks you through every line, dot, and curve.
Looking for a neat and festive kolam with a structured dot layout? This 11 by 6 dots kutti kolam is perfect for simple and elegant festival decoration. In this video, I guide you step by step to draw a 11×6 straight dot grid muggulu that combines symmetry and simplicity. The rectangular layout gives the design a balanced appearance, while the compact kutti structure keeps it easy to complete. Even though the grid is medium-sized, the pattern remains neat and manageable.
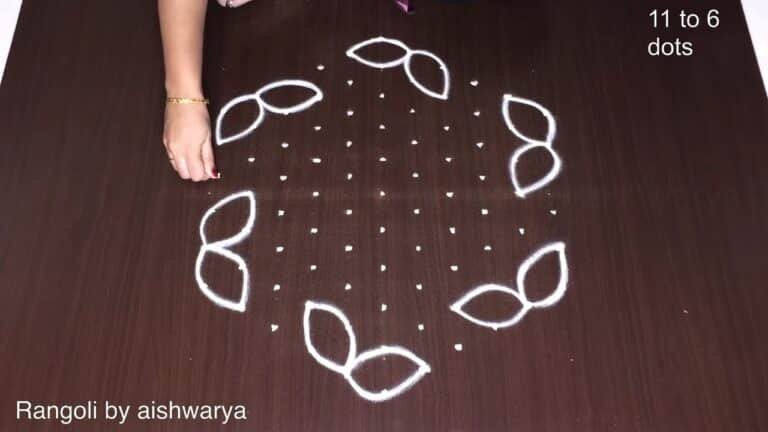
We begin by placing a clear 11 by 6 straight dot structure, ensuring proper spacing for alignment. Then, the dots are connected smoothly to form a symmetrical and attractive kolam pattern. The design gradually develops into a festive and structured rangoli suitable for entrances and pooja spaces. How to construct a proper 11–6 dot grid How to maintain symmetry in rectangular kolams
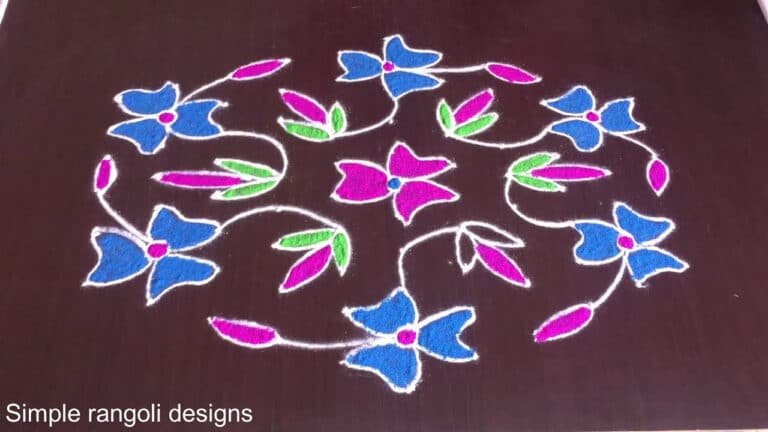
How to create compact kutti kolam patterns Tips to keep festival muggulu neat and balanced This design is ideal for festival occasions, home entrances, and traditional decorations. Its structured format makes it beginner-friendly while still looking elegant and festive.
Watch till the end to see the full transformation from simple dots to a complete festival kolam — the final reveal highlights a clean and symmetrical design. If you enjoy dot-based kolams, explore more 11 by 6 dots rangoli, kutti kolams, and structured festival muggulu on the channel.
Tip: Use chalk to lightly mark your dot grid first — it wipes away cleanly once your rangoli is finished.
About this design: Simple Festival Muggulu 11X6 is a beginner-friendly pattern that comes together in just a few minutes. Once you have practised the simple festival muggulu 11×6 dot grid, you can scale it up for festival mornings or scale it down for a daily doorstep. Many learners on our channel make this simple festival muggulu 11×6 their go-to design once they get the rhythm of the curves.
Simple Festival Muggulu 11X6 — Step by Step Guide
If you have drawn dot rangoli before, this will feel familiar. If you have not, the dot grid will guide you.
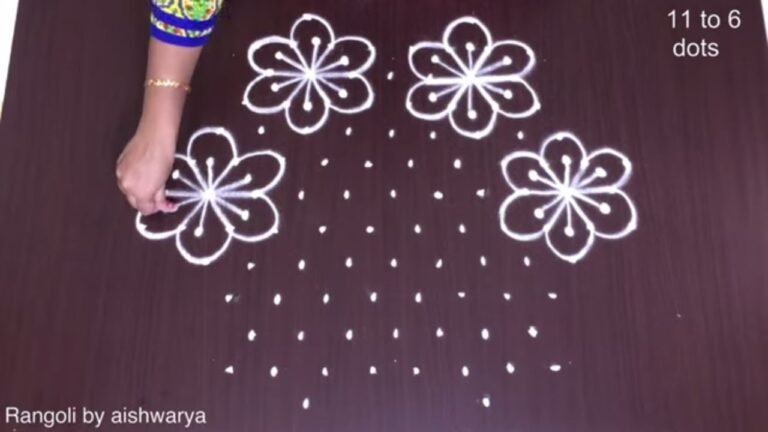
- Mark the 11×6 dot grid.
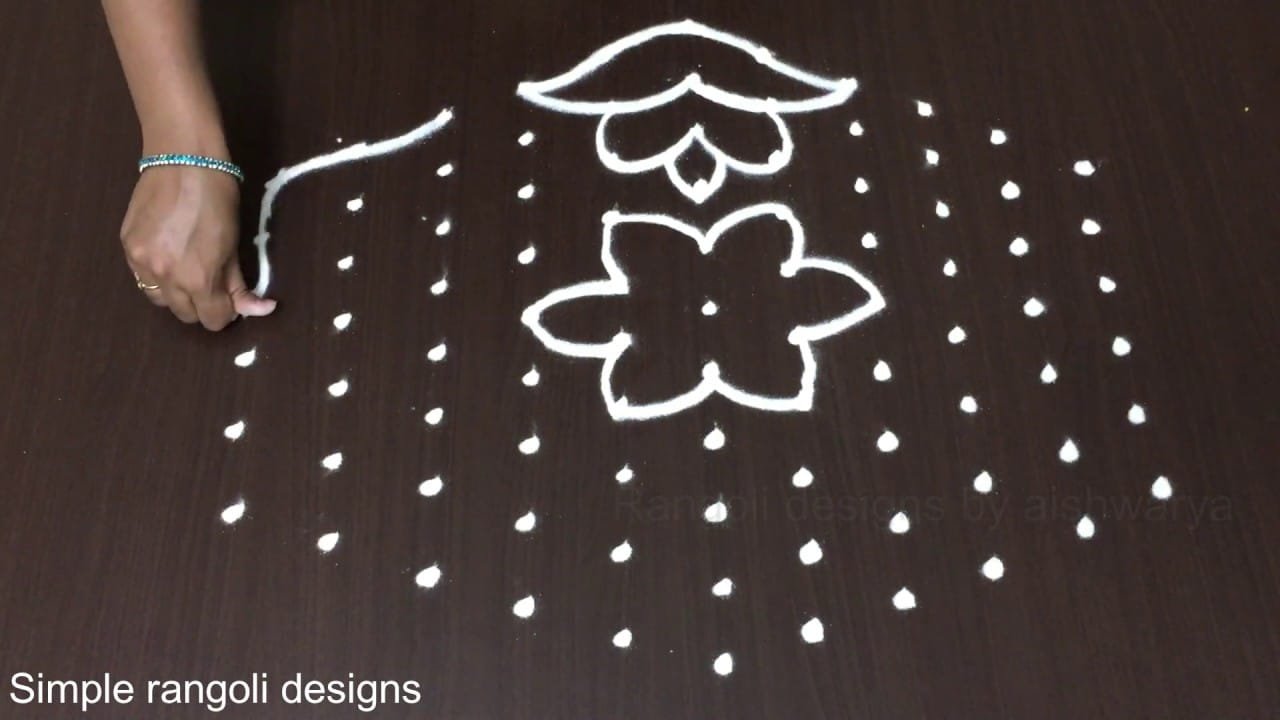
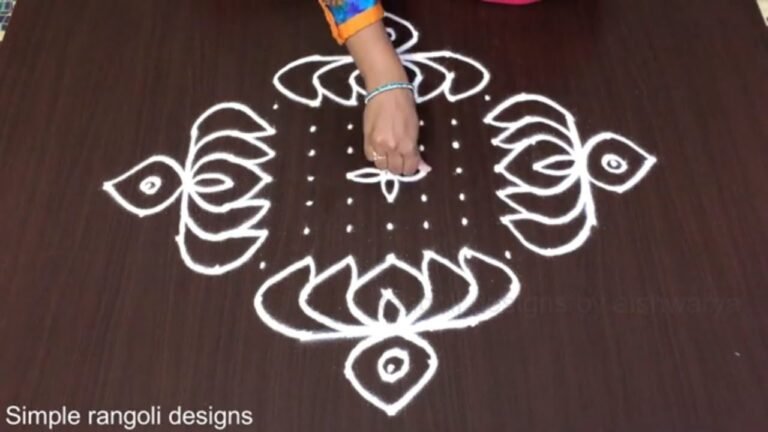
- At the centre, draw a six-petal flower with rounded petals and a small circle in the middle.
- Directly above the flower draw a lotus fan (a spread of rounded petals over a small bud); mirror an opening lotus bud with pointed petals directly below.
- In each of the four corners draw an outward-curving leaf/lotus-bud motif with a pointed tip, so they frame the centre flower.
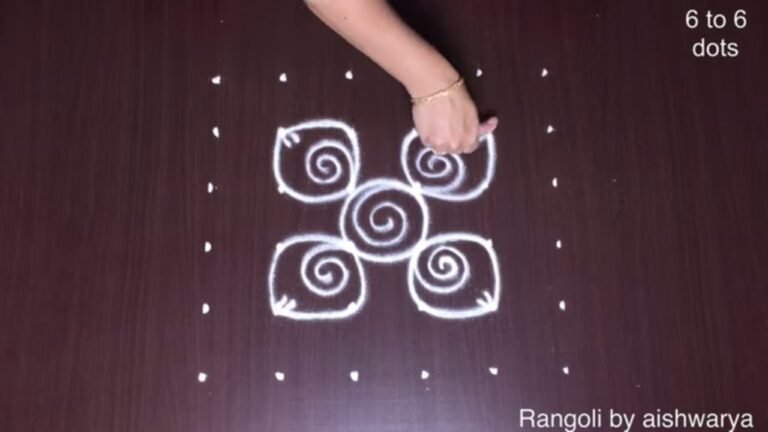
- Fill the spaces between the motifs with small round spirals (little curl dots).
- Go over every outline once more to even the thickness; the muggulu stays white on the floor with no colour fill.
What You Will Learn
- 11 By 6 Dots Kolam
- Simple Festival Muggulu 11X6
- Latest Kutti Kolam Design
- 11 6 Chukkala Muggulu
- Rectangular Dot Grid Rangoli
- Festival Dot Kolam
Frequently Asked Questions
How do I draw this rangoli?
Set down the dot grid in pencil or chalk, then follow the loops one petal at a time. If a curve goes off, wipe it and retry — kolam is forgiving.
Is this suitable for beginners?
Beginner-friendly is exactly the right description. The video walks through every line clearly and you can match the pace.
What materials do I need?
Powder (white for outlines, colours for filling), a flat surface, and a dot stencil if you want absolute precision. Beyond that, just your hand and a steady pace.
How long does it take?
The video runs 2 min 39 sec. In practice, most learners take between 10 and 20 minutes — a little longer the first time, faster as the pattern becomes familiar.
Save this design for your next festival morning. The pattern is small enough to draw quickly but striking enough to make a real impression at the doorstep.

Leave a Reply