Drawing Vibrant Flower Kolangal Designs is a relaxing, almost meditative practice. The dots guide your hand and the design unfolds naturally.
Vibrant different flower rangoli kolangal designs | 11 6 dots thai poosam sandu muggulu Thank you so much for watching Channel
My Rangoli Channel Contains : Rangoli Designs Sankranthi Muggulu
Diwali Rangoli Ratham Muggulu Kolam Designs
Muggulu Designs Chukkala Muggulu Easy Rangoli
Simple Rangoli Easy Rangoli Designs Dhanurmasam Muggulu
Melikala Muggulu Geethala Muggulu Sivarathri Muggulu
Tip: A slightly damp brush along the edges gives a sharper finish, especially for festival photographs.
The vibrant flower kolangal designs made with 11 to 6 dots are perfect for festivals like Thai Poosam, where the emphasis is on celebrating nature’s beauty through art. These designs often feature a combination of bright colors and intricate petal shapes, inviting a sense of joy and festivity. Beginners can start with simple patterns and gradually add complexity, making it a great way to engage with the tradition of rangoli during auspicious occasions.
Incorporating elements from both traditional and contemporary styles, these kolangal designs can be adapted for various settings, whether on the floor or using colored powders. They may also include additional motifs such as leaves or geometric shapes to enhance the visual appeal. For those interested in exploring other flower-themed designs, the 12 to 4 Dots Flower Pot Rangoli can offer inspiration, while the Harvest Festival Kolam 15×1 Dots showcases how flowers can be integrated into festive themes beautifully.
About this design: Vibrant Flower Kolangal Designs is a beginner-friendly pattern that comes together in just a few minutes. Once you have practised the vibrant flower kolangal designs dot grid, you can scale it up for festival mornings or scale it down for a daily doorstep. Many learners on our channel make this vibrant flower kolangal designs their go-to design once they get the rhythm of the curves.
Vibrant Flower Kolangal Designs — Step by Step Guide
These steps are written for absolute beginners. Watch once, draw once, then watch again — that is how the pattern locks in.
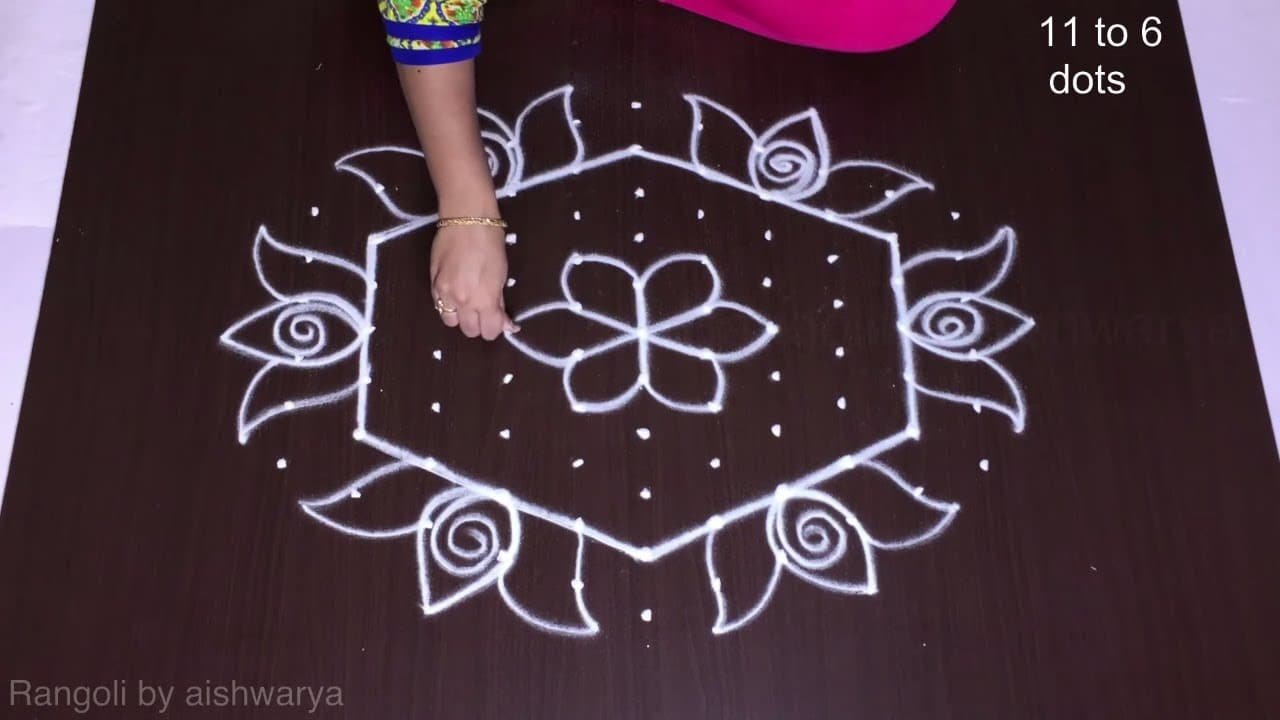
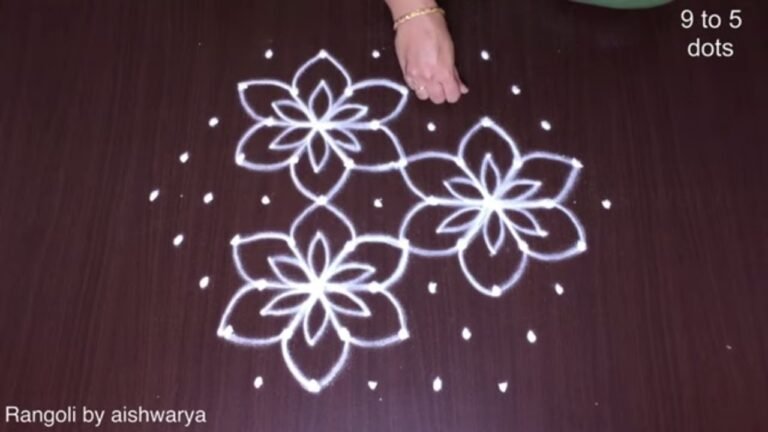
- Mark the 11-to-6 dot grid (rows from 11 down to 6), a broad hexagonal field.
- In the centre draw a many-petalled lotus/rose: start from a small centre and loop petals outward in rings until you have a full blooming flower.
- Enclose the flower in a six-sided (hexagon) outline drawn with straight lines between the outer dots.
- At each of the six hexagon corners add an outward spiral curl.
- In the four outer corners of the grid draw lotus-petal clusters – a spiral curl framed by pointed petals and small buds.
- Join the corner clusters to the hexagon with light curved stems and keep the design in white (fill the flower petals with vibrant colour to match the theme if you wish).
What You Will Learn
- Simple Rangoli Designs
- Rangoli
- Muggulu
- Rangoli Designs
- Rangoli Kolam
- Kolam
Frequently Asked Questions
How do I draw this rangoli?
It looks complex but follows a simple rhythm: dots first, then loops. Mark the grid, take a breath, and trace the curves at a steady pace. The pattern emerges on its own.
Is this suitable for beginners?
Yes — this design is shaped specifically with newcomers in mind. The dot grid is small enough to manage, and the curves are gentle. Most learners get it right by the second try.
What materials do I need?
Powder (white for outlines, colours for filling), a flat surface, and a dot stencil if you want absolute precision. Beyond that, just your hand and a steady pace.
How long does it take?
About 3 min 58 sec on screen, perhaps 15 minutes for a relaxed first attempt. By the second try most people are noticeably quicker.
Try this design tomorrow morning at your doorstep. The compact grid makes it ideal for a daily ritual, not just festival days.


Leave a Reply