This 12×2 beautiful butterfly rangoli tutorial walks you through every step from the dot grid to the final pattern.
For another beginner-friendly variation, try Perfect Geometrical Shapes Rangoli.
Learn more about the tradition of Rangoli on Wikipedia.
12 2 Beautiful Butterfly Rangoli combines tradition with simplicity, making it one of the most rewarding designs to practice at home.
Looking for a beautiful butterfly kolam for Sankranthi or Pongal? This 12 by 2 dots rangoli is simple, creative, and perfect for festive decoration. In this video, I guide you step by step to create a 12×2 straight dot grid butterfly kolam specially designed for Sankranthi and Pongal celebrations. The narrow rectangular layout makes it compact and elegant, while the butterfly wings add a lively and festive touch to your entrance.
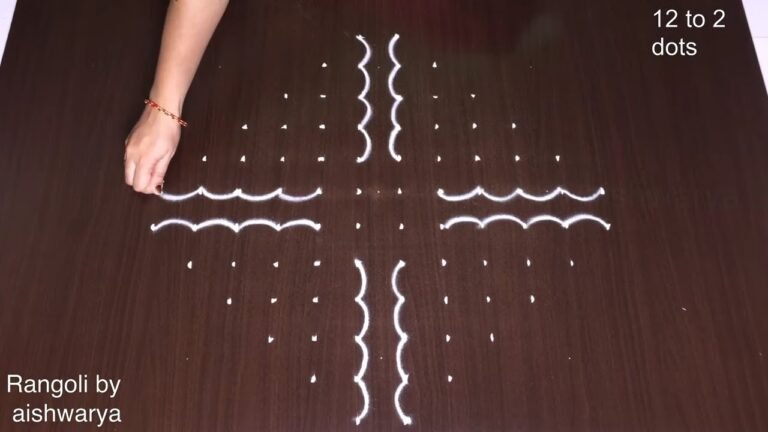
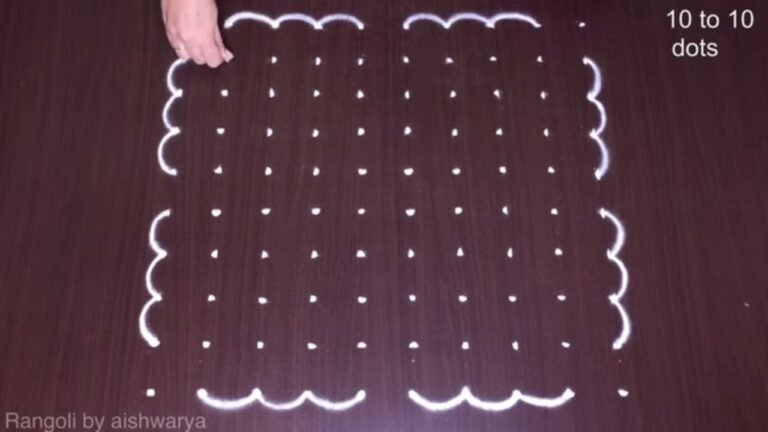
We begin by placing a neat 12 by 2 straight dot structure, ensuring proper spacing and alignment. Then, the butterfly outline is formed by smoothly connecting the dots into symmetrical wing shapes. Inner detailing enhances the wings and body, giving the kolam a refined and balanced appearance. Even though the grid is narrow, the final design looks eye-catching and festive. How to construct a proper 12–2 straight dot grid How to create symmetrical butterfly shapes using dots
How to maintain balance in narrow rectangular kolams Tips to make Sankranthi and Pongal kolam neat and attractive This butterfly muggulu is ideal for festive entrances, verandas, and compact apartment spaces. The structured grid ensures a clean finish while keeping the design easy to recreate.
Watch till the end to see the full transformation from simple dots to a complete butterfly kolam — the final reveal highlights a beautifully balanced and vibrant festival design. If you enjoy themed dot kolams, explore more 12 by 2 dots rangoli, Sankranthi special muggulu, and creative festival patterns on the channel.
Tip: A slightly damp brush along the edges gives a sharper finish, especially for festival photographs.
About this design: 12X2 Beautiful Butterfly Rangoli is a beginner-friendly pattern that comes together in just a few minutes. Once you have practised the 12×2 beautiful butterfly rangoli dot grid, you can scale it up for festival mornings or scale it down for a daily doorstep. Many learners on our channel make this 12×2 beautiful butterfly rangoli their go-to design once they get the rhythm of the curves.
12X2 Beautiful Butterfly Rangoli — Step by Step Guide
Follow the steps below to recreate this design at home. Pause the video whenever you need — there is no hurry.
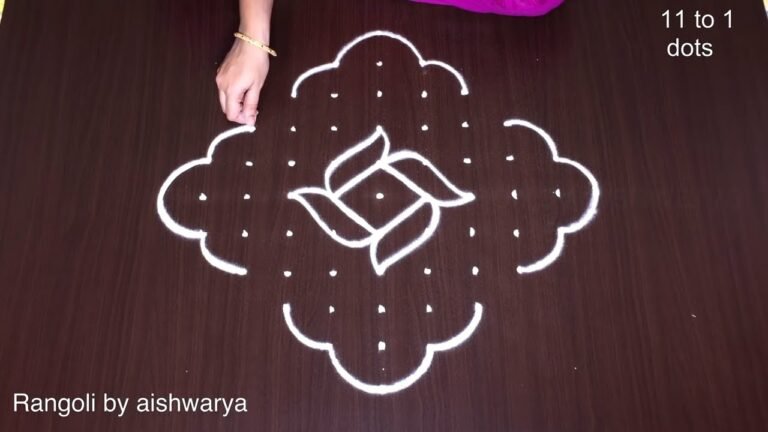
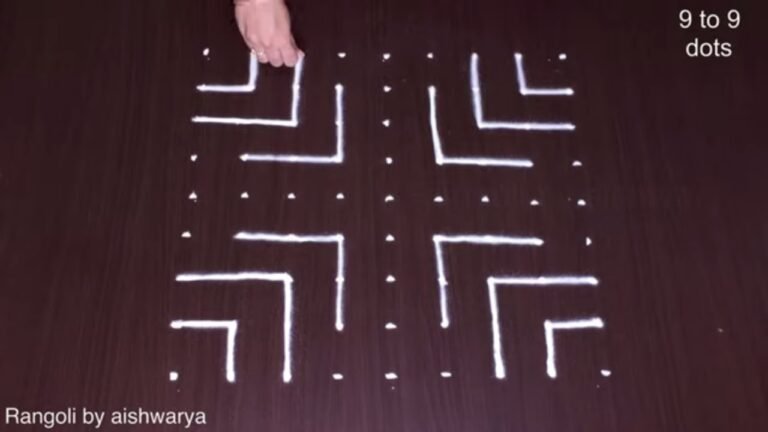
- Mark the 12×2 dot grid and locate the centre point.
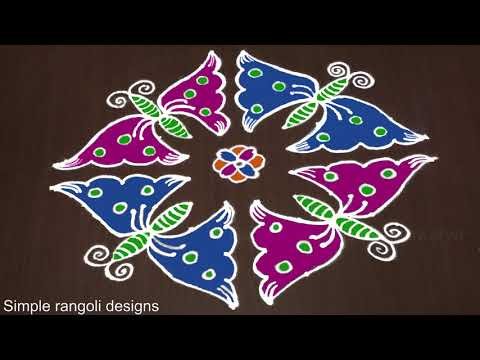
- In the very centre draw a small round flower – a ring of six little petals – as the hub the butterflies will circle around.
- Around the centre block out six butterflies pointing outward like the spokes of a wheel, evenly spaced; for each, first sketch the two wings, a large rounded lower wing and a smaller upper wing, meeting at an inner tip near the centre.
- Draw each butterfly body as a pointed leaf shape running down the middle between the wings, and add a pair of thin feelers and a loose spiral curl at the outer (tail) end.
- Scallop the outer edge of every wing so it looks feathered and scatter a few small round dots across each wing.
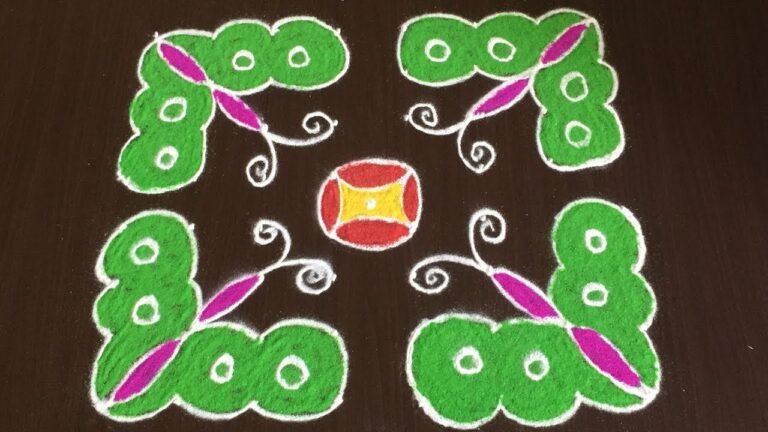
- Colour the butterflies in alternating magenta/purple and blue, fill the leaf-shaped bodies and the wing dots in green, pick out the centre flower in red, orange and green, and outline everything in white.
What You Will Learn
- Sankranthi Butterfly Rangoli 12 By 2 Dots
- Pongal Butterfly Kolam 12X2
- 12 By 2 Dots Kolam Design
- Beautiful Butterfly Muggulu
- 12 2 Chukkala Muggulu
- Straight Dot Grid Butterfly Kolam
Frequently Asked Questions
How do I draw this rangoli?
Set down the dot grid in pencil or chalk, then follow the loops one petal at a time. If a curve goes off, wipe it and retry — kolam is forgiving.
Is this suitable for beginners?
Yes, and it is one we recommend to first-timers. The small grid keeps the design manageable while still teaching the core technique.
What materials do I need?
Rice flour, coloured rangoli powders, and a clean stretch of floor or paper. Some draw with chalk first to set the grid before powdering over it.
How long does it take?
The video clocks in at 5 min 8 sec. Allow about quarter of an hour to draw the design at a comfortable pace.
Once you get the rhythm of this design, try scaling it up or experimenting with colours. The grid stays the same; the personality changes.

Leave a Reply