Whether you are decorating for a festival or your daily morning ritual, 3 To 3 Beautiful is an excellent design to keep handy.
Rangoli Design Small and Simple 🌷 3 to 3 Beautiful Friday Kolam 🌷 Gummam Muggulu Designs Latest Thank you so much for watching Channel
My Rangoli Channel Contains : Rangoli Designs Sankranthi Muggulu
Diwali Rangoli Ratham Muggulu Kolam Designs
Muggulu Designs Chukkala Muggulu Easy Rangoli
Simple Rangoli Easy Rangoli Designs Dhanurmasam Muggulu
Melikala Muggulu Geethala Muggulu Sivarathri Muggulu
Tip: Work from the centre outward. It keeps the symmetry honest and prevents the design from drifting off-balance.
This design belongs to the broader tradition of rangoli and kolam art practised across South India. Explore more in our 3 to 3 dots Rangoli Designs collection.
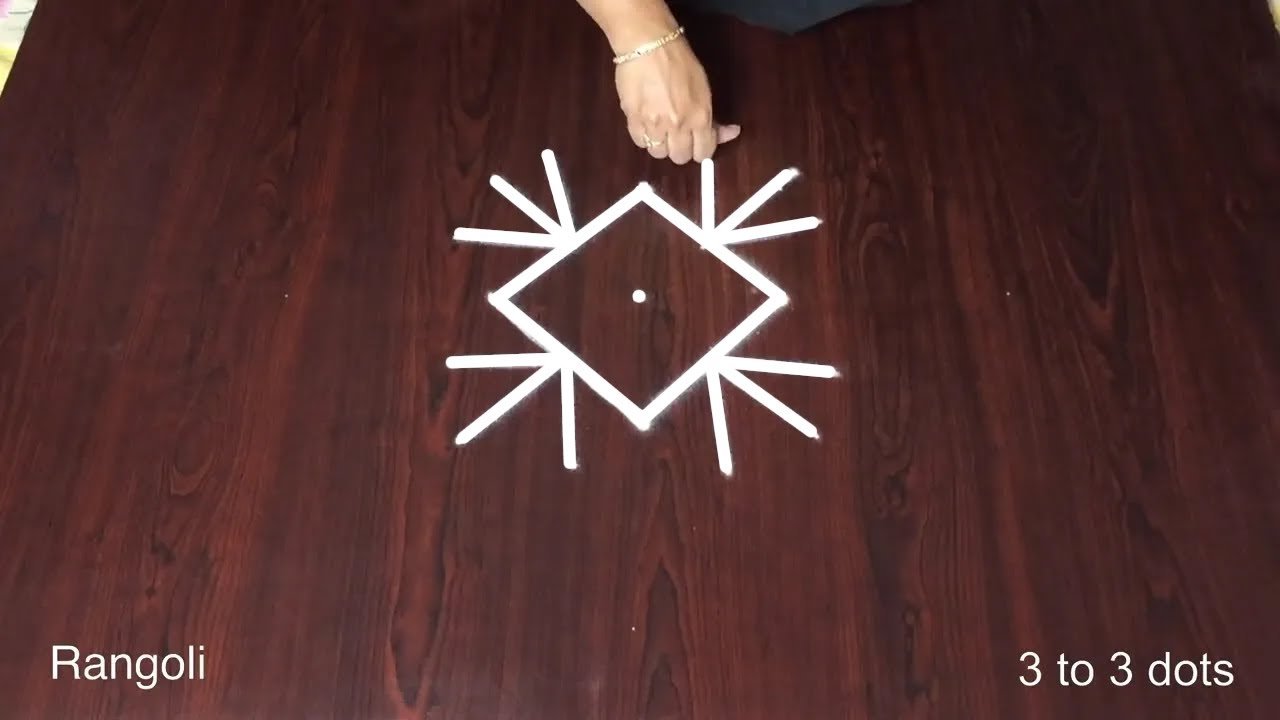
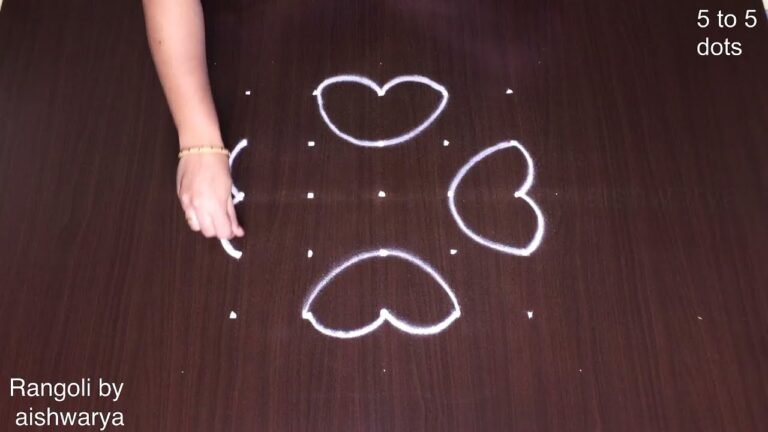
The 3 to 3 beautiful kolam is a delightful design that embodies simplicity and elegance, making it perfect for beginners. Typically created on Fridays, this kolam features a grid of dots arranged in a 3×3 pattern, which allows for both creativity and precision. The design can be enhanced with vibrant colors and patterns, making it a wonderful way to brighten up your home and create a warm, inviting atmosphere. For more inspiration, you might enjoy exploring the Beautiful Deepam Rangoli Designs 7 or checking out the Attractive Beautiful Design Festivals Easy Rangoli.
This kolam is not just about aesthetics; it carries cultural significance, especially during festive days. Traditionally, it is believed that drawing kolams brings prosperity and good luck to the household. The 3 to 3 design can be embellished with flower petals or colored powders to create a stunning visual effect. If you’re interested in learning more about the history and cultural aspects of this art form, visit this Wikipedia page on rangoli. It’s a great way to appreciate the rich traditions behind this beautiful practice.
3 To 3 Beautiful — Step by Step Guide
The video above shows the full sequence; the steps below summarise each stage so you can glance back as you draw.
- Clear a flat surface and set down your dot grid using rice flour or chalk.
- Confirm the dot spacing is even — uneven dots are the biggest cause of wobbly curves.
- Begin tracing from the centre outward, following the curves shown in the video above.
- Fill the petals and sections with your chosen colours, working one area at a time.
- Finish the edges with a fine line for a sharp, photograph-ready result.
What You Will Learn
- Simple Rangoli Designs
- Rangoli
- Muggulu
- Rangoli Designs
- Rangoli Kolam
- Kolam
Frequently Asked Questions
How do I draw this rangoli?
The grid comes first. Use a soft chalk to dot the surface, count twice to confirm the spacing, then start connecting them following the video. Work from the centre outward.
Is this suitable for beginners?
Absolutely. You can pause and rewind the video at every step. The pattern is straightforward once you have the grid down.
What materials do I need?
You will need rice flour or rangoli powder (white, plus your choice of colours), a flat surface like a clean floor or courtyard, and optionally a dot stencil if you are new to grid-drawing.
How long does it take?
The full demonstration takes 3 min 52 sec. Most people find their own drawing time settles to about 15 minutes once the grid is familiar.
Pin this for later or share with a friend learning kolam — and let us know in the comments which design you would like next.
Leave a Reply