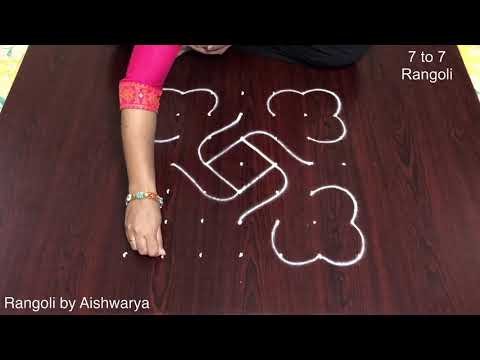
Rangoli Muggulu Easy has become a favourite among learners on our channel — and once you try it, you will see why.
Simple Pulli Kolam Designs With Dots 🌺 Rangoli Muggulu Easy Thank you so much for watching Channel
Learn more about the tradition of Rangoli on Wikipedia.
Chapters: 0:00 Intro 0:05 Simple Pulli Kolam Designs With Dots
3:06 Rangoli Muggulu Easy My Simple Rangoli Designs Channel Contains : Rangoli designs
Sankranthi muggulu Diwali rangoli Kolam designs
Simple rangoli Easy rangoli designs Pongal kolams
New year rangoli designs Ratham muggulu Muggulu designs
Tip: Work from the centre outward. It keeps the symmetry honest and prevents the design from drifting off-balance.
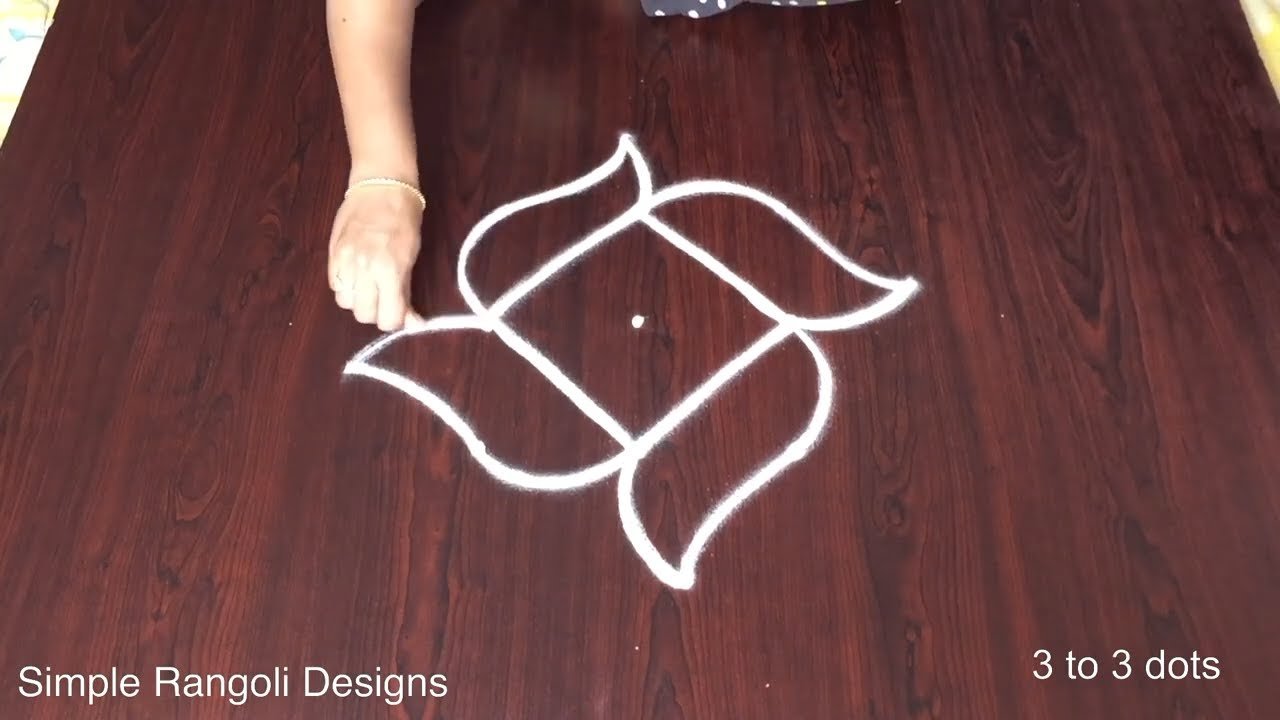
This design belongs to the broader tradition of rangoli and kolam art practised across South India. Explore more in our 3 to 3 dots Rangoli Designs collection.
The simplicity of a 3 to 3 dots rangoli muggulu design makes it perfect for beginners and those looking for an easy yet beautiful artistic expression. This design often features intricate patterns that can be easily replicated using just a few dots as a base. Ideal for festivals like Pongal and Diwali, these designs bring a touch of warmth and festivity to any home. For inspiration, you might want to explore the Daily Simple Small Rangoli or delve into the vibrant world of Diwali Festival Muggulu Rangoli.
Rangoli, traditionally created during auspicious occasions, serves as a welcoming gesture to guests while also enhancing the beauty of one’s home. The charm of 3 to 3 dots designs lies in their versatility; they can be adorned with colors or left simple for a classic look. As you practice, you’ll discover the joy of creating unique patterns that reflect your personal style. For more insights into this beautiful art form, check out the [Rangoli Wikipedia page](https://en.wikipedia.org/wiki/Rangoli) to learn about its history and significance.
Rangoli Muggulu Easy — Step by Step Guide
Pace yourself through the steps — kolam rewards patience more than speed.
- Clear a flat surface and set down your dot grid using rice flour or chalk.
- Confirm the dot spacing is even — uneven dots are the biggest cause of wobbly curves.
- Begin tracing from the centre outward, following the curves shown in the video above.
- Fill the petals and sections with your chosen colours, working one area at a time.
- Finish the edges with a fine line for a sharp, photograph-ready result.
What You Will Learn
- Simple Rangoli Designs
- Rangoli
- Muggulu
- Rangoli Designs
- Rangoli Kolam
- Kolam
Frequently Asked Questions
How do I draw this rangoli?
Set down the dot grid in pencil or chalk, then follow the loops one petal at a time. If a curve goes off, wipe it and retry — kolam is forgiving.
Is this suitable for beginners?
Yes — this design is shaped specifically with newcomers in mind. The dot grid is small enough to manage, and the curves are gentle. Most learners get it right by the second try.
What materials do I need?
Just three things: powder (white plus any colours you want), a flat dry surface, and a few minutes of focus. A small bowl per colour helps keep things tidy.
How long does it take?
The tutorial is 6 min 26 sec long. With practice the actual drawing settles around 10 minutes; the first time will likely take twice that.
Drawing kolam is as much about the practice as the result. Set aside ten minutes, follow the video, and enjoy the process.
Leave a Reply