7 Dots Simple Beginners has become a favourite among learners on our channel — and once you try it, you will see why.
7 dots Simple Beginners Rangoli Easy | Small Designs Latest Daily Muggulu | Rangoli Aishwarya Thank you so much for watching Channel
My Rangoli Channel Contains : Rangoli Designs Sankranthi Muggulu
Diwali Rangoli Ratham Muggulu Kolam Designs
Muggulu Designs Chukkala Muggulu Easy Rangoli
Simple Rangoli Easy Rangoli Designs Dhanurmasam Muggulu
Melikala Muggulu Geethala Muggulu Sivarathri Muggulu
Tip: A slightly damp brush along the edges gives a sharper finish, especially for festival photographs.
This 7 dots simple beginners rangoli design is perfect for those who are just starting their journey into the world of rangoli. With its straightforward pattern, it’s ideal for festivals like Pongal or Sankranthi, where colorful designs brighten up the atmosphere. The use of seven dots allows for creativity while keeping the design manageable, making it a great choice for those who may feel intimidated by more complex patterns. If you’re looking for additional inspiration, check out this Beautiful Rangoli With 7 Dots post.
Creating this rangoli can be a delightful activity, especially for beginners. The simplicity of the design not only fosters confidence but also encourages experimentation with colors and embellishments. As you practice, you might want to explore other related designs, such as those featured in Daily Kolams Latest Rangoli Designs. For those interested in learning more about the history and significance of rangoli, you can visit this link.
7 Dots Simple Beginners — Step by Step Guide
Use the steps below as a reference card while the video plays. Most learners finish on the second attempt.
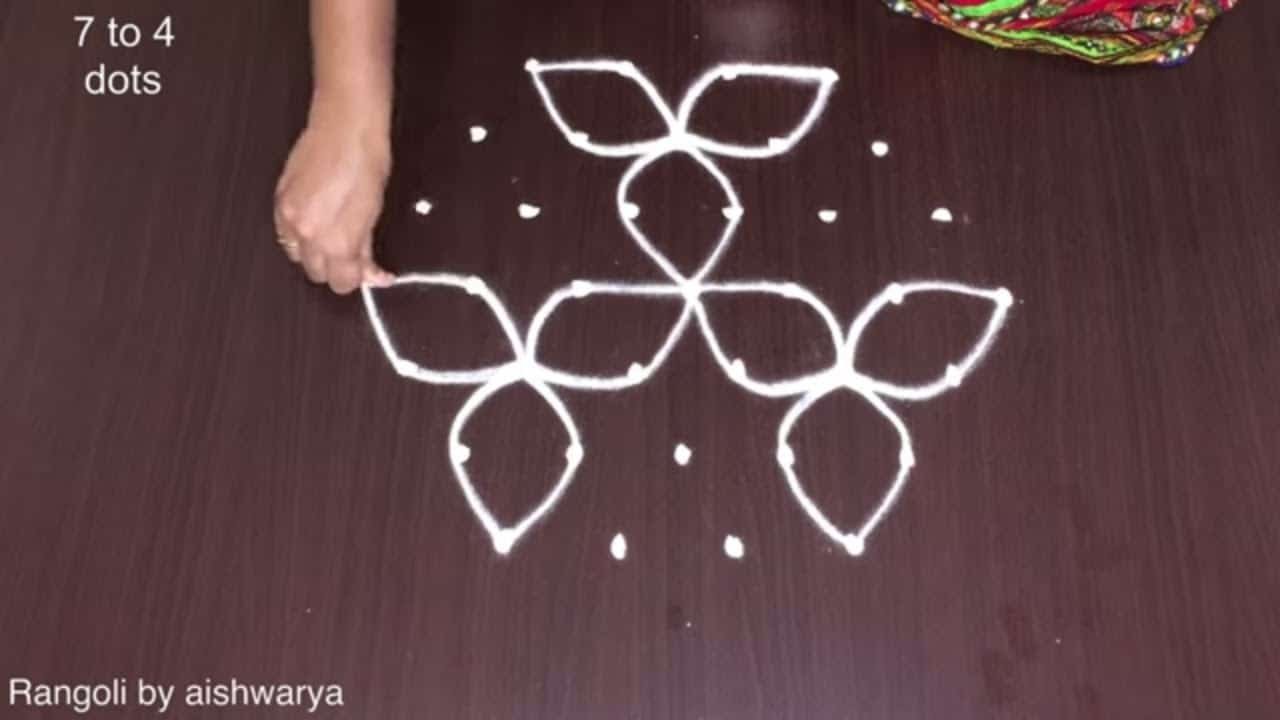
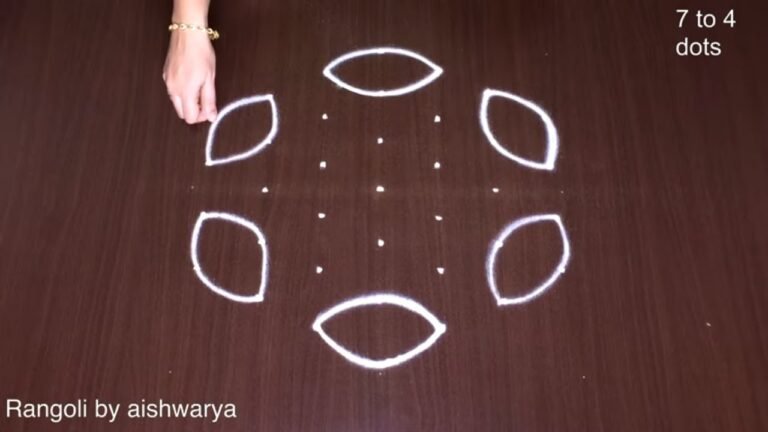
- Mark the 7-to-4 dot grid (7 dots across the middle row, tapering to 4).
- Connect the dots into a pair of overlapping triangles (a six-point star / hexagram) as the frame.
- Inside each point of the star draw a spiral coil (a snail-shell curl).
- Cap the top and the upper-side points with pointed leaf-petals (a loop coming to a point).
- Hang one pointed pendant petal from the bottom-centre point.
- Lightly hatch the connecting triangles and trace the whole design in white powder.
What You Will Learn
- Simple Rangoli Designs
- Rangoli
- Muggulu
- Rangoli Designs
- Rangoli Kolam
- Kolam
Frequently Asked Questions
How do I draw this rangoli?
Set down the dot grid in pencil or chalk, then follow the loops one petal at a time. If a curve goes off, wipe it and retry — kolam is forgiving.
Is this suitable for beginners?
Yes — this design is shaped specifically with newcomers in mind. The dot grid is small enough to manage, and the curves are gentle. Most learners get it right by the second try.
What materials do I need?
Rice flour, coloured rangoli powders, and a clean stretch of floor or paper. Some draw with chalk first to set the grid before powdering over it.
How long does it take?
The tutorial is 2 min 48 sec long. With practice the actual drawing settles around 10 minutes; the first time will likely take twice that.
Half the skill of kolam is learning to slow down. Put on some music, give yourself the time, and let the curves come naturally.

Leave a Reply