This easy star kolam tutorial walks you through every step from the dot grid to the final pattern.
How To Draw Easy 3 is a beautiful kolam pattern you can draw right at your doorstep — perfect for beginners and seasoned rangoli artists alike.
Amazing Rangoli & Kolam Designs | Easy Deepala Muggulu With 9 se 9 dots | Rangoli Aishwarya Thank you so much for watching Channel
My Rangoli Channel Contains : Rangoli Designs Sankranthi Muggulu
Diwali Rangoli Ratham Muggulu Kolam Designs
Muggulu Designs Chukkala Muggulu Easy Rangoli
Simple Rangoli Easy Rangoli Designs Dhanurmasam Muggulu
Melikala Muggulu Geethala Muggulu Sivarathri Muggulu
Tip: Keep your powder bowl close to your dominant hand. Small movements give cleaner curves.
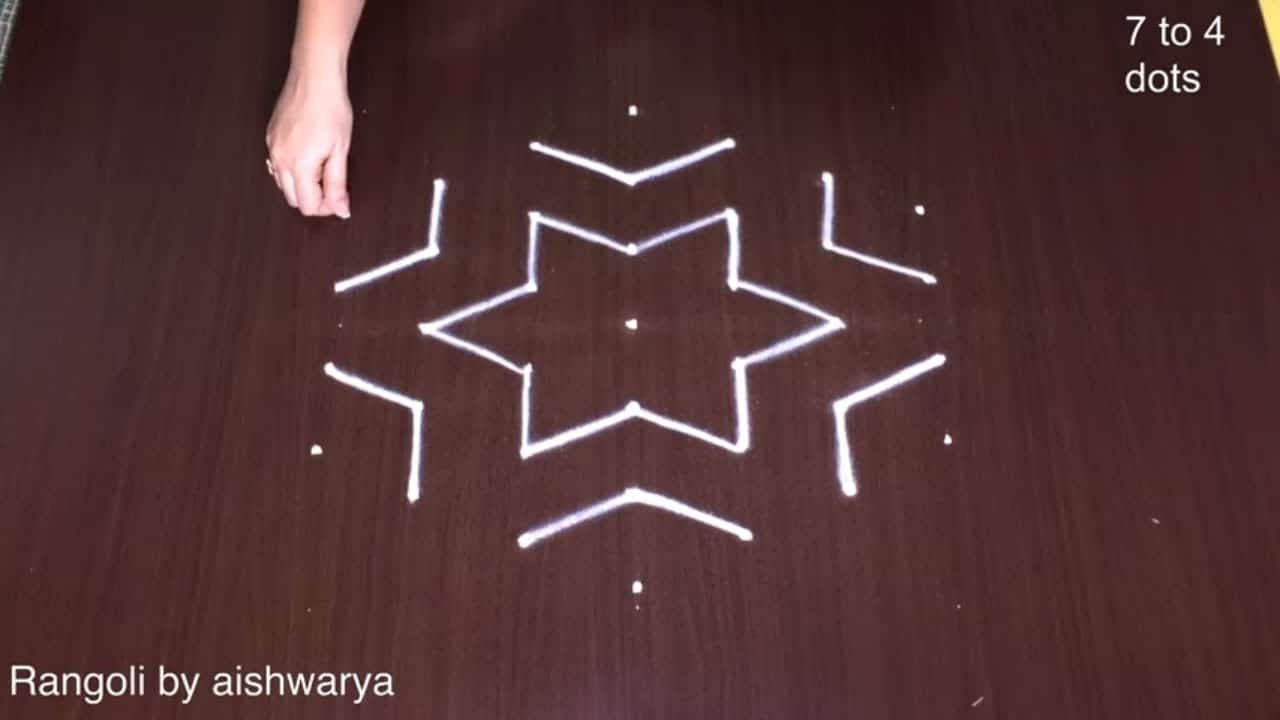
The easy star kolam is a delightful design that can be created using a simple dot grid, typically between 7 to 4 dots. This design is perfect for beginners, as it combines basic shapes into a beautiful star pattern that can be enhanced with colors or embellishments. Often drawn during festivals, it serves as a warm welcome to guests and brings good luck. If you’re interested in exploring more designs, you might enjoy the Basic Daily Flower Rangoli or the Beautiful Friday Special Kolam.
Creating this star kolam not only adds charm to your home but also provides a creative outlet for expression. The process of drawing kolams can be quite meditative, allowing you to focus on the rhythm of placing the dots and connecting them. For those who wish to further their skills, looking into designs like Trendy Creative Kolam Designs can offer inspiration. For more insights into the art of rangoli, you can refer to this Wikipedia article.
About this design: Easy Star Kolam is a beginner-friendly pattern that comes together in just a few minutes. Once you have practised the easy star kolam dot grid, you can scale it up for festival mornings or scale it down for a daily doorstep. Many learners on our channel make this easy star kolam their go-to design once they get the rhythm of the curves.
Easy Star Kolam — Step by Step Guide
Each step takes only a moment. The whole design comes together in just a few minutes once the grid is in place.
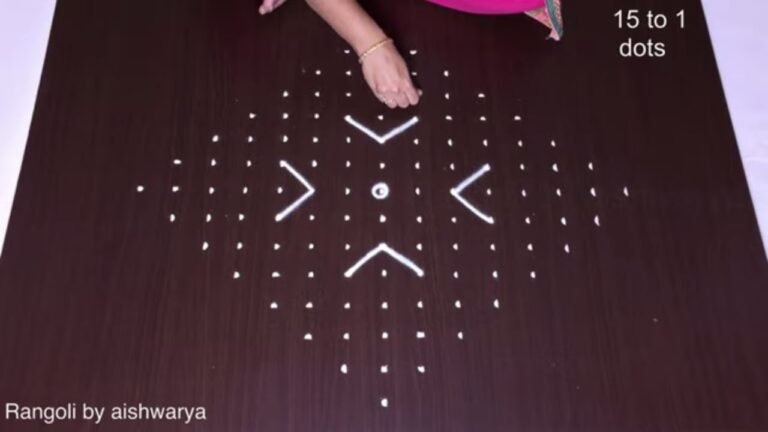
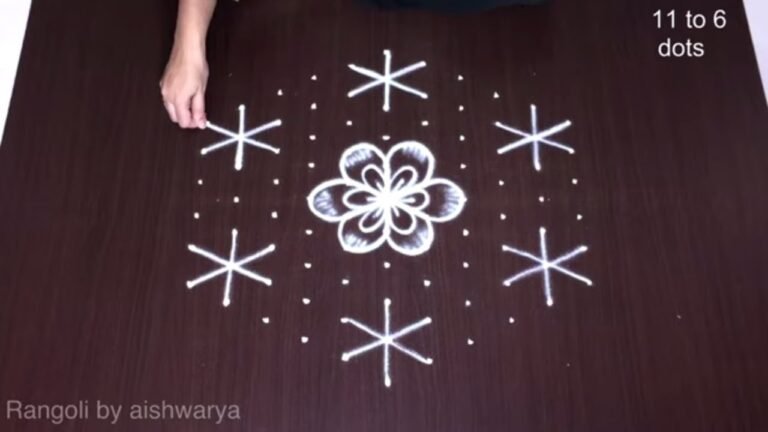
- Mark the 7 to 4 dot grid.
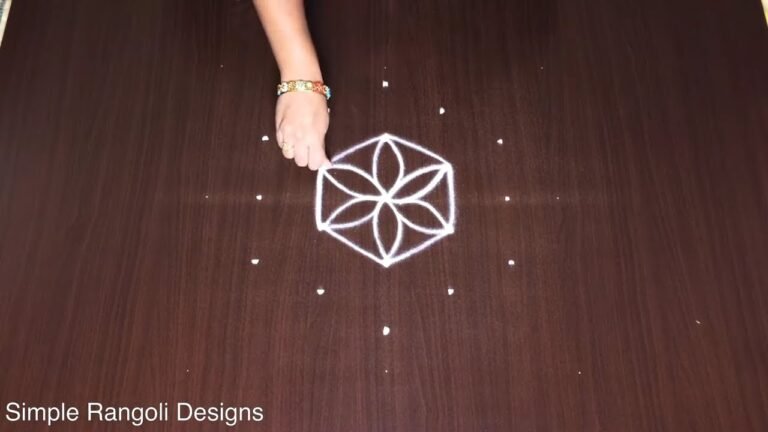
- In the centre draw a hexagon and fill it with a six-petal flower – six pointed petals meeting at the middle like a flower-of-life star.
- From each of the hexagon's six sides extend a line out to a point so the whole outline becomes a six-pointed star.
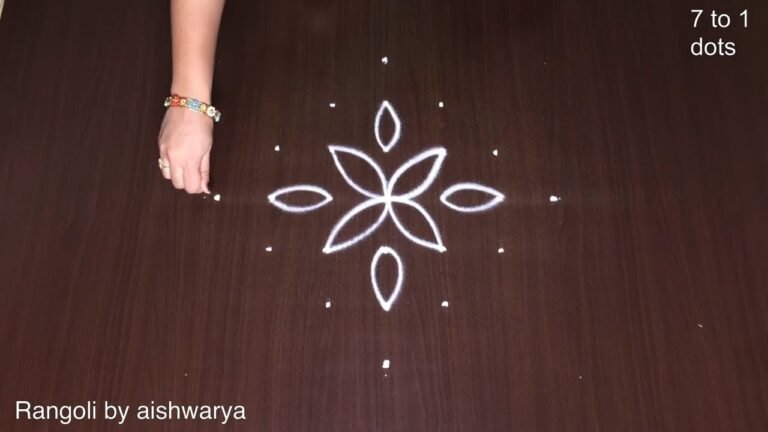
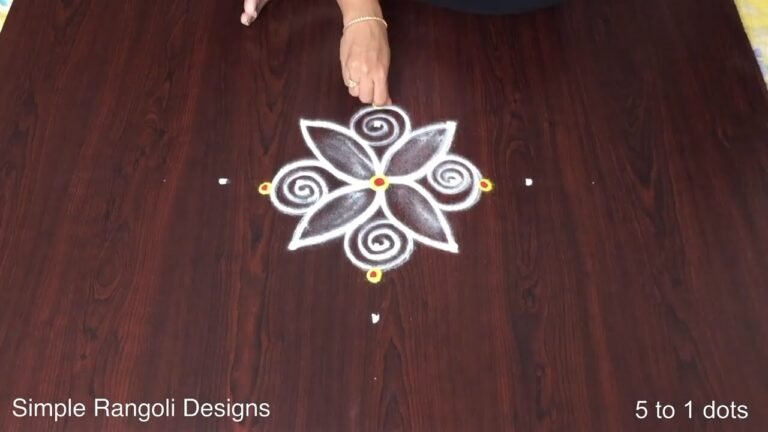
- In each star point draw a matching floral cluster – a fan of small rounded petals with a curled spiral scroll on each side.
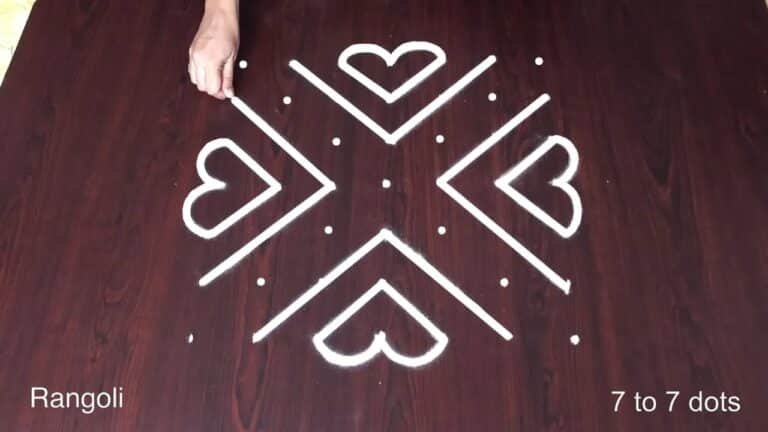
- Tuck a small heart or curl accent into each notch between the star points to join the clusters.
- Outline everything in white and lightly shade the petals with pale purple to give the star depth.
What You Will Learn
- Simple Rangoli Designs
- Rangoli
- Muggulu
- Rangoli Designs
- Rangoli Kolam
- Kolam
Frequently Asked Questions
How do I draw this rangoli?
Start by marking an even dot grid on a flat, clean surface. Once the grid is in place, connect the dots following the curves shown in the video. Even spacing between dots is the single biggest factor for a clean finish.
Is this suitable for beginners?
It is one of the more forgiving designs in our collection. Beginners often pick it as a confidence-builder before moving on to larger grids.
What materials do I need?
Just three things: powder (white plus any colours you want), a flat dry surface, and a few minutes of focus. A small bowl per colour helps keep things tidy.
How long does it take?
A 8 min 41 sec video shows the complete sequence. On paper or floor, expect to spend around a quarter of an hour from grid to finished pattern.
We rotate festival designs through the year — bookmark the homepage and you will find a new pattern every morning.
Leave a Reply