There is something timeless about Trendy Designer Rangoli 7 — the symmetry, the rhythm of the dots, and the soft curves it produces.
Trendy Designer Rangoli 7 Into 4 Middle Dots | Creative Pattern Muggulu Every Day Morning Kolam. This tutorial will show you how to draw Beautiful Indian traditional art Diwali Rangoli patterns using materials such as dry rice flour, colored sand or flower petals Rangoli designs by Aishwarya. Simple rangoli Kutti Kolam pattern is created on the floor in living rooms or courtyards. Draw the Lines step by step as it is shown in this video and will be awesome Rangoli Design. 😲 The Diwali rangoli pattern here is one of the amazing latest kolam designs. Simple Rangoli Designs and easy rangoli designs by Aishwarya with dots for beginners and intermediate.
1. Diwali Rangoli 2. Pongal kolams 3. Easy rangoli designs
4. Rangoli design 5. Chukkala muggulu 6. Dot rangoli designs
7. Dots rangoli 8. Easy rangoli 9. Easy rangoli designs
10. Kolam designs 11. Kolam with dots 12. Muggulu designs
13. Muggulu designs with dots 14. Small rangoli designs 15. Muggulu chukkala muggulu
Tip: A slightly damp brush along the edges gives a sharper finish, especially for festival photographs.
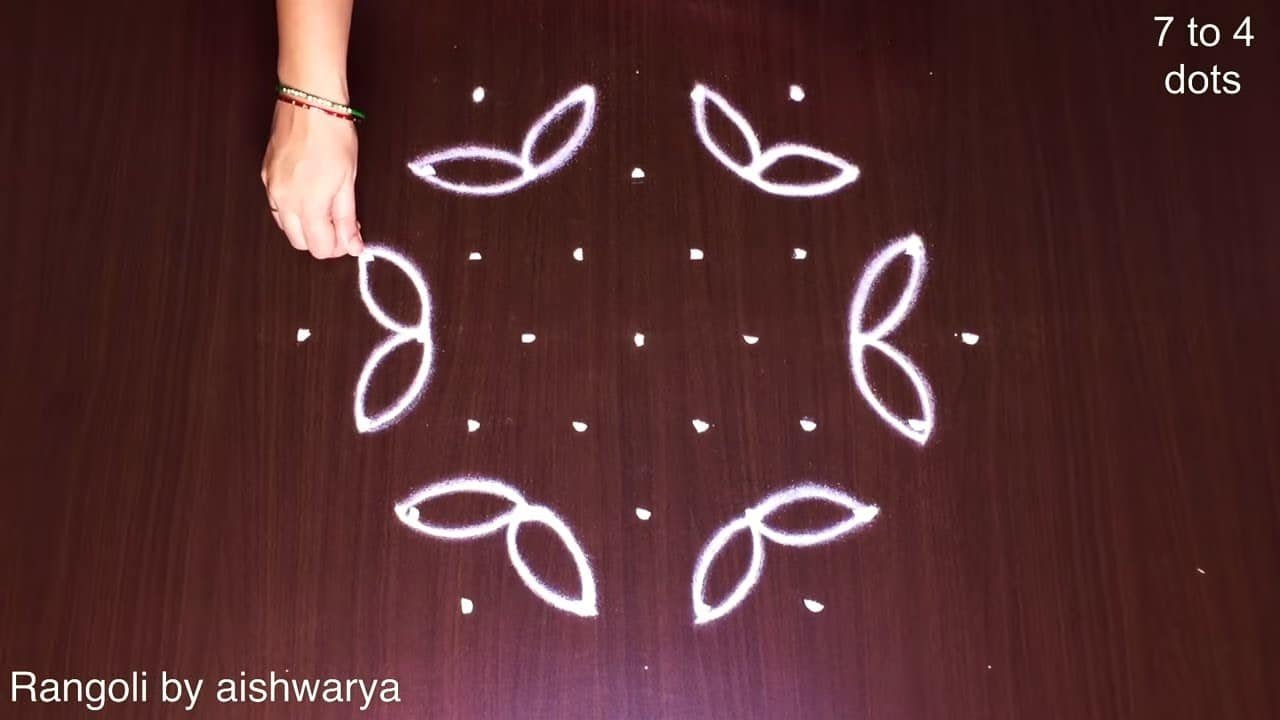
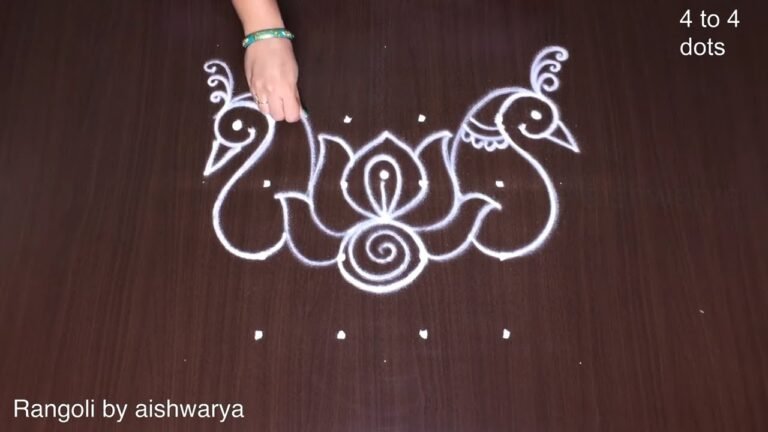
The Trendy Designer Rangoli 7 features a beautiful arrangement with 4 dots in the center, making it a delightful choice for festivals like Diwali. This design incorporates intricate patterns that reflect traditional Indian artistry while also showcasing a modern twist, appealing to both beginners and experienced artists alike. It’s a versatile design that can be created using dry rice flour, colored sand, or even flower petals, allowing for creativity in your choice of materials. For more ideas, you might also explore the Latest Flower Rangoli Designs 9 Dots.
This kolam can be easily drawn in living rooms or courtyards, adding a festive touch to your home. The simplicity of the design makes it accessible for those just starting with rangoli, while the trendy elements inspire more advanced artists to experiment. As you create this pattern, consider combining it with other motifs, like those found in the Simple Pongal Pot Koalm, to enhance its beauty. For further reading on the cultural significance of rangoli, check out this Wikipedia article.
Trendy Designer Rangoli — Step by Step Guide
The video above shows the full sequence; the steps below summarise each stage so you can glance back as you draw.
- Clear a flat surface and set down your dot grid using rice flour or chalk.
- Confirm the dot spacing is even — uneven dots are the biggest cause of wobbly curves.
- Begin tracing from the centre outward, following the curves shown in the video above.
- Fill the petals and sections with your chosen colours, working one area at a time.
- Finish the edges with a fine line for a sharp, photograph-ready result.
What You Will Learn
- Simple Rangoli Designs
- Rangoli
- Muggulu
- Rangoli Designs
- Rangoli Kolam
- Kolam
Frequently Asked Questions
How do I draw this rangoli?
The grid comes first. Use a soft chalk to dot the surface, count twice to confirm the spacing, then start connecting them following the video. Work from the centre outward.
Is this suitable for beginners?
Yes, and it is one we recommend to first-timers. The small grid keeps the design manageable while still teaching the core technique.
What materials do I need?
White rice flour for the outline, coloured powders for the fill, and a clean dry floor. That is the essentials list — you can add a stencil if you prefer.
How long does it take?
The video clocks in at 3 min 18 sec. Allow about quarter of an hour to draw the design at a comfortable pace.
Beginners often ask which design to start with. Honestly, this one. It is small enough to finish in a sitting and the curves teach you the basics of dot kolam.
Leave a Reply