Looking to learn Chukkala Muggulu Latest 11? This step-by-step guide walks you through every line, dot, and curve.

Chukkala Muggulu Latest 11 Se 1 dots | Door Entrance Rangoli Traditional Kolam Designs Thank you so much for watching Channel
My Rangoli Channel Contains : Rangoli Designs Sankranthi Muggulu
Diwali Rangoli Ratham Muggulu Kolam Designs
Muggulu Designs Chukkala Muggulu Easy Rangoli
Simple Rangoli Easy Rangoli Designs Dhanurmasam Muggulu
Melikala Muggulu Geethala Muggulu Sivarathri Muggulu
Tip: Work from the centre outward. It keeps the symmetry honest and prevents the design from drifting off-balance.
The Chukkala Muggulu latest 11 Se 1 design showcases the beauty of traditional kolam art, typically crafted for festive occasions. This particular design involves a grid of 11 dots, arranged in a unique way that allows for intricate patterns to emerge as you connect the dots. Perfect for welcoming guests during festivals, this style reflects the rich cultural heritage of India. For those looking to explore additional designs, consider checking out the 7 to 7 Sulabayina Rojuvari Muggulu for inspiration.
Creating this muggulu requires a steady hand and a bit of practice, making it an enjoyable activity for both beginners and seasoned artists. The use of white rice flour not only enhances the beauty of the design but also symbolizes purity. As you immerse yourself in this art form, you may find it helpful to refer to other simple designs, such as the Simple 10-2 Dots Rangoli Design. For more insights into rangoli, you can visit this Wikipedia page.
Chukkala Muggulu Latest 11 — Step by Step Guide
If you have drawn dot rangoli before, this will feel familiar. If you have not, the dot grid will guide you.
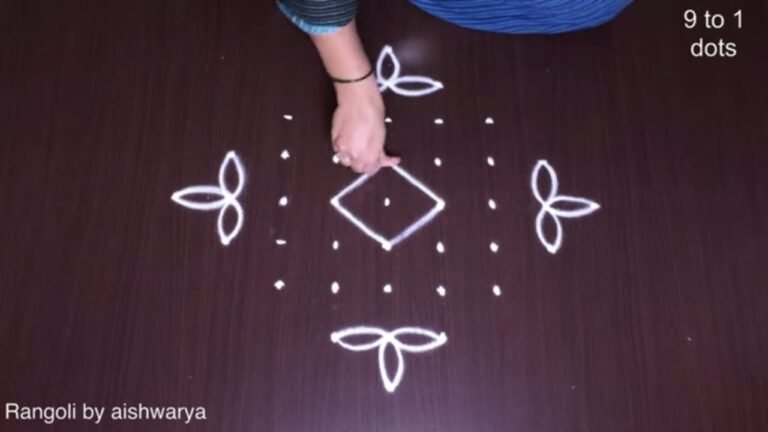
- Mark the 11-to-1 dot grid — a diamond of pulli, the middle row holding 11 dots and tapering to a single dot at the top and bottom points.
- In the very centre draw a small tilted square with one dot inside it.
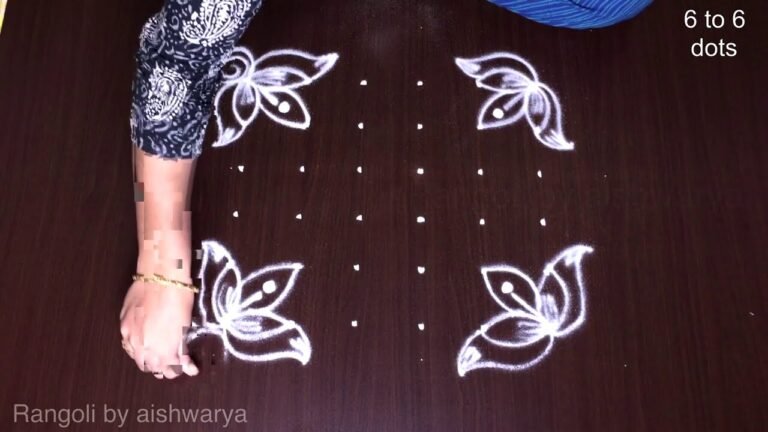
- From the four corners of that square extend four pointed, leaf-like spearheads outward on the diagonals so together they read as a four-point star.
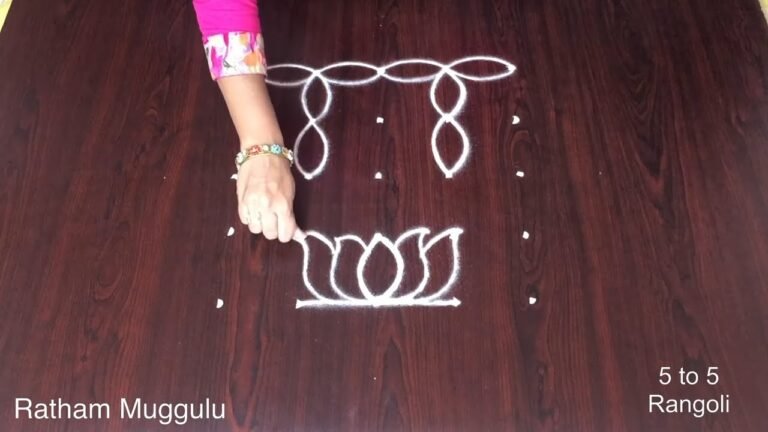
- At the top and bottom points of the diamond draw a rounded rose-like flower, capping each with a small arc/crown of tiny dots.
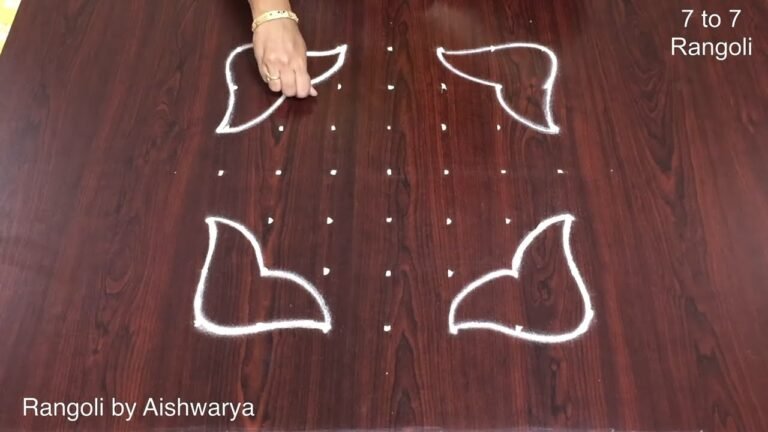
- At the left and right points draw matching two-lobed butterfly/bow motifs, each finished with rolled spiral curls and a fringe of small dots.
- Join all the motifs with the curved diamond outline that frames the whole design.
- Shade the flower petals and leaf spearheads solid, leaving the outlines and dot-rows crisp white.
What You Will Learn
- Simple Rangoli Designs
- Rangoli
- Muggulu
- Rangoli Designs
- Rangoli Kolam
- Kolam
Frequently Asked Questions
How do I draw this rangoli?
Set down the dot grid in pencil or chalk, then follow the loops one petal at a time. If a curve goes off, wipe it and retry — kolam is forgiving.
Is this suitable for beginners?
Yes, and it is one we recommend to first-timers. The small grid keeps the design manageable while still teaching the core technique.
What materials do I need?
Rice flour, coloured rangoli powders, and a clean stretch of floor or paper. Some draw with chalk first to set the grid before powdering over it.
How long does it take?
The video runs 8 min 10 sec. In practice, most learners take between 10 and 20 minutes — a little longer the first time, faster as the pattern becomes familiar.
Practice this design a few times and you will find your own variations emerging. That is half the joy of kolam — every artist leaves a fingerprint on the pattern.
Leave a Reply