Dipawali Muggulu is the kind of design that looks intricate but is genuinely beginner-friendly once you follow the dot grid.
This tutorial will show you how to draw beautiful dipawali muggulu patterns using materials such as dry rice flour, colored sand or flower petals Rangoli designs by Aishwarya. Simple rangoli designs with dots Kolam pattern is created on the floor in living rooms or courtyards. Draw the Lines step by step as it is shown in this video and will be awesome rangoli de. Chapters: 0:00 Intro
0:05 Dipawali Muggulu 3:31 Design Rangoli 6:05 4 dots Kolam
😲 The artistic rangoli design for Diwali pattern here is one of the amazing latest simple kolam designs. Simple Rangoli Designs Aishwarya and easy rangoli designs by Aishwarya with dots for beginners and intermediate. 1. Design Rangoli
2. Rangoli Sand Art 3. Muggulu 4. Rangoli
5. Kolam 6. Diwali Rangoli 7. Rangoli Kolam
8. Rangoli Designs for Diwali 9. Sankranthi Muggulu 10. Rangoli Art
Tip: Practice on paper first if you are new to dot kolam. The grid is the same; only the surface changes.
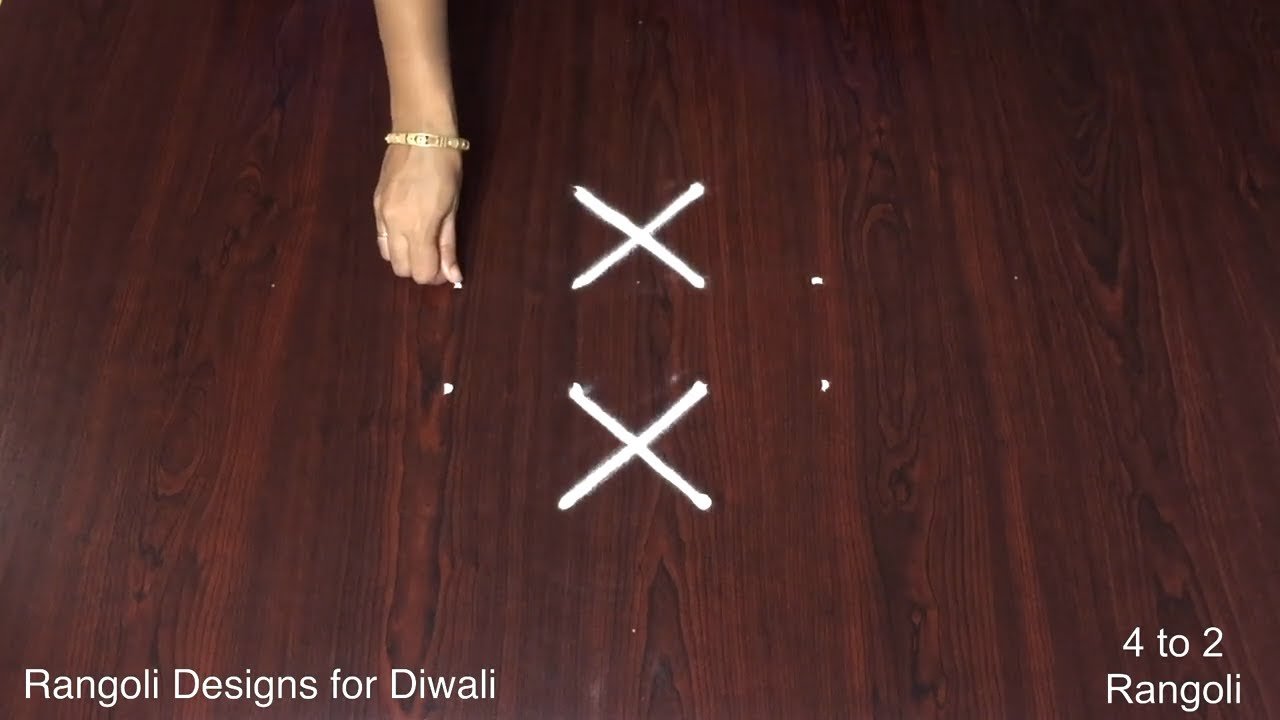
This design belongs to the broader tradition of rangoli and kolam art practised across South India. Explore more in our 4 to 2 dots Rangoli Designs collection.
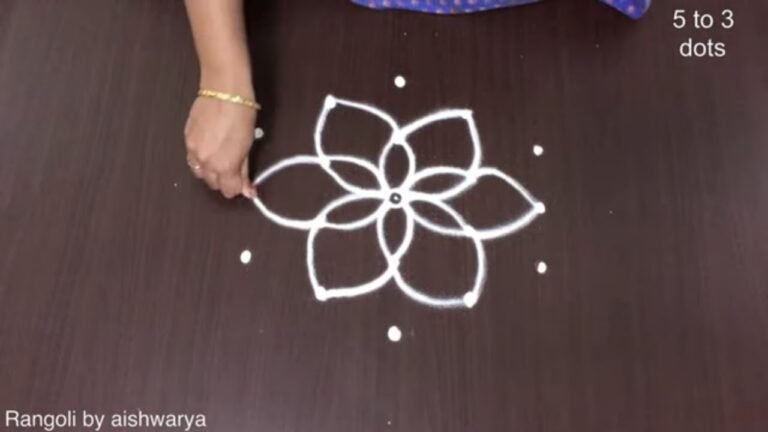
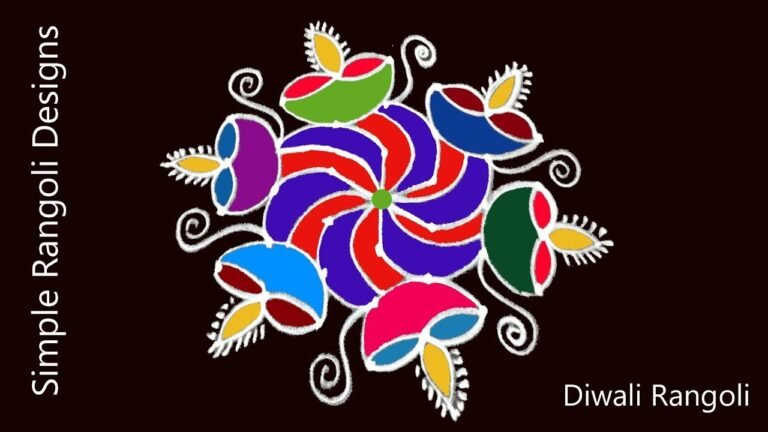
Dipawali muggulu, typically created for the festival of lights, showcases intricate patterns that symbolize joy and prosperity. This design, made with 4 to 2 dots, allows beginners to explore the beauty of traditional art forms. The use of vibrant colors, often derived from natural materials like flower petals or colored sand, brings life to the muggulu, making it a perfect addition to your home during Diwali. For inspiration, you might enjoy exploring the 5 to 5 Peacock Rangoli for Diwali design as well.
The art of creating dipawali muggulu is not just about aesthetics; it also fosters creativity and patience. As you practice drawing these patterns, you can connect with your cultural roots and the significance of the festival. Each stroke and dot reflects the essence of Diwali, welcoming light and positivity into your space. You may also want to try the Big Creative Deepam Rangoli for a stunning visual impact. For further reading on this beautiful tradition, check out the Wikipedia page on Rangoli.
Dipawali Muggulu — Step by Step Guide
Read through the steps before you begin so the sequence feels familiar when you start drawing.
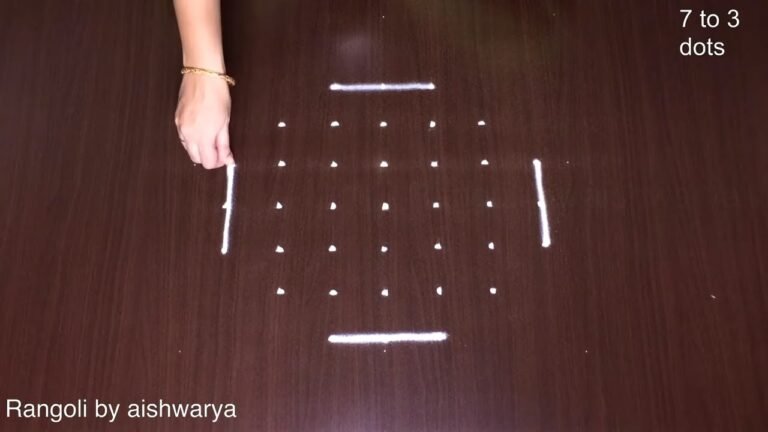
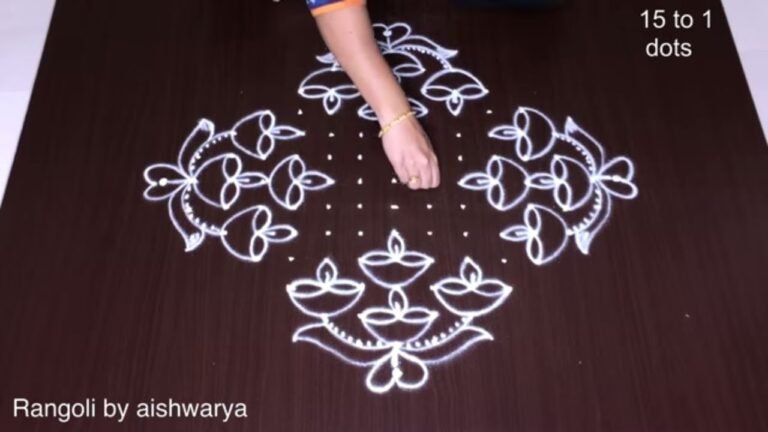
- Clear a flat surface and set down your dot grid using rice flour or chalk.
- Confirm the dot spacing is even — uneven dots are the biggest cause of wobbly curves.
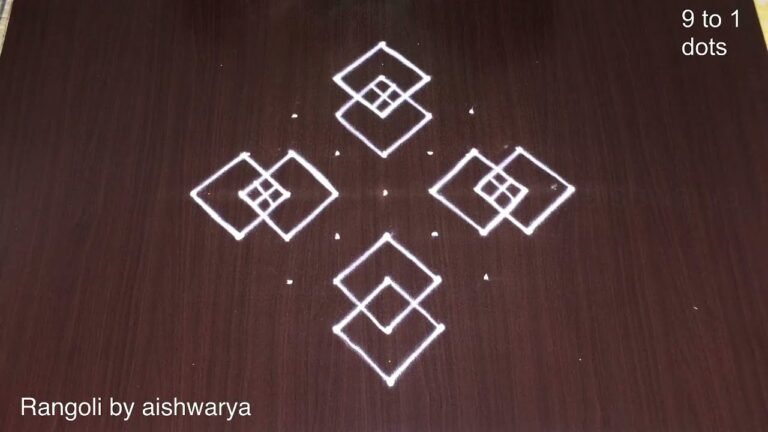
- Begin tracing from the centre outward, following the curves shown in the video above.
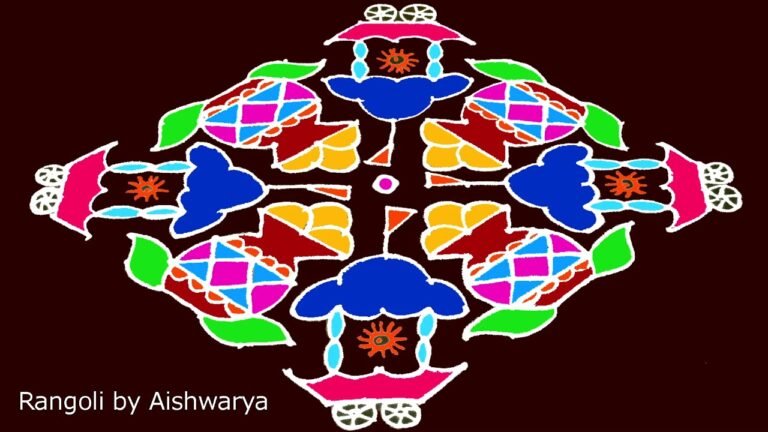
- Fill the petals and sections with your chosen colours, working one area at a time.
- Finish the edges with a fine line for a sharp, photograph-ready result.
What You Will Learn
- Simple Rangoli Designs
- Rangoli
- Muggulu
- Rangoli Designs
- Rangoli Kolam
- Kolam
Frequently Asked Questions
How do I draw this rangoli?
The grid comes first. Use a soft chalk to dot the surface, count twice to confirm the spacing, then start connecting them following the video. Work from the centre outward.
Is this suitable for beginners?
Yes, and it is one we recommend to first-timers. The small grid keeps the design manageable while still teaching the core technique.
What materials do I need?
Just three things: powder (white plus any colours you want), a flat dry surface, and a few minutes of focus. A small bowl per colour helps keep things tidy.
How long does it take?
The video clocks in at 9 min 37 sec. Allow about quarter of an hour to draw the design at a comfortable pace.
There is real pleasure in finishing a kolam at your own doorstep — even more so when the pattern is one you have practised before. Make this one of those.
Leave a Reply