Easy Pulli Kolam For has become a favourite among learners on our channel — and once you try it, you will see why.
Easy Pulli Kolam for Beginners 🌷 Muggulu for Sunday 🌷 Simple 3 3 dots Rangoli Thank you so much for watching Channel
Chapters: 0:00 Intro 0:05 Easy Pulli Kolam for Beginners
3:24 Muggulu for Sunday My Rangoli Channel Contains : Rangoli Designs
Sankranthi Muggulu Diwali Rangoli Ratham Muggulu
Kolam Designs Muggulu Designs Chukkala Muggulu
Easy Rangoli Simple Rangoli Easy Rangoli Designs
Tip: Use chalk to lightly mark your dot grid first — it wipes away cleanly once your rangoli is finished.
This design belongs to the broader tradition of rangoli and kolam art practised across South India. Explore more in our 3 to 3 dots Rangoli Designs collection.
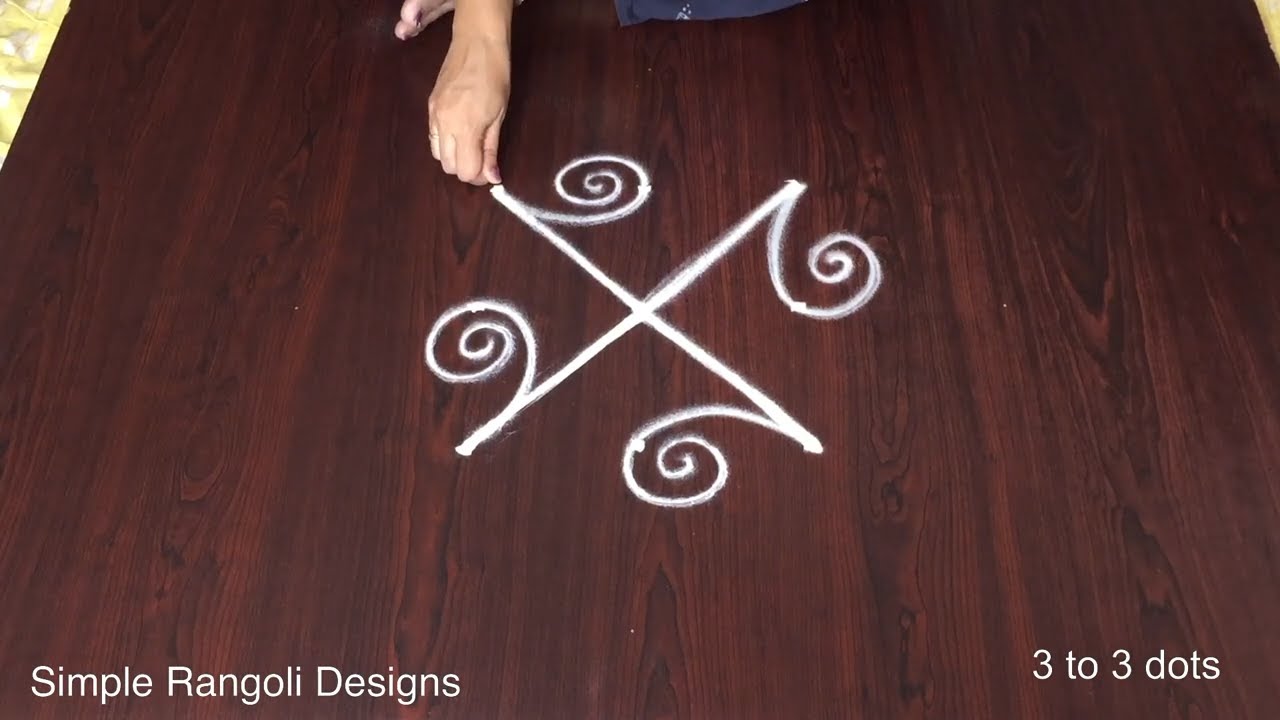
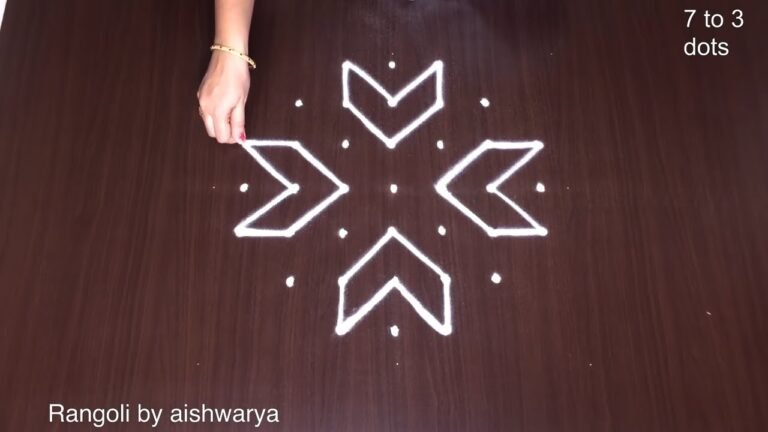
The easy pulli kolam for beginners features a delightful design created using a simple 3×3 dot grid, making it accessible for those new to the art of rangoli. This style is perfect for festive occasions and daily celebrations alike, often gracing the entrance of homes as a warm welcome. The rhythmic patterns formed by connecting the dots can evoke a sense of harmony and joy, making it a lovely choice for Sunday muggulu. For further inspiration, you might explore Occasional Kolam Designs that also embrace simplicity.
This kolam design is not only easy to create but also allows for personal creativity with colors and embellishments. Beginners can enjoy practicing the flowing lines and curves that characterize traditional kolams. As you master this design, consider trying your hand at other beginner-friendly designs like the Birds Kolam Design Simple Steps to expand your skills. To learn more about the cultural significance and variations of rangoli, visit this Wikipedia page.
Easy Pulli Kolam — Step by Step Guide
Use the steps below as a reference card while the video plays. Most learners finish on the second attempt.
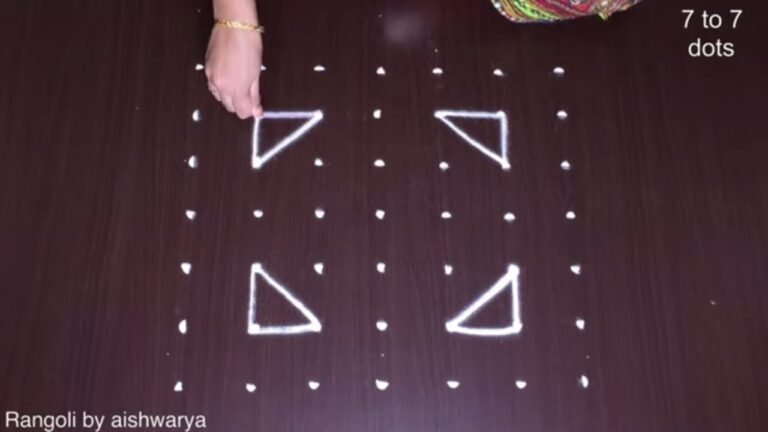
- Clear a flat surface and set down your dot grid using rice flour or chalk.
- Confirm the dot spacing is even — uneven dots are the biggest cause of wobbly curves.
- Begin tracing from the centre outward, following the curves shown in the video above.
- Fill the petals and sections with your chosen colours, working one area at a time.
- Finish the edges with a fine line for a sharp, photograph-ready result.
What You Will Learn
- Simple Rangoli Designs
- Rangoli
- Muggulu
- Rangoli Designs
- Rangoli Kolam
- Kolam
Frequently Asked Questions
How do I draw this rangoli?
Begin with the dot grid — this is the skeleton of the design. With rice flour or chalk, place each dot at equal intervals. Then trace the curves slowly, one section at a time.
Is this suitable for beginners?
Beginner-friendly is exactly the right description. The video walks through every line clearly and you can match the pace.
What materials do I need?
White rice flour for the outline, coloured powders for the fill, and a clean dry floor. That is the essentials list — you can add a stencil if you prefer.
How long does it take?
About 7 min 16 sec on screen, perhaps 15 minutes for a relaxed first attempt. By the second try most people are noticeably quicker.
Half the skill of kolam is learning to slow down. Put on some music, give yourself the time, and let the curves come naturally.

Leave a Reply