Looking to learn Kolam Step By Step? This step-by-step guide walks you through every line, dot, and curve.
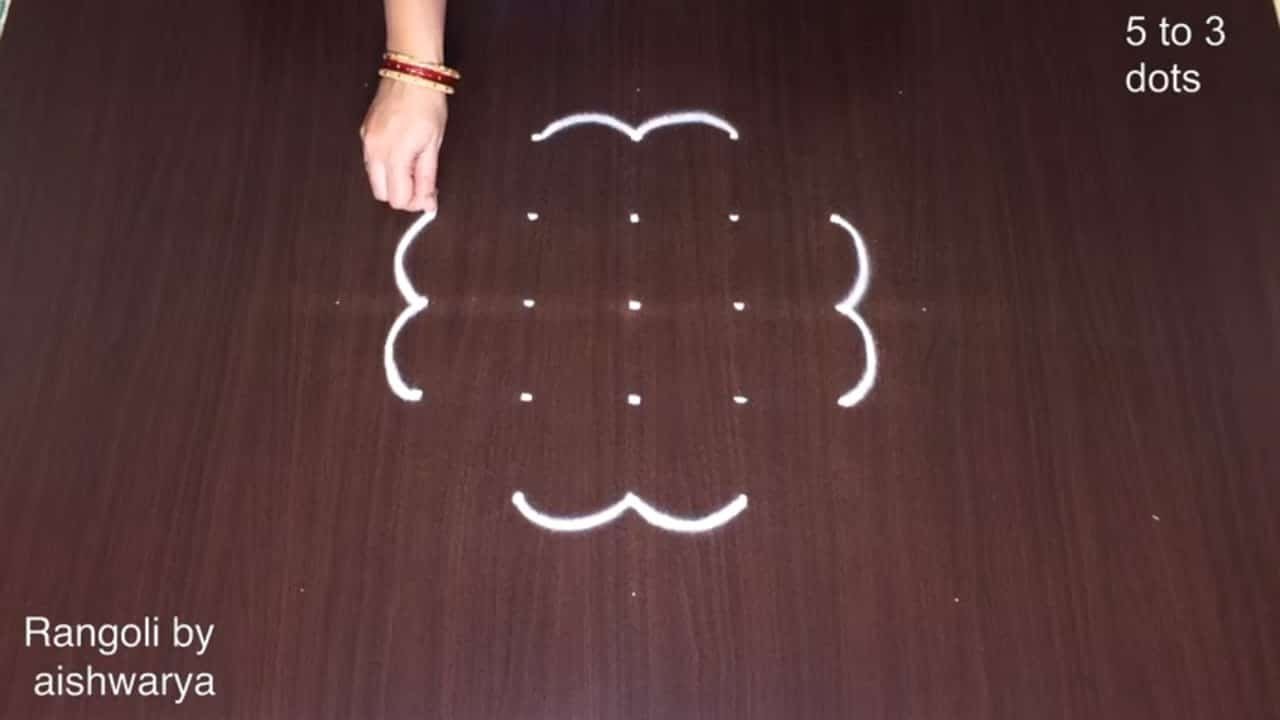
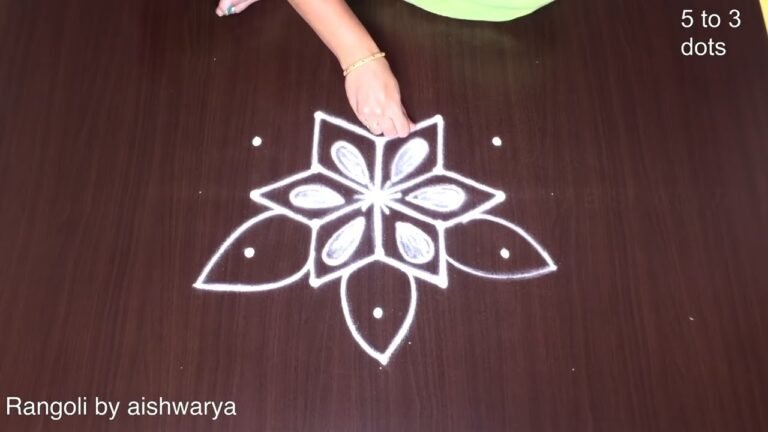
Kolam Step by Step 5 Into 3 Simple Lines Muggulu | Daily Rangoli Routine Designs New Model. This tutorial will show you how to draw Beautiful Indian traditional art Diwali Rangoli patterns using materials such as dry rice flour, colored sand or flower petals Rangoli designs by Aishwarya. Simple rangoli Kutti Kolam pattern is created on the floor in living rooms or courtyards. Draw the Lines step by step as it is shown in this video and will be awesome Rangoli Design. 😲 The Diwali rangoli pattern here is one of the amazing latest 15 august rangoli simple kolam designs. Simple Rangoli Designs and 15 august rangoli design by Aishwarya with dots for beginners and intermediate.
1. Diwali Rangoli 2. Pongal kolams 3. Pongal rangoli designs
4. Sankranthi designs 5. Easy rangoli for sankranthi 6. Pongal designs
7. Latest rangoli for sankranthi 8. Marzaghi kolams 9. velli special kolam
10. Easy rangoli designs 11. velli kizlamai kolam 12. रंगोली रंगोली
13. aadi madha kolam 14. Karthika Masam Chukkala Muggulu 15. rangoli for independence day
Tip: Keep your powder bowl close to your dominant hand. Small movements give cleaner curves.
This design belongs to the broader tradition of rangoli and kolam art practised across South India. Explore more in our 5 to 3 dots Rangoli Designs collection.
The 5 into 3 dot kolam is a delightful design that captures the essence of simplicity and elegance, perfect for beginners looking to enhance their skills in traditional Indian art. This pattern is commonly drawn during festivals like Diwali, where vibrant colors and intricate designs bring joy to homes. Following a step-by-step guide, you can create this beautiful Karthika Masam Deepala Muggulu that breathes life into any space, making it an excellent practice for honing your kolam skills.
Using dry rice flour or colored sand, the 5 into 3 kolam can be adapted for various occasions, including Pongal and Sankranthi, showcasing how versatile this art form can be. The design starts with basic lines, and with patience, you can progress to more complex patterns, making it a rewarding experience. For more inspiration, you can explore Daily Kolams Latest Rangoli Designs or dive deeper into the world of rangoli with a comprehensive overview on Wikipedia.
About this design: Kolam Step By Step is a beginner-friendly pattern that comes together in just a few minutes. Once you have practised the kolam step by step dot grid, you can scale it up for festival mornings or scale it down for a daily doorstep. Many learners on our channel make this kolam step by step their go-to design once they get the rhythm of the curves.
Kolam Step By Step — Step by Step Guide
Pace yourself through the steps — kolam rewards patience more than speed.
- Clear a flat surface and set down your dot grid using rice flour or chalk.
- Confirm the dot spacing is even — uneven dots are the biggest cause of wobbly curves.
- Begin tracing from the centre outward, following the curves shown in the video above.
- Fill the petals and sections with your chosen colours, working one area at a time.
- Finish the edges with a fine line for a sharp, photograph-ready result.
What You Will Learn
- Simple Rangoli Designs
- Rangoli
- Muggulu
- Rangoli Designs
- Rangoli Kolam
- Kolam
Frequently Asked Questions
How do I draw this rangoli?
Start by marking an even dot grid on a flat, clean surface. Once the grid is in place, connect the dots following the curves shown in the video. Even spacing between dots is the single biggest factor for a clean finish.
Is this suitable for beginners?
Beginner-friendly is exactly the right description. The video walks through every line clearly and you can match the pace.
What materials do I need?
Rice flour, coloured rangoli powders, and a clean stretch of floor or paper. Some draw with chalk first to set the grid before powdering over it.
How long does it take?
You will see a 8 min 19 sec walkthrough above. Drawing it yourself is usually a 12–18 minute affair, slightly slower the first time.
A reminder that beautiful art does not need expensive materials — just a steady hand, a clean surface, and a few pinches of rice flour.


Leave a Reply