Drawing New Model Kutti Kolam is a relaxing, almost meditative practice. The dots guide your hand and the design unfolds naturally.
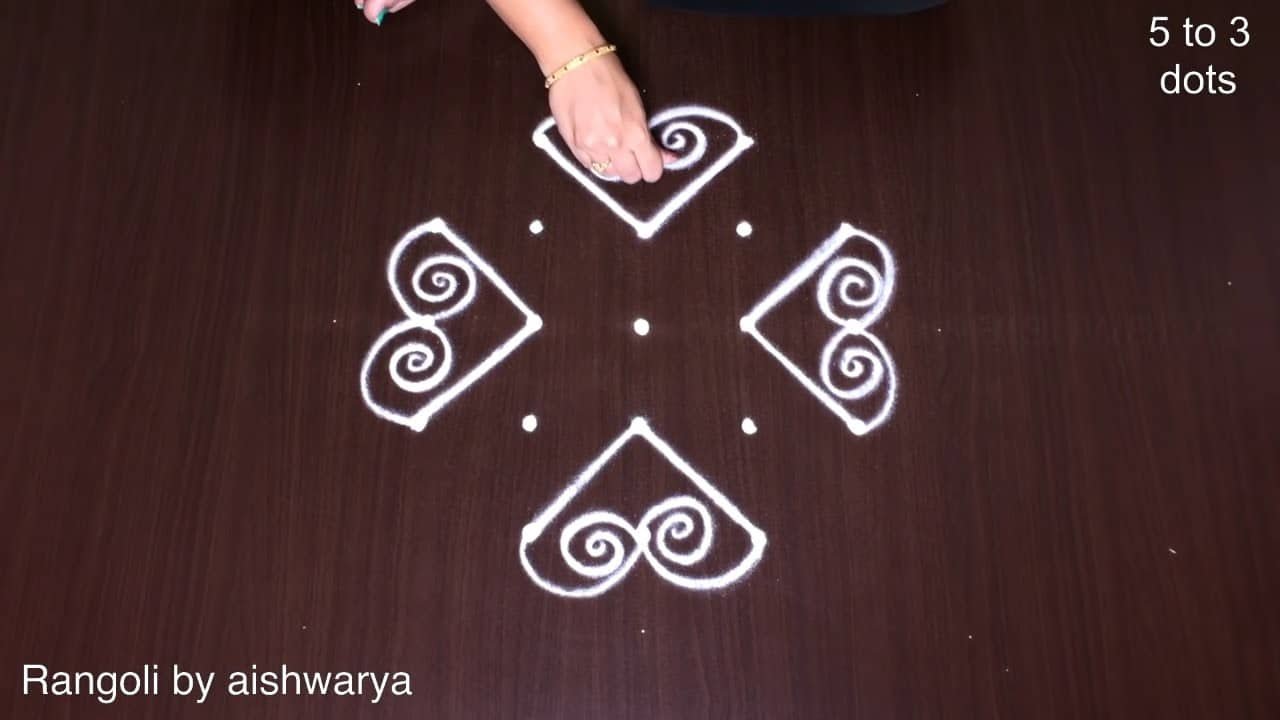
New Model Kutti Kolam 5 by 3 Chukkala | Muggulu With Small Dots Hand Rangoli Design | Rangoli Thank you so much for watching Channel
My Rangoli Channel Contains : Rangoli Designs Sankranthi Muggulu
Diwali Rangoli Ratham Muggulu Kolam Designs
Muggulu Designs Chukkala Muggulu Easy Rangoli
Simple Rangoli Easy Rangoli Designs Dhanurmasam Muggulu
Melikala Muggulu Geethala Muggulu Sivarathri Muggulu
Tip: Practice on paper first if you are new to dot kolam. The grid is the same; only the surface changes.
This design belongs to the broader tradition of rangoli and kolam art practised across South India. Explore more in our 5 to 3 dots Rangoli Designs collection.
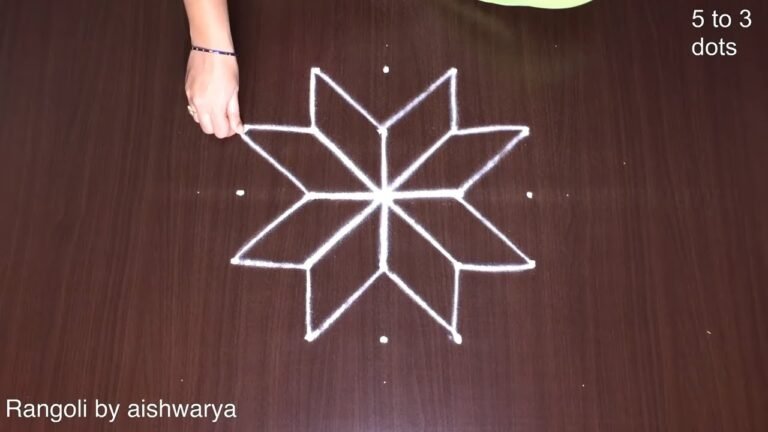
The New Model Kutti Kolam, designed with a 5 by 3 dot grid, is perfect for beginners and adds a touch of elegance to any space. This design is especially popular during festivals like Pongal, where vibrant and intricate patterns symbolize the joy of the harvest. The simplicity of the small dots allows for creativity and personal expression, making it a delightful addition to daily rangoli practice. For those looking to explore more about festive designs, check out the Pongal Rangoli Designs for inspiration.
This kolam style, characterized by its neat arrangement and flowing lines, showcases traditional artistry while being easy to replicate. It serves as a wonderful introduction to the world of rangoli, where each pattern tells a story and adds beauty to the home. If you’re intrigued by more complex designs, the Amazing Big Peacock Muggulu offers a stunning contrast to this simpler style. For further understanding of this fascinating art form, visit this page on rangoli.
New Model Kutti Kolam — Step by Step Guide
Follow the steps below to recreate this design at home. Pause the video whenever you need — there is no hurry.
- Mark the 5-to-3 dot grid (rows of 5-4-3 and back), a small compact 'kutti' diamond field.
- In the centre draw a square and fill it with a fine diagonal net (a hatched diamond) as the core.
- Around the core draw four pairs of spiral curls (S-shaped swirls) so they spin outward like a pinwheel.
- At the top, bottom, left and right draw four coiled rose flowers – a tight spiral centre wrapped with a few rounded petals each.
- In the four diagonal gaps add small clusters of pointed leaves and buds.
- Join everything with clean curved lines and keep the little kolam in white.
What You Will Learn
- Simple Rangoli Designs
- Rangoli
- Muggulu
- Rangoli Designs
- Rangoli Kolam
- Kolam
Frequently Asked Questions
How do I draw this rangoli?
The grid comes first. Use a soft chalk to dot the surface, count twice to confirm the spacing, then start connecting them following the video. Work from the centre outward.
Is this suitable for beginners?
Yes — this design is shaped specifically with newcomers in mind. The dot grid is small enough to manage, and the curves are gentle. Most learners get it right by the second try.
What materials do I need?
Powder (white for outlines, colours for filling), a flat surface, and a dot stencil if you want absolute precision. Beyond that, just your hand and a steady pace.
How long does it take?
Plan for roughly 8 min 50 sec to watch and 15 minutes to draw. The second attempt is always cleaner than the first — that is the nature of dot kolam.
After you draw this, take a picture before the day blows it away. Kolam is impermanent by design, but a photo lets you revisit the version you drew.


Leave a Reply