Latest Kolangal Designs 11 combines tradition with simplicity, making it one of the most rewarding designs to practice at home.

Latest Kolangal Designs 11 Se 5 Rangoli | Muggulu for Beginners Pulli big Kolams Thank you so much for watching Channel
My Rangoli Channel Contains : Rangoli Designs Sankranthi Muggulu
Diwali Rangoli Ratham Muggulu Kolam Designs
Muggulu Designs Chukkala Muggulu Easy Rangoli
Simple Rangoli Easy Rangoli Designs Dhanurmasam Muggulu
Melikala Muggulu Geethala Muggulu Sivarathri Muggulu
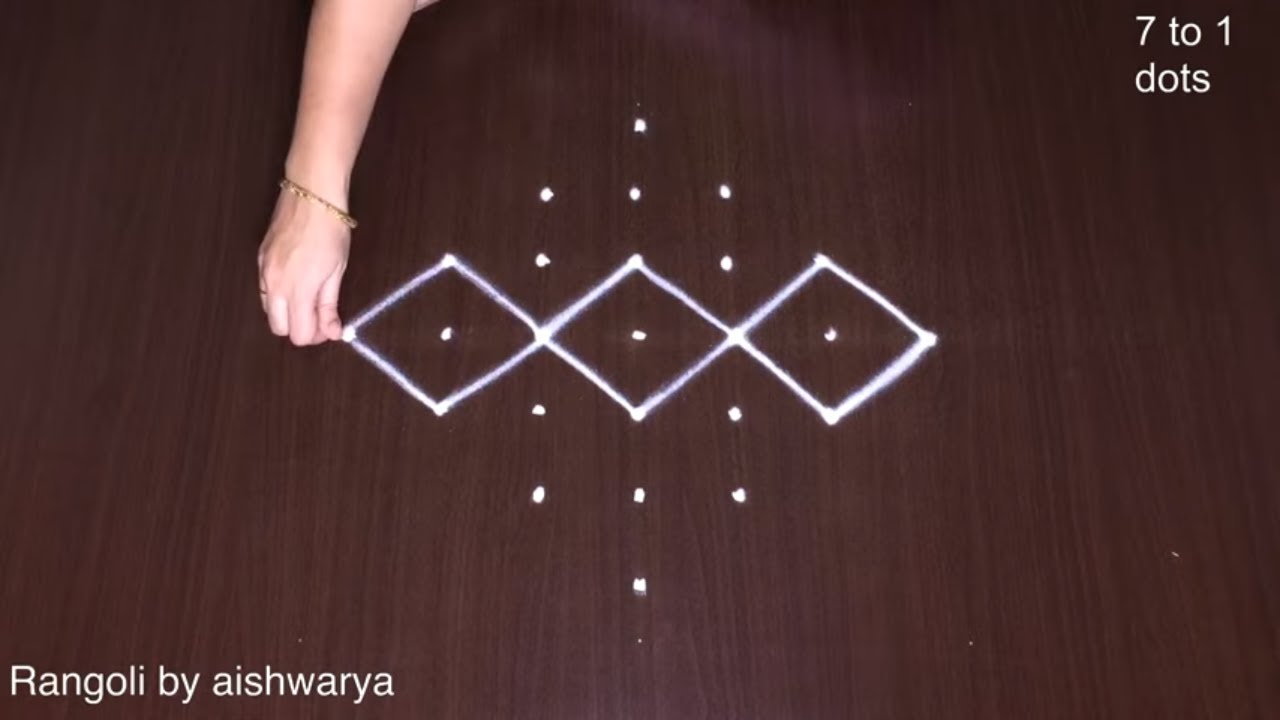
Tip: Work from the centre outward. It keeps the symmetry honest and prevents the design from drifting off-balance.
The 11 to 5 dots kolangal design is a wonderful choice for beginners looking to explore traditional art forms. This design is characterized by its symmetrical patterns and intricate detailing, making it both visually appealing and a great way to enhance your home during festivals. It can serve as an excellent backdrop for celebrations like Pongal and Diwali, where vibrant colors and patterns bring joy and good fortune. For those interested in expanding their skills, check out this Butterfly Rangoli for Festival for more creative inspiration.
Creating this kolangal involves careful placement of each dot, allowing for a range of designs from simple to elaborate. The beauty of this style lies in its adaptability; you can adjust the colors and motifs according to the specific occasion. Additionally, beginners can benefit from exploring related designs such as the 7 to 4 Diya Kolam for Pooja Room at Home, which showcases a similar technique. For a broader understanding of this art form, you might want to read more about it on Wikipedia.
About this design: Latest Kolangal Designs 11 is a beginner-friendly pattern that comes together in just a few minutes. Once you have practised the latest kolangal designs 11 dot grid, you can scale it up for festival mornings or scale it down for a daily doorstep. Many learners on our channel make this latest kolangal designs 11 their go-to design once they get the rhythm of the curves.
Latest Kolangal Designs 11 — Step by Step Guide
The video above shows the full sequence; the steps below summarise each stage so you can glance back as you draw.
- Clear a flat surface and set down your dot grid using rice flour or chalk.
- Confirm the dot spacing is even — uneven dots are the biggest cause of wobbly curves.
- Begin tracing from the centre outward, following the curves shown in the video above.
- Fill the petals and sections with your chosen colours, working one area at a time.
- Finish the edges with a fine line for a sharp, photograph-ready result.
What You Will Learn
- Simple Rangoli Designs
- Rangoli
- Muggulu
- Rangoli Designs
- Rangoli Kolam
- Kolam
Frequently Asked Questions
How do I draw this rangoli?
Begin with the dot grid — this is the skeleton of the design. With rice flour or chalk, place each dot at equal intervals. Then trace the curves slowly, one section at a time.
Is this suitable for beginners?
Absolutely. You can pause and rewind the video at every step. The pattern is straightforward once you have the grid down.
What materials do I need?
Rice flour, coloured rangoli powders, and a clean stretch of floor or paper. Some draw with chalk first to set the grid before powdering over it.
How long does it take?
The video clocks in at 9 min 26 sec. Allow about quarter of an hour to draw the design at a comfortable pace.
Whenever you finish your version, share a photo with us. Seeing your work is the best part of running this channel.


Leave a Reply