This 13 x 7 rangoli tutorial walks you through every step from the dot grid to the final pattern.
For another beginner-friendly variation, try Diwali Festival Muggulu Rangoli.
Learn more about the tradition of Rangoli on Wikipedia.
Whether you are decorating for a festival or your daily morning ritual, Flowers 13 X 7 is an excellent design to keep handy.
Looking for a colourful flower kolam for Sankranti celebration? This 13 by 7 dots rangoli is festive, elegant, and perfect for special decoration. In this video, I guide you step by step to draw a 13×7 decreasing dot grid flower muggu specially designed for Sankranti. The structured layout creates strong symmetry, while the layered floral curves give the kolam a rich and traditional festival appearance.
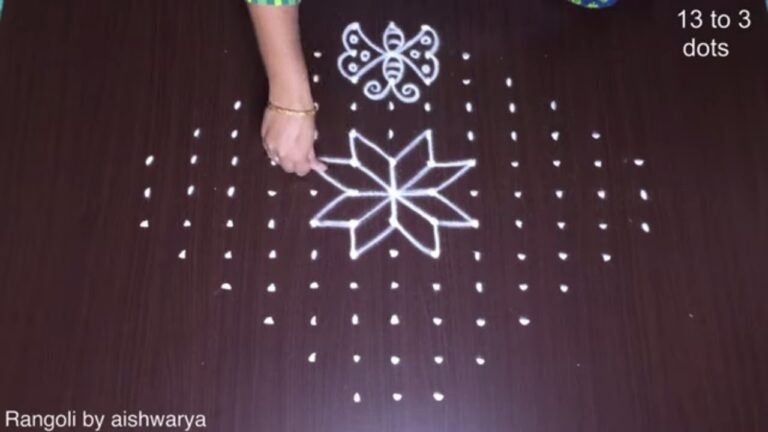
We begin by placing a neat 13 by 7 straight dot structure, carefully aligned to maintain balance and proportion. Then, the outer flower framework is formed by smoothly connecting the dots into petal shapes. Inner detailing enhances the center and adds depth to the design. Once the structure is complete, colours are added thoughtfully to give the kolam a vibrant and celebratory finish. How to construct a proper 13–7 dot grid How to create symmetrical layered flower patterns
How to maintain balance in medium-large kolams Colour placement techniques for a bright Sankranti look This colourful flower muggu is ideal for Sankranti entrances, verandas, and festive gathering spaces. The structured grid ensures a clean and impressive result suitable for festival days.
Watch till the end to see the full transformation from simple dots to a complete floral kolam — the final reveal highlights a beautifully balanced and vibrant Sankranti design. If you enjoy structured dot kolams, explore more 13 by 7 dots rangoli, Sankranti special muggulu, and traditional colourful festival patterns on the channel.
Tip: Keep your powder bowl close to your dominant hand. Small movements give cleaner curves.
About this design: 13 X 7 Rangoli is a beginner-friendly pattern that comes together in just a few minutes. Once you have practised the 13 x 7 rangoli dot grid, you can scale it up for festival mornings or scale it down for a daily doorstep. Many learners on our channel make this 13 x 7 rangoli their go-to design once they get the rhythm of the curves.
13 X 7 Rangoli — Flowers 13 X 7 — Step by Step Guide
Follow the steps below to recreate this design at home. Pause the video whenever you need — there is no hurry.
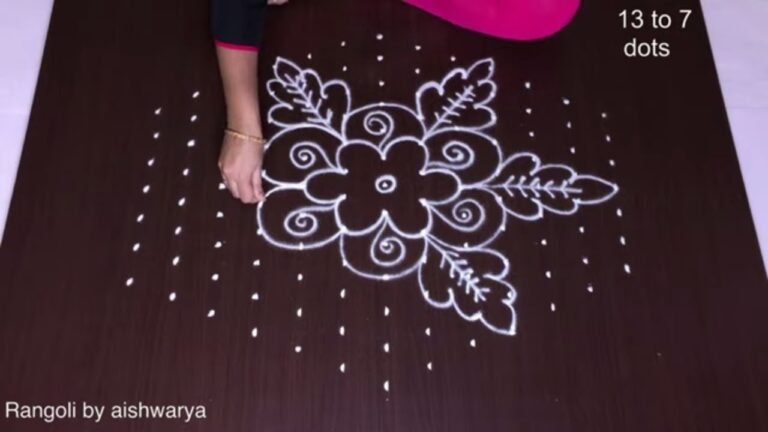
- Mark the 13-to-7 dot grid (thirteen dots tapering to seven).
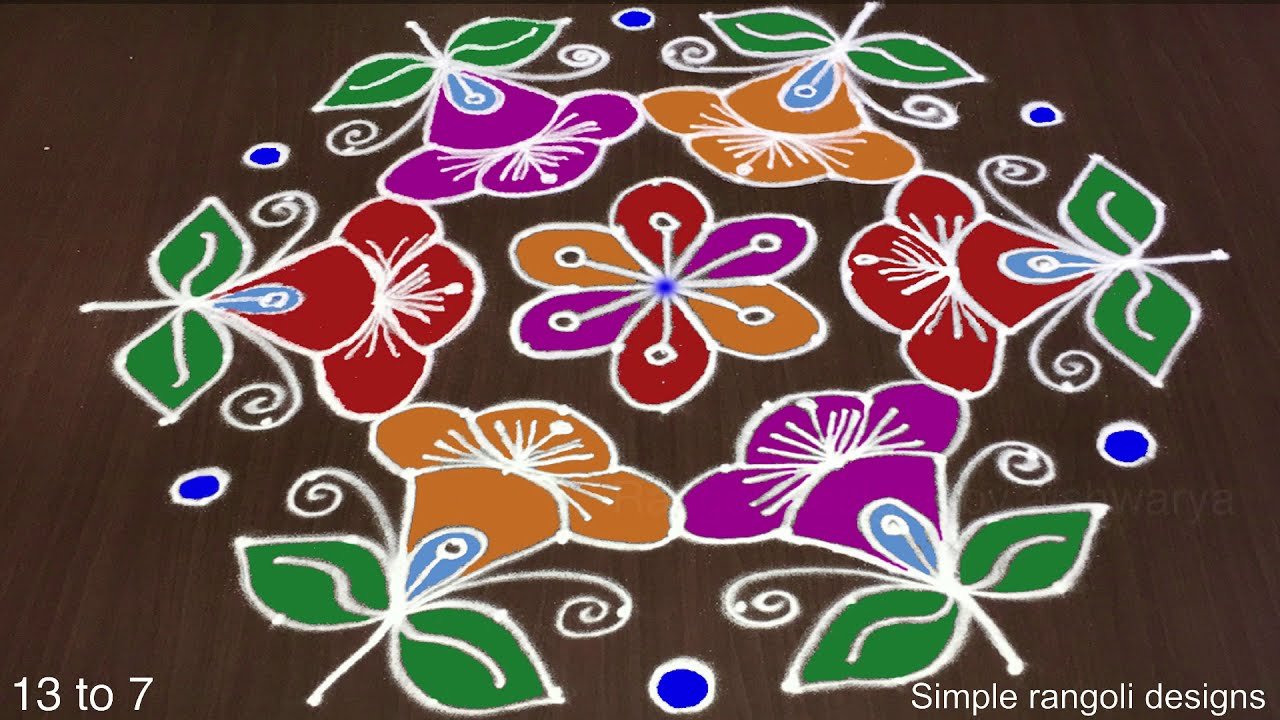
- Draw a five-petal hibiscus flower in the center with a protruding stamen.
- Around it, draw a ring of large five-petal hibiscus flowers, each with a curved stamen and white veins on the petals.
- Add green two-lobed leaves in the gaps between the flowers.
- Add small spiral curls and a few scattered dots around the outer edge.
- Colour the flowers in alternating red, orange, and purple, the leaves green, with white petal detail and blue outer dots.
What You Will Learn
- Sankranti Flower Rangoli 13 By 7 Dots
- Colourful 13X7 Muggu Design
- 13 By 7 Dots Kolam Design
- Sankranti Special Floral Kolam
- 13 7 Chukkala Muggulu
- Decreasing Dot Grid Flower Rangoli
Frequently Asked Questions
How do I draw this rangoli?
Start by marking an even dot grid on a flat, clean surface. Once the grid is in place, connect the dots following the curves shown in the video. Even spacing between dots is the single biggest factor for a clean finish.
Is this suitable for beginners?
It is one of the more forgiving designs in our collection. Beginners often pick it as a confidence-builder before moving on to larger grids.
What materials do I need?
Just three things: powder (white plus any colours you want), a flat dry surface, and a few minutes of focus. A small bowl per colour helps keep things tidy.
How long does it take?
About 5 min 23 sec on screen, perhaps 15 minutes for a relaxed first attempt. By the second try most people are noticeably quicker.
If you draw this and would like a follow-up design at the same skill level, leave a comment on the video — we read every one and queue up requests.


Leave a Reply