Looking to learn New Diwali Rangoli Designs? This step-by-step guide walks you through every line, dot, and curve.

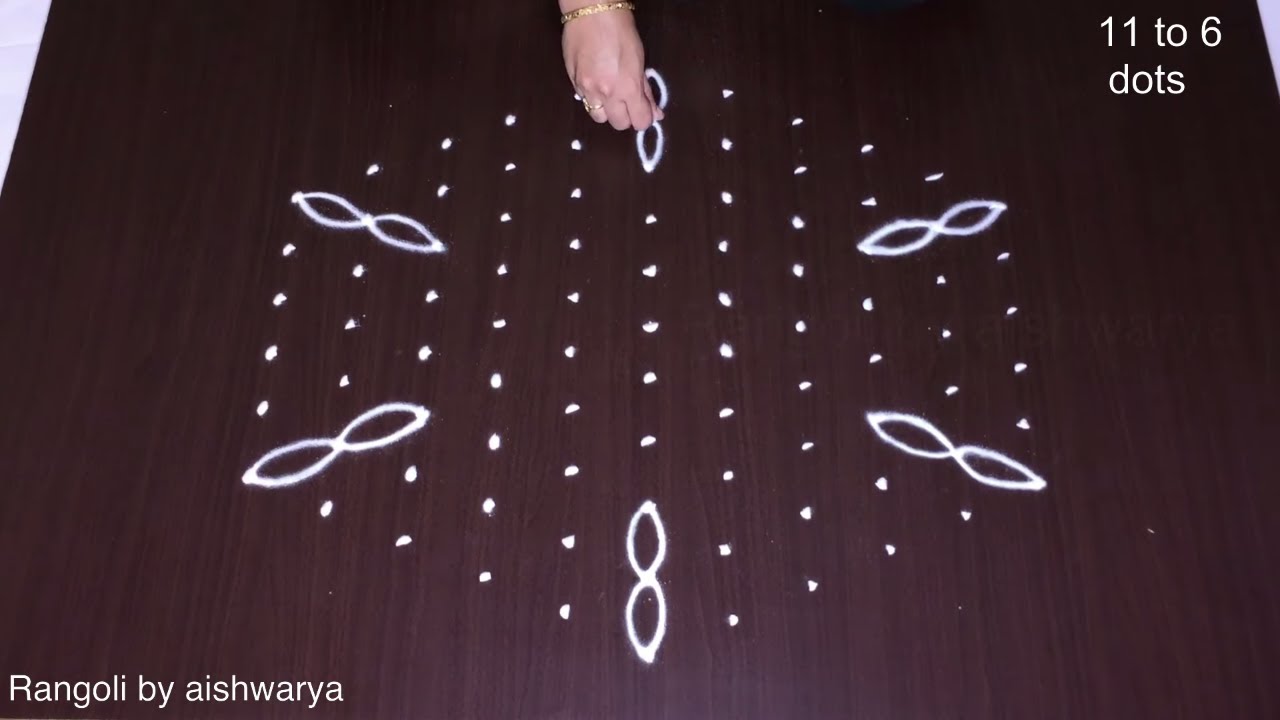
This tutorial will show you how to draw New Diwali Rangoli Designs Muggulu 7 to 1 using materials such as dry rice flour, colored sand or flower petals Rangoli designs by Aishwarya. Simple rangoli designs with dots Kolam pattern is created on the floor in living rooms or courtyards. Draw the Lines step by step as it is shown in this video and will be awesome rangoli de. Chapters: 0:00 Intro
0:05 New Diwali Rangoli Designs 2:41 Muggulu 7 to 1 6:01 Daily Kutti Kolam
😲 The artistic rangoli design for Diwali kolam here is one of the amazing latest simple muggulu designs. Simple Rangoli Designs Aishwarya and easy rangoli designs by Aishwarya with dots for beginners and intermediate. 1. New Diwali Rangoli Designs
2. Rangoli Sand Art 3. Muggulu 4. Thipkyanchi Rangoli Designs
5. Kolam 6. Diwali Rangoli 7. Rangoli Kolam
8. Rangoli Designs for Diwali 9. Sankranthi Muggulu 10. ठिपक्यांची रांगोळी
Tip: Keep your powder bowl close to your dominant hand. Small movements give cleaner curves.
The New Diwali Rangoli Designs, particularly those created with a dot count ranging from 7 to 1, embody the festive spirit with their intricate yet manageable patterns. These designs often incorporate vibrant colors and motifs that symbolize prosperity and joy, making them perfect for welcoming guests during the Diwali celebrations. The step-by-step instructions in the tutorial make it accessible for beginners, allowing anyone to create a stunning display. You might also enjoy exploring a Simple Rose Flower Muggulu for a touch of floral elegance.
Drawing a traditional Kolam like this encourages creativity and mindfulness, especially during festive times. The use of natural materials, such as rice flour, adds an eco-friendly element to the practice. As you engage with these designs, you’ll find that they not only beautify your space but also serve as a means to connect with cultural heritage. If you’re looking for more inspiration, consider trying the Butterfly Rangoli for Festival design to add a playful touch to your festivities. For further reading on the significance of rangoli, check out this Wikipedia article.
New Diwali Rangoli Designs — Step by Step Guide
Here is how to draw it, line by line. Take your time on the corners and the symmetry will take care of itself.
- Clear a flat surface and set down your dot grid using rice flour or chalk.
- Confirm the dot spacing is even — uneven dots are the biggest cause of wobbly curves.
- Begin tracing from the centre outward, following the curves shown in the video above.
- Fill the petals and sections with your chosen colours, working one area at a time.
- Finish the edges with a fine line for a sharp, photograph-ready result.
What You Will Learn
- Simple Rangoli Designs
- Rangoli
- Muggulu
- Rangoli Designs
- Rangoli Kolam
- Kolam
Frequently Asked Questions
How do I draw this rangoli?
It looks complex but follows a simple rhythm: dots first, then loops. Mark the grid, take a breath, and trace the curves at a steady pace. The pattern emerges on its own.
Is this suitable for beginners?
Absolutely. You can pause and rewind the video at every step. The pattern is straightforward once you have the grid down.
What materials do I need?
White rice flour for the outline, coloured powders for the fill, and a clean dry floor. That is the essentials list — you can add a stencil if you prefer.
How long does it take?
The video runs 8 min 51 sec. In practice, most learners take between 10 and 20 minutes — a little longer the first time, faster as the pattern becomes familiar.
There is real pleasure in finishing a kolam at your own doorstep — even more so when the pattern is one you have practised before. Make this one of those.


Leave a Reply