Shanku Lotus Kolam Patterns has become a favourite among learners on our channel — and once you try it, you will see why.
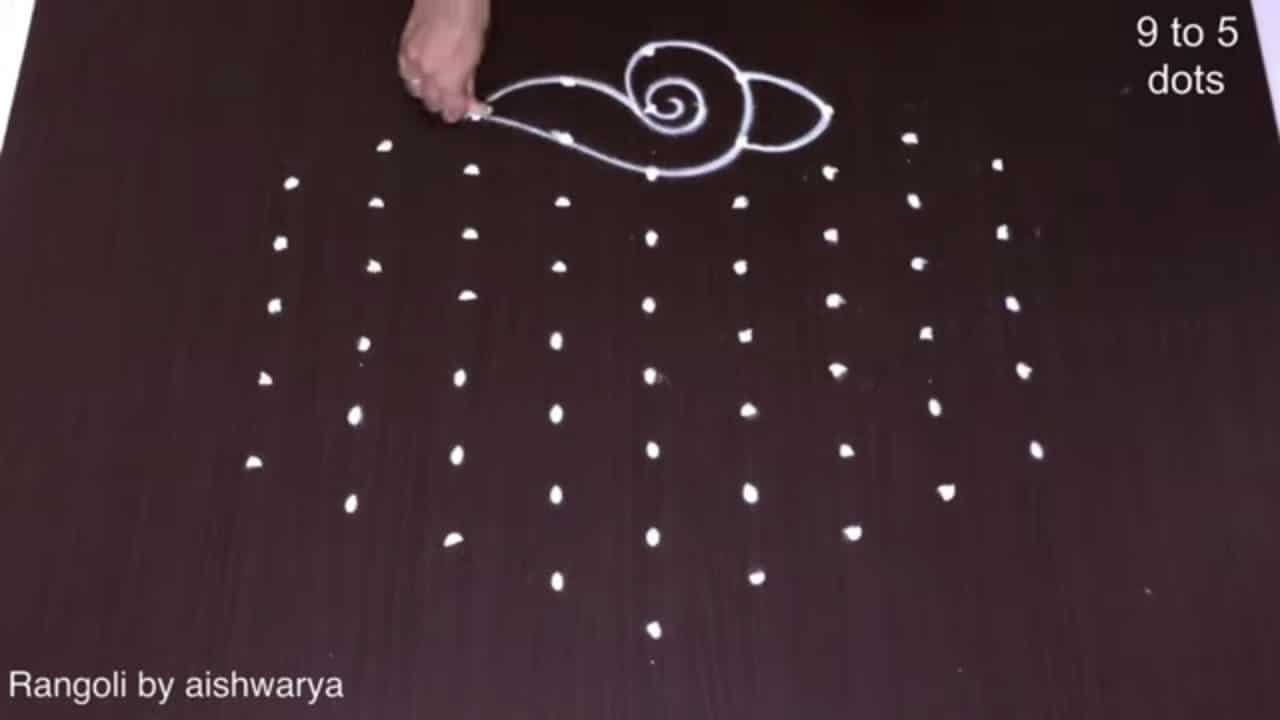
Shanku Lotus Kolam Patterns With 9 by 5 dots | Beginners Shanku Muggulu Designs Easy Rangoli. This tutorial will show you how to draw Beautiful Indian traditional art sankranthi muggulu patterns using materials such as dry rice flour, colored sand or flower petals Rangoli designs by Aishwarya. Simple rangoli designs with dots Kolam pattern is created on the floor in living rooms or courtyards. Draw the Lines step by step as it is shown in this video and will be awesome Rangoli Design. 😲 The rangoli design for diwali pattern here is one of the amazing latest simple kolam designs. Simple Rangoli Designs and easy rangoli designs by Aishwarya with dots for beginners and intermediate.
1. Diwali Rangoli 2. Pongal kolams 3. Easy rangoli designs
4. Rangoli design 5. Chukkala muggulu 6. Dot rangoli designs
7. Rangoli for diwali 8. Rangoli Simple 9. Easy rangoli designs
10. Kolam designs 11. Simple rangoli design 12. Muggulu designs
13. Muggulu designs with dots 14. Small rangoli designs 15. Muggulu chukkala muggulu
Tip: Practice on paper first if you are new to dot kolam. The grid is the same; only the surface changes.
The Shanku Lotus Kolam, characterized by its intricate 9 by 5 dot pattern, is a stunning design often created during the auspicious festival of Shivaratri. This traditional art form showcases the beauty of lotus motifs, symbolizing purity and spirituality. Beginners can find joy in crafting this kolam, as it encourages mindfulness and creativity. By using materials like rice flour or colored sand, the Shanku Lotus Kolam becomes a vibrant addition to your home, enhancing the festive atmosphere. For those looking for more designs, explore the 7 to 7 Sulabayina Rojuvari Muggulu and Simple 10-2 Dots Rangoli Design for inspiration.
This kolam design not only beautifies the living space but also serves as an engaging activity for families during Shivaratri. Drawing the Shanku Lotus Kolam can foster a sense of togetherness, as loved ones gather to create art that pays homage to tradition. The process of outlining and filling in colors within the dots can be therapeutic, allowing individuals to express their artistic flair. For a deeper understanding of this art form, you can read more about Rangoli and its significance in Indian culture.
About this design: Shanku Lotus Kolam Patterns is a beginner-friendly pattern that comes together in just a few minutes. Once you have practised the shanku lotus kolam patterns dot grid, you can scale it up for festival mornings or scale it down for a daily doorstep. Many learners on our channel make this shanku lotus kolam patterns their go-to design once they get the rhythm of the curves.
Shanku Lotus Kolam Patterns — Step by Step Guide
Here is how to draw it, line by line. Take your time on the corners and the symmetry will take care of itself.
- Clear a flat surface and set down your dot grid using rice flour or chalk.
- Confirm the dot spacing is even — uneven dots are the biggest cause of wobbly curves.
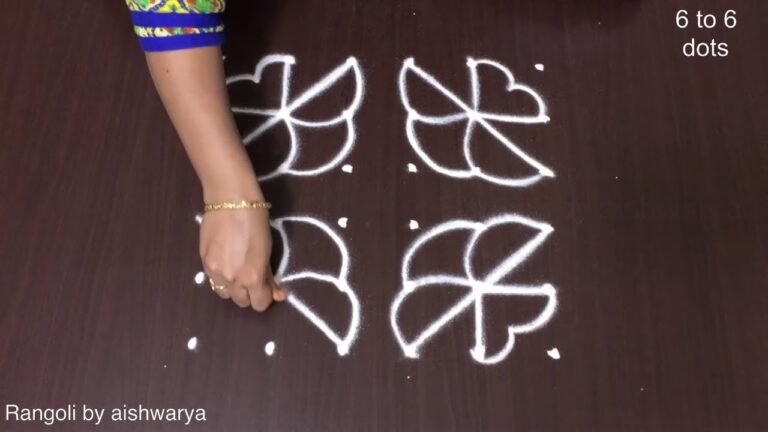
- Begin tracing from the centre outward, following the curves shown in the video above.
- Fill the petals and sections with your chosen colours, working one area at a time.
- Finish the edges with a fine line for a sharp, photograph-ready result.
What You Will Learn
- Simple Rangoli Designs
- Rangoli
- Muggulu
- Rangoli Designs
- Rangoli Kolam
- Kolam
Frequently Asked Questions
How do I draw this rangoli?
Begin with the dot grid — this is the skeleton of the design. With rice flour or chalk, place each dot at equal intervals. Then trace the curves slowly, one section at a time.
Is this suitable for beginners?
Yes — this design is shaped specifically with newcomers in mind. The dot grid is small enough to manage, and the curves are gentle. Most learners get it right by the second try.
What materials do I need?
White rice flour for the outline, coloured powders for the fill, and a clean dry floor. That is the essentials list — you can add a stencil if you prefer.
How long does it take?
Roughly 3 min 18 sec to watch end-to-end, and 10–20 minutes to draw yourself depending on grid size and how careful you are with the curves.
This is one of those designs that grows on you. The first attempt is for learning; the second is for muscle memory; the third is when it starts to feel like your own.
Leave a Reply