This simple 7×1 dots lakshmi tutorial walks you through the design step-by-step.
3-2 Dots Rangoli combines tradition with simplicity, making it one of the most rewarding designs to practice at home.

Simple Rangoli Designs presents: Simple 7×1 Dots Lakshmi Rangoli Designs for Friday Pooja Room Muggulu 🌸 In this video, learn a simple & easy rangoli step-by-step. Whether you need a daily rangoli for your home entrance or a beautiful festival rangoli, this design is perfect for beginners! Time: Just 3 minutes for instant, eye-catching beauty.
Style: Classic traditional Muggulu / Kolam vibes with a graceful touch. Perfect for: Everyday doorstep elegance, special Friday, quick festive entrances, or whenever you want your home to feel instantly blessed & welcoming. 🌟 Perfect occasions & styles:
Everyday Home Entrance Rangoli Special Friday Rangoli Pongal Kolam & Sankranti celebrations
Diwali Rangoli Lotus Rangoli Graceful Peacock Rangoli
Door Rangoli Designs Chukkala Muggulu (dot-based patterns) Easy Rangoli Designs / Rangoli with Dots
Chukkala Muggulu / Traditional Kolam Beginners Rangoli / Border Rangoli Latest Rangoli Trends
Tip: A slightly damp brush along the edges gives a sharper finish, especially for festival photographs.
This design belongs to the broader tradition of rangoli and kolam art practised across South India. Explore more in our 7 to 1 dots Rangoli Designs collection.
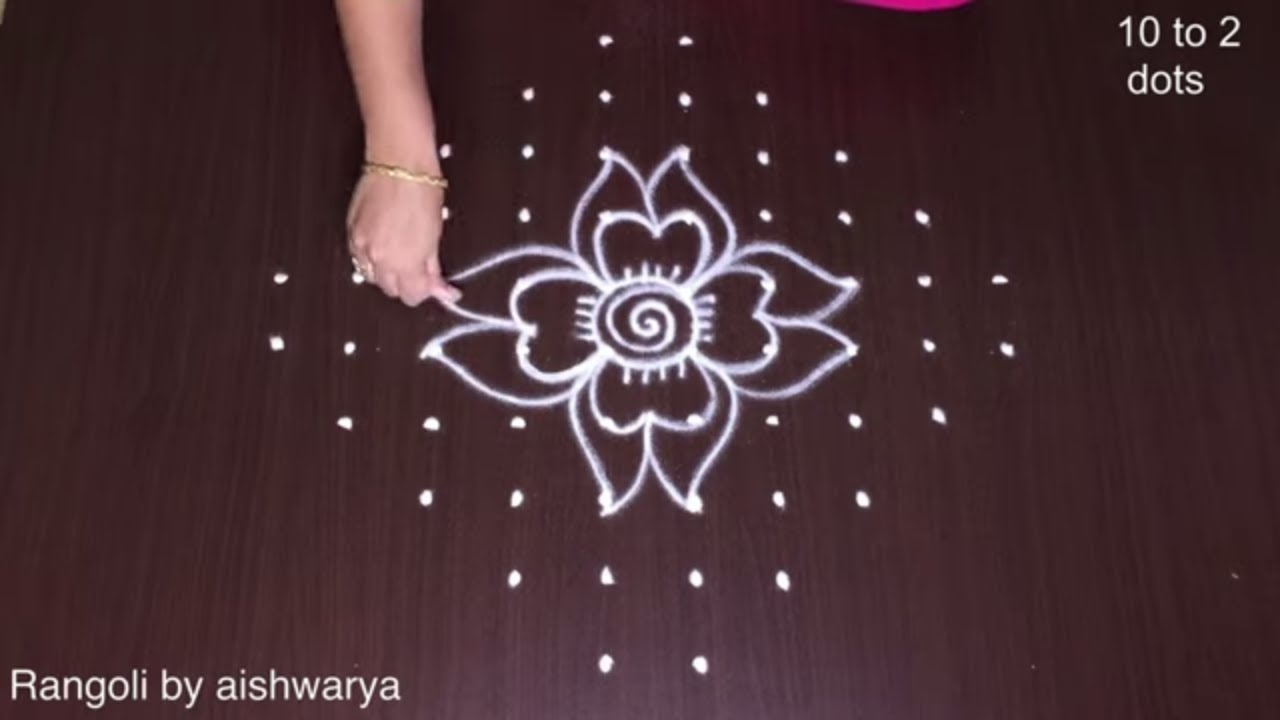
The 7×1 dots Lakshmi Rangoli design is a beautiful and simple option for Friday pooja or any day when you want to bless your home with positive energy. This design, which consists of three rows of two dots and one row of a single dot, allows for creativity while remaining easy enough for beginners to replicate. The traditional motifs often associated with Lakshmi, the goddess of wealth, make this design particularly suitable for auspicious occasions. For more festive inspiration, you might enjoy our Festival Flower Rangoli With 9×9 post.
Creating this rangoli can be a delightful practice that enhances the welcoming atmosphere of your home. It is often made using rice flour or colored powders, allowing you to personalize the colors based on your preferences or the occasion. This simplicity makes it a versatile choice for both everyday use and special celebrations. If you’re interested in exploring more designs, consider checking out our Easy Drawing Floor New Chukkala Kolam for additional ideas. To learn more about the cultural significance of rangoli, visit this page.
About this design: Simple 7X1 Dots Lakshmi is a beginner-friendly pattern that comes together in just a few minutes. Once you have practised the simple 7×1 dots lakshmi dot grid, you can scale it up for festival mornings or scale it down for a daily doorstep. Many learners on our channel make this simple 7×1 dots lakshmi their go-to design once they get the rhythm of the curves.
Simple 7X1 Dots Lakshmi — Step by Step Guide
These steps are written for absolute beginners. Watch once, draw once, then watch again — that is how the pattern locks in.
- Clear a flat surface and set down your dot grid using rice flour or chalk.
- Confirm the dot spacing is even — uneven dots are the biggest cause of wobbly curves.
- Begin tracing from the centre outward, following the curves shown in the video above.
- Fill the petals and sections with your chosen colours, working one area at a time.
- Finish the edges with a fine line for a sharp, photograph-ready result.
What You Will Learn
- 3-2 Dots Rangoli
- 3X2 Dots Kolam
- New Muggulu Designs
- Easy Flower Kolam
- Flower Rangoli With Dots
- Rangoli With Dots
Frequently Asked Questions
How do I draw this rangoli?
Start by marking an even dot grid on a flat, clean surface. Once the grid is in place, connect the dots following the curves shown in the video. Even spacing between dots is the single biggest factor for a clean finish.
Is this suitable for beginners?
It is one of the more forgiving designs in our collection. Beginners often pick it as a confidence-builder before moving on to larger grids.
What materials do I need?
White rice flour for the outline, coloured powders for the fill, and a clean dry floor. That is the essentials list — you can add a stencil if you prefer.
How long does it take?
The tutorial is 3 min 54 sec long. With practice the actual drawing settles around 10 minutes; the first time will likely take twice that.
Roll up your sleeves, grab a handful of rice flour, and give this design ten quiet minutes. The result is worth the small effort.


Leave a Reply