If you enjoy dot-grid muggulu, Rangoli Designs For Sankranti is a satisfying pattern that comes together in just a few minutes.

For another beginner-friendly variation, try 8×2 Beautiful Small Festival Muggulu.
Learn more about the tradition of Rangoli on Wikipedia.
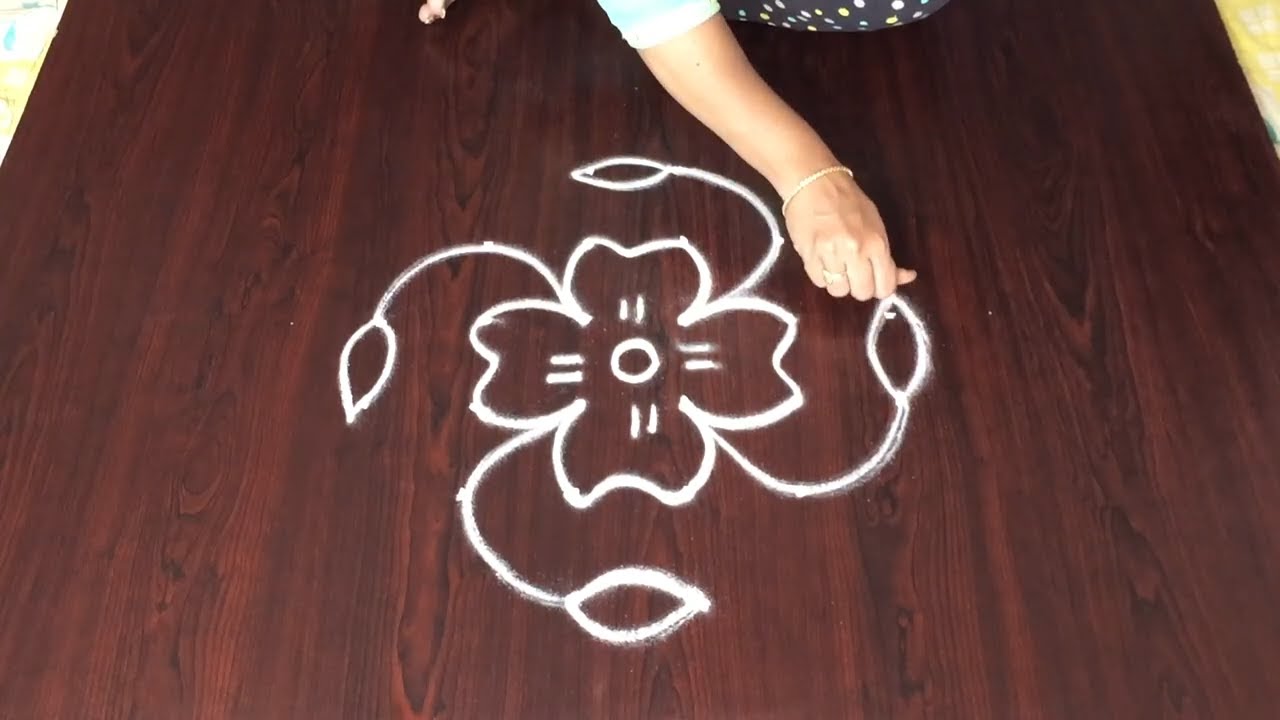
Looking for a graceful rose flower kolam for Sankranthi using a 9-3 dot grid? This beautiful festive rangoli design adds elegance and warmth to your harvest celebration. In this video, we create a 9-3 dots rose flower kolam, structured on a compact decreasing grid that ensures smooth curves and balanced symmetry. The 9 to 3 format is ideal for small to medium entrances, offering enough space to shape layered rose petals while keeping the layout neat.
🌹 What You’ll Learn Step by Step: Proper placement of the 9-3 decreasing dot grid Forming soft and symmetrical rose petals
Maintaining alignment along the central axis Clean finishing techniques for a festive look Sankranthi celebrations are known for colourful and decorative kolam designs at home entrances. A structured rose pattern symbolizes freshness and positivity, making it a perfect choice for the season.
Even though the layout is compact, the dot structure naturally guides spacing and proportion, helping both beginners and experienced artists achieve a neat final result. Watch till the end to see the complete floral transformation — the final symmetrical reveal highlights how the 9-3 dot structure turns into a beautiful Sankranthi rose kolam. If you enjoy festive floral grids, explore other formats like 7-4 and 11-6 to expand your seasonal rangoli collection.
Save this design and recreate it to brighten your Sankranthi celebration beautifully.
Tip: Use chalk to lightly mark your dot grid first — it wipes away cleanly once your rangoli is finished.
About this design: Rangoli Designs For Sankranti is a beginner-friendly pattern that comes together in just a few minutes. Once you have practised the rangoli designs for sankranti dot grid, you can scale it up for festival mornings or scale it down for a daily doorstep. Many learners on our channel make this rangoli designs for sankranti their go-to design once they get the rhythm of the curves.
Rangoli Designs For Sankranti — Step by Step Guide
Here is how to draw it, line by line. Take your time on the corners and the symmetry will take care of itself.
- Clear a flat surface and set down your dot grid using rice flour or chalk.
- Confirm the dot spacing is even — uneven dots are the biggest cause of wobbly curves.
- Begin tracing from the centre outward, following the curves shown in the video above.
- Fill the petals and sections with your chosen colours, working one area at a time.
- Finish the edges with a fine line for a sharp, photograph-ready result.
What You Will Learn
- 9-3 Dots Rose Flower Kolam
- Sankranthi Rose Rangoli 9-3
- Beautiful Festival Muggulu 9-3
- 9-3 Dots Kolam Design
- Harvest Flower Rangoli 9-3
- 9-3 Pulli Kolam
Frequently Asked Questions
How do I draw this rangoli?
Begin with the dot grid — this is the skeleton of the design. With rice flour or chalk, place each dot at equal intervals. Then trace the curves slowly, one section at a time.
Is this suitable for beginners?
Yes, and it is one we recommend to first-timers. The small grid keeps the design manageable while still teaching the core technique.
What materials do I need?
Just three things: powder (white plus any colours you want), a flat dry surface, and a few minutes of focus. A small bowl per colour helps keep things tidy.
How long does it take?
The tutorial is 3 min 19 sec long. With practice the actual drawing settles around 10 minutes; the first time will likely take twice that.
Practice this design a few times and you will find your own variations emerging. That is half the joy of kolam — every artist leaves a fingerprint on the pattern.


Leave a Reply