This simple rangoli designs 6×6 tutorial walks you through the design step-by-step.
Add a touch of charm to your doorway with 6X6 Dots Rangoli 2 — clean lines, balanced symmetry, and easy to scale.

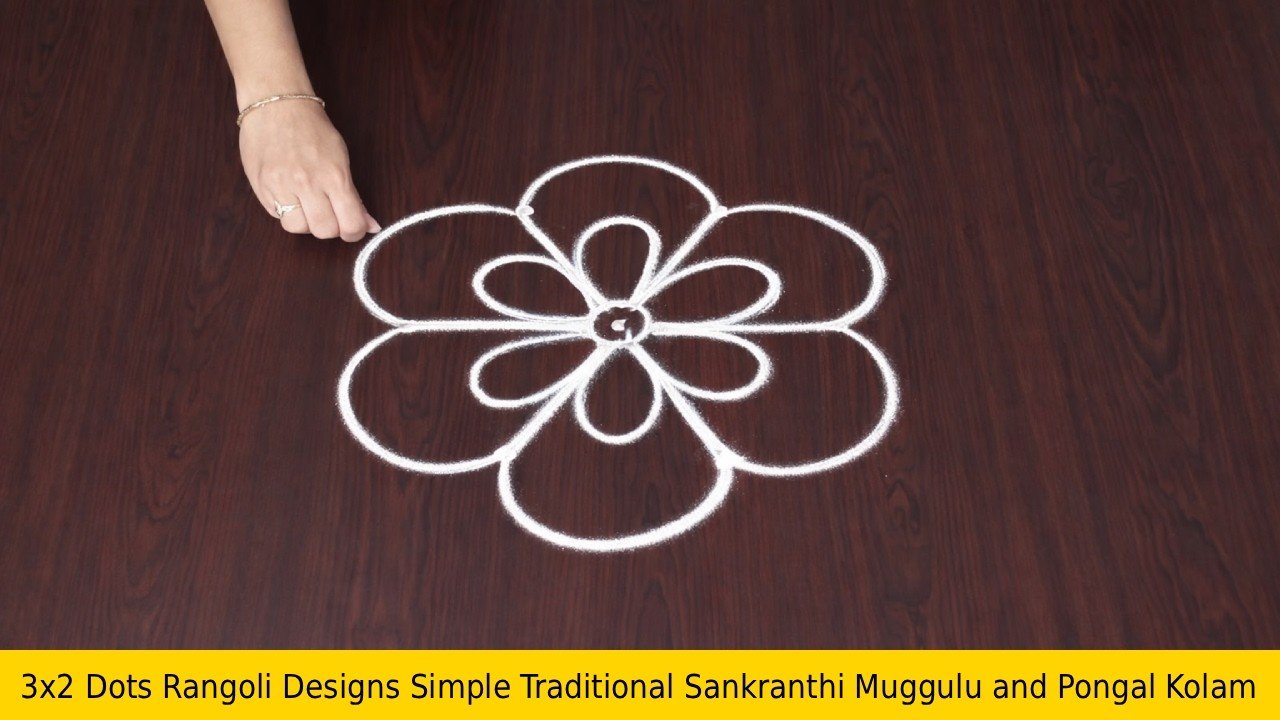
Simple Rangoli Designs presents: Simple Rangoli Designs 6×6 Dots Sankranti Muggulu and New Pongal Kolam for Beginners 🌸 In this video, learn a simple & easy rangoli step-by-step. Whether you need a daily rangoli for your home entrance or a beautiful festival rangoli, this design is perfect for beginners! Time: Just 3 minutes for instant, eye-catching beauty.
Style: Classic traditional Muggulu / Kolam vibes with a graceful touch. Perfect for: Everyday doorstep elegance, special Friday, quick festive entrances, or whenever you want your home to feel instantly blessed & welcoming. 🌟 Perfect occasions & styles:
Everyday Home Entrance Rangoli Special Friday Rangoli Pongal Kolam & Sankranti celebrations
Diwali Rangoli Lotus Rangoli Graceful Peacock Rangoli
Door Rangoli Designs Chukkala Muggulu (dot-based patterns) Easy Rangoli Designs / Rangoli with Dots
Chukkala Muggulu / Traditional Kolam Beginners Rangoli / Border Rangoli Latest Rangoli Trends
Tip: A slightly damp brush along the edges gives a sharper finish, especially for festival photographs.
This design belongs to the broader tradition of rangoli and kolam art practised across South India. Explore more in our 6 to 6 dots Rangoli Designs collection.
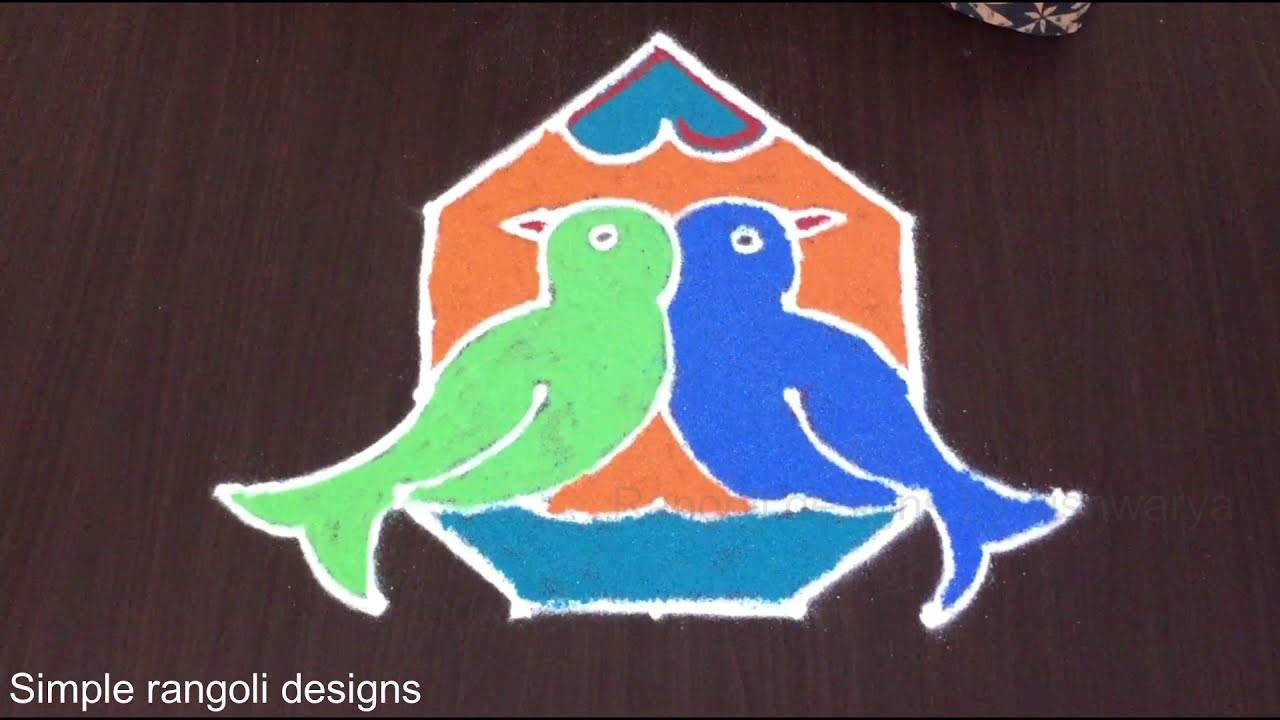
The 6×6 dots rangoli design is a delightful choice for beginners looking to create something special for the Sankranti festival or Pongal celebrations. Its simple geometric patterns can be easily crafted in just a few minutes, making it a perfect addition to your home entrance. This design typically features intricate motifs that embody traditional muggulu aesthetics, reflecting the vibrant spirit of festivities. For more inspiration, you might also enjoy exploring Pongal Rangoli Designs or 14 to 2 Pongal Special Pot Kolam.
The charm of a 6×6 dots rangoli lies in its versatility; it can be adapted for everyday use or special occasions. As you create this beautiful kolam, you will find that it not only enhances the beauty of your surroundings but also invites positive energy into your home. This rangoli style is a wonderful way to practice your artistic skills and connect with cultural traditions. For more information about the art form, visit this Wikipedia page on Rangoli.
About this design: Simple Rangoli Designs 6X6 is a beginner-friendly pattern that comes together in just a few minutes. Once you have practised the simple rangoli designs 6×6 dot grid, you can scale it up for festival mornings or scale it down for a daily doorstep. Many learners on our channel make this simple rangoli designs 6×6 their go-to design once they get the rhythm of the curves.
Simple Rangoli Designs 6X6 — Step by Step Guide
Pace yourself through the steps — kolam rewards patience more than speed.
- Clear a flat surface and set down your dot grid using rice flour or chalk.
- Confirm the dot spacing is even — uneven dots are the biggest cause of wobbly curves.
- Begin tracing from the centre outward, following the curves shown in the video above.
- Fill the petals and sections with your chosen colours, working one area at a time.
- Finish the edges with a fine line for a sharp, photograph-ready result.
What You Will Learn
- 6X6 Dots Rangoli
- Sankranti Muggulu
- Pongal Kolam With Dots
- Simple 6X6 Dots Kolam
- Rangoli With Dots
- Dot Kolam Designs
Frequently Asked Questions
How do I draw this rangoli?
Begin with the dot grid — this is the skeleton of the design. With rice flour or chalk, place each dot at equal intervals. Then trace the curves slowly, one section at a time.
Is this suitable for beginners?
It is one of the more forgiving designs in our collection. Beginners often pick it as a confidence-builder before moving on to larger grids.
What materials do I need?
You will need rice flour or rangoli powder (white, plus your choice of colours), a flat surface like a clean floor or courtyard, and optionally a dot stencil if you are new to grid-drawing.
How long does it take?
Roughly 3 min 23 sec to watch end-to-end, and 10–20 minutes to draw yourself depending on grid size and how careful you are with the curves.
Try it once, share your version with a friend, and keep exploring our collection — there is a design here for every festival, every entrance, and every skill level.


Leave a Reply