Traditional Rangoli Designs is the kind of design that looks intricate but is genuinely beginner-friendly once you follow the dot grid.
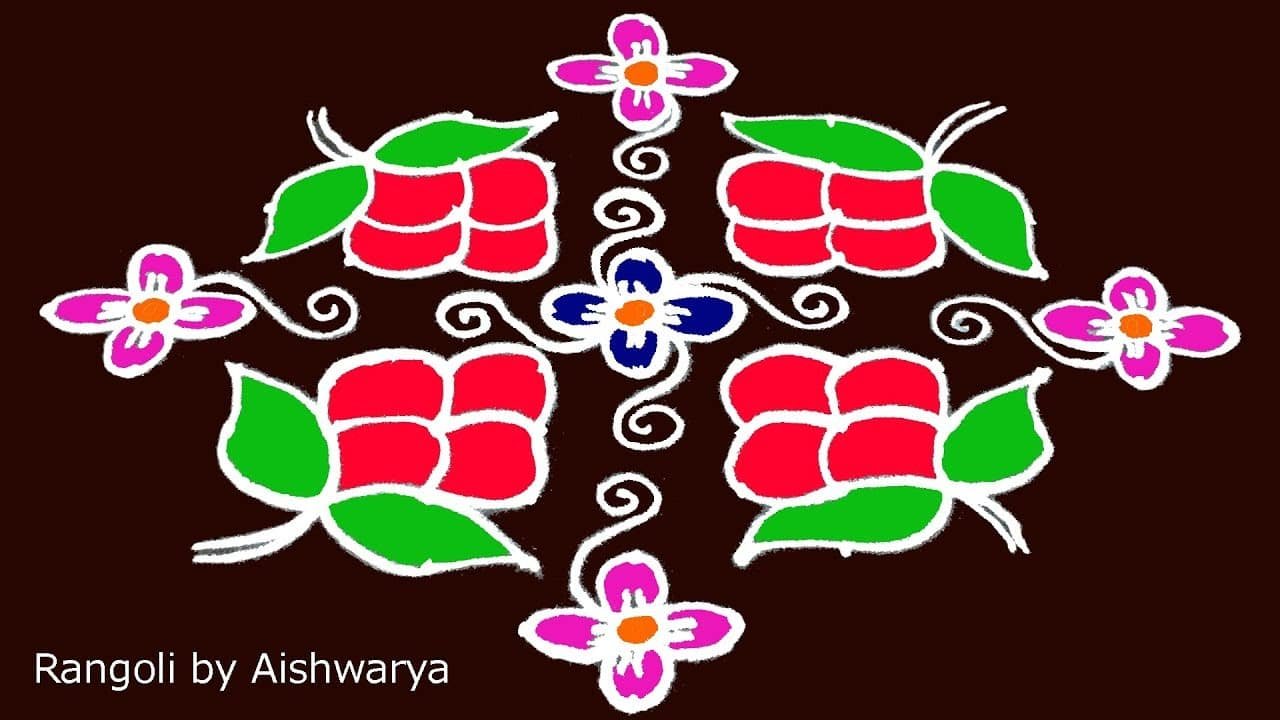
Easy Traditional Rangoli Designs Amazing Flower | Kolam With 13×1 Dots Creative Colour Muggulu. This tutorial will show you how to draw Beautiful Indian traditional art sankranthi muggulu patterns using materials such as dry rice flour, colored sand or flower petals rangoli design by Aishwarya. Simple rangoli designs with dots Kolam pattern is created on the floor in living rooms or courtyards. Draw the Lines step by step as it is shown in this video and will be awesome alpona Design. 😲 The rangoli design for diwali pattern here is one of the amazing latest simple kolam designs. Simple Rangoli Designs and easy rangoli designs by Aishwarya with dots for beginners and intermediate.
1. Simple rangoli 2. Rangoli kolam 3. Rangoli for diwali
4. Simple rangoli design 5. Rangoli design for diwali 6. Alpona design
7. Kolam designs 8. Easy rangoli designs 9. Sankranthi muggulu
10. Muggulu designs 11. Simple kolam 12. Easy rangoli
13. Rangoli designs with dots 14. Chukkala muggulu 15. Pongal kolam
Tip: Keep your powder bowl close to your dominant hand. Small movements give cleaner curves.
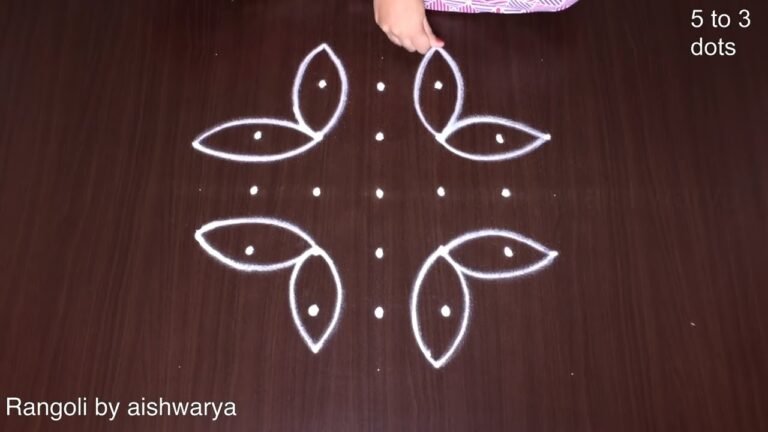
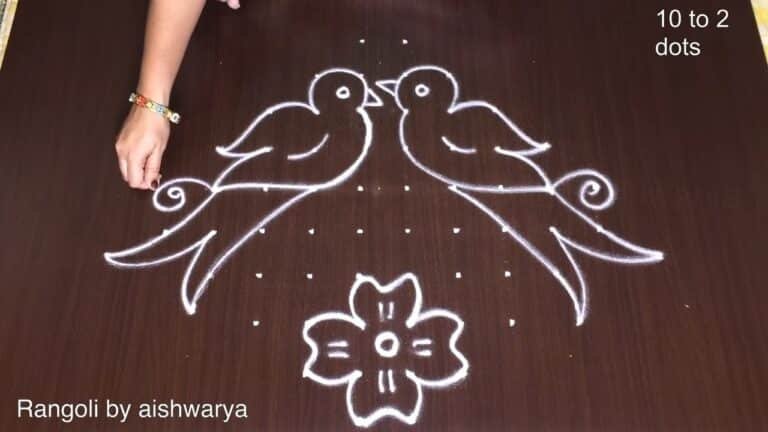
Creating traditional rangoli designs with a 13 to 1 dot pattern is a joyful experience, often associated with festivals like Sankranthi. This particular style allows for intricate floral patterns that can brighten up any living space. By using natural materials such as dry rice flour or colored sand, you can easily replicate this design at home. For beginners, starting with a simple 10-2 dots rangoli design can help build confidence before tackling more complex patterns.
The beauty of this 13 to 1 dot kolam lies in its versatility and the personal touch one can add while designing. It serves as a welcoming gesture for guests during festive occasions, showcasing the rich cultural heritage of India. As you explore the art of rangoli, consider trying out diya kolam designs for your pooja room, which can complement the vibrant aesthetics of your home. For more information on the history and significance of rangoli, you can visit this page.
Traditional Rangoli Designs — Step by Step Guide
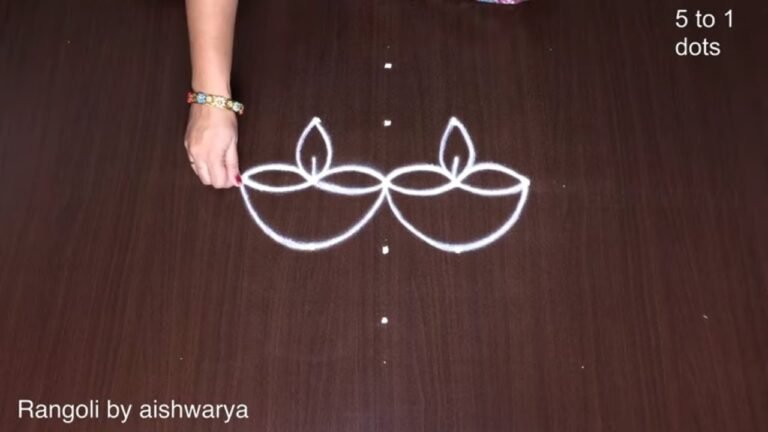
Here is how to draw it, line by line. Take your time on the corners and the symmetry will take care of itself.
- Clear a flat surface and set down your dot grid using rice flour or chalk.
- Confirm the dot spacing is even — uneven dots are the biggest cause of wobbly curves.
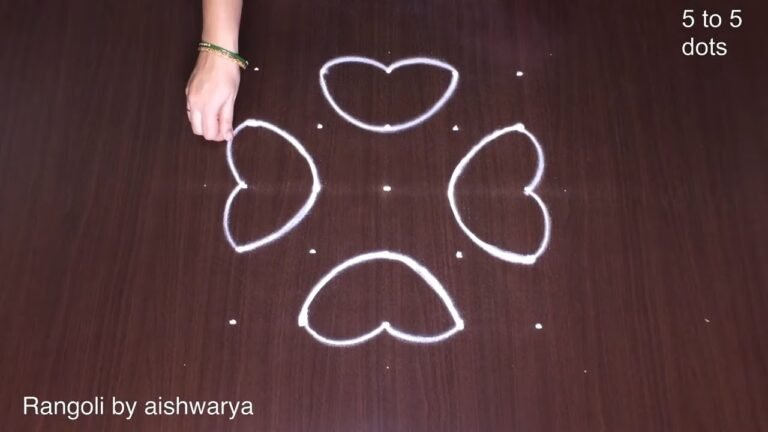
- Begin tracing from the centre outward, following the curves shown in the video above.
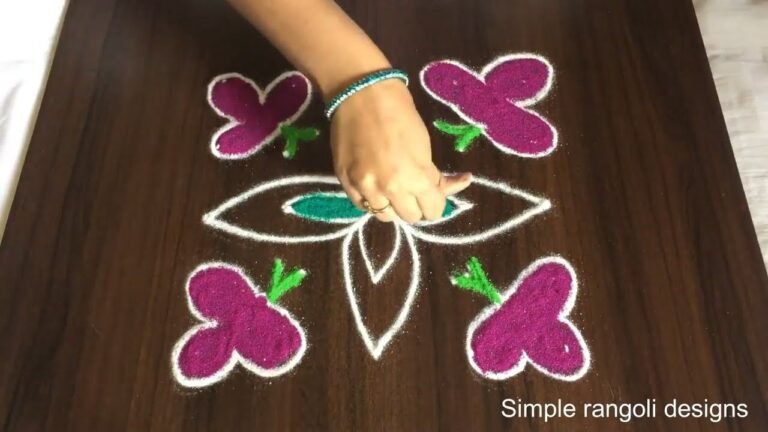
- Fill the petals and sections with your chosen colours, working one area at a time.
- Finish the edges with a fine line for a sharp, photograph-ready result.
What You Will Learn
- Simple Rangoli Designs
- Rangoli
- Muggulu
- Rangoli Designs
- Rangoli Kolam
- Kolam
Frequently Asked Questions
How do I draw this rangoli?
Set down the dot grid in pencil or chalk, then follow the loops one petal at a time. If a curve goes off, wipe it and retry — kolam is forgiving.
Is this suitable for beginners?
Yes, and it is one we recommend to first-timers. The small grid keeps the design manageable while still teaching the core technique.
What materials do I need?
You will need rice flour or rangoli powder (white, plus your choice of colours), a flat surface like a clean floor or courtyard, and optionally a dot stencil if you are new to grid-drawing.
How long does it take?
Roughly 3 min 3 sec to watch end-to-end, and 10–20 minutes to draw yourself depending on grid size and how careful you are with the curves.
Drawing kolam is as much about the practice as the result. Set aside ten minutes, follow the video, and enjoy the process.
Leave a Reply