This muggulu designs 9 pulli tutorial walks you through every step from the dot grid to the final pattern.

Ugadi Muggulu Designs 9 combines tradition with simplicity, making it one of the most rewarding designs to practice at home.
Ugadi Muggulu Designs | 9 Pulli Kolam with dots | Maasi Madha Rangoli | RamRangoli Aishwarya Thank you so much for watching Channel
My Rangoli Channel Contains : Rangoli Designs Sankranthi Muggulu
Diwali Rangoli Ratham Muggulu Kolam Designs
Muggulu Designs Chukkala Muggulu Easy Rangoli
Simple Rangoli Easy Rangoli Designs Dhanurmasam Muggulu
Melikala Muggulu Geethala Muggulu Sivarathri Muggulu
Tip: A slightly damp brush along the edges gives a sharper finish, especially for festival photographs.
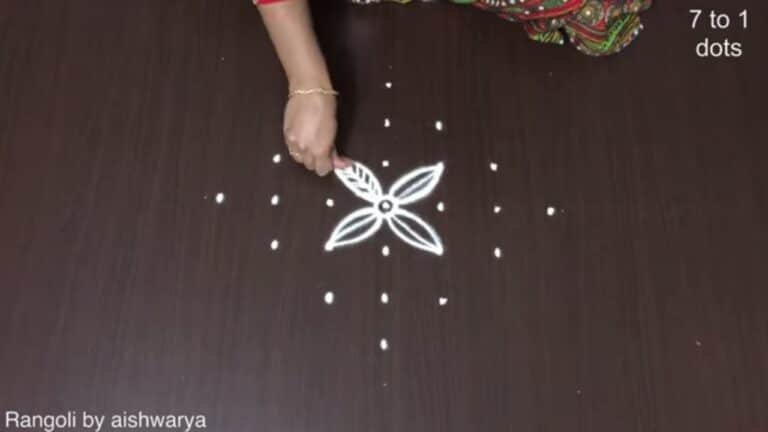
The 9 pulli muggulu design is a delightful way to celebrate Ugadi, marking the New Year in many South Indian households. This design typically features intricate patterns that are easy to create yet visually stunning, making it perfect for beginners. The use of nine dots allows for a variety of geometric shapes and floral motifs, which embody the spirit of renewal and joy associated with the festival. For those interested in exploring other festive designs, check out the 7 Into 7 Dots Festival Rangoli.
Creating Ugadi muggulu with 9 dots often involves symmetry and creativity, allowing the artist to express their personal touch. The vibrant colors and patterns can be enhanced using natural powders or flower petals, adding to the festive atmosphere. This design is not only a symbol of artistic expression but also serves as a welcoming gesture for guests. If you enjoy exploring different styles, consider visiting our post on Pongal Rangoli Designs for additional inspiration. For more information on the art of rangoli, you can visit this page.
About this design: Muggulu Designs 9 Pulli is a beginner-friendly pattern that comes together in just a few minutes. Once you have practised the muggulu designs 9 pulli dot grid, you can scale it up for festival mornings or scale it down for a daily doorstep. Many learners on our channel make this muggulu designs 9 pulli their go-to design once they get the rhythm of the curves.
Muggulu Designs 9 Pulli — Step by Step Guide
These steps are written for absolute beginners. Watch once, draw once, then watch again — that is how the pattern locks in.
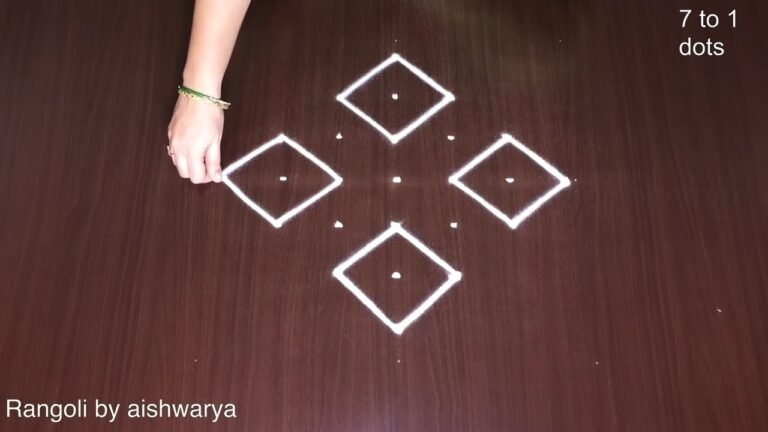
- Clear a flat surface and set down your dot grid using rice flour or chalk.
- Confirm the dot spacing is even — uneven dots are the biggest cause of wobbly curves.
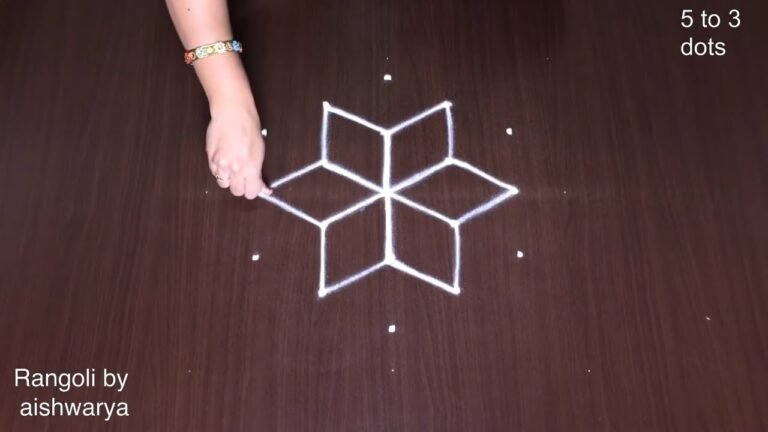
- Begin tracing from the centre outward, following the curves shown in the video above.
- Fill the petals and sections with your chosen colours, working one area at a time.
- Finish the edges with a fine line for a sharp, photograph-ready result.
What You Will Learn
- Ugadi Rangoli With Dots
- Ugadi Rangoli Side Designs
- Ugadi Rangoli Simple
- Ugadi Rangoli Easy
- Rangoli Ugadi Special
- Ugadi Rangoli Designs With Dots
Frequently Asked Questions
How do I draw this rangoli?
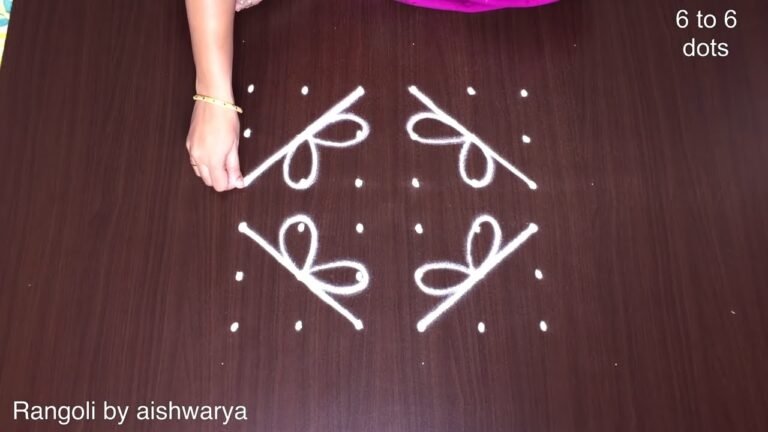
It looks complex but follows a simple rhythm: dots first, then loops. Mark the grid, take a breath, and trace the curves at a steady pace. The pattern emerges on its own.
Is this suitable for beginners?
Beginner-friendly is exactly the right description. The video walks through every line clearly and you can match the pace.
What materials do I need?
Rice flour, coloured rangoli powders, and a clean stretch of floor or paper. Some draw with chalk first to set the grid before powdering over it.
How long does it take?
The video clocks in at 3 min 22 sec. Allow about quarter of an hour to draw the design at a comfortable pace.
After you draw this, take a picture before the day blows it away. Kolam is impermanent by design, but a photo lets you revisit the version you drew.


Leave a Reply