There is something timeless about Vinayaka Chavithi Muggulu With — the symmetry, the rhythm of the dots, and the soft curves it produces.

Simple Design Kolam 🌷 Vinayaka Chavithi Muggulu with dots 🌷 Rangavalli Muggulu 2023. This tutorial will show you how to draw Beautiful Indian traditional art sankranthi muggulu patterns using materials such as dry rice flour, colored sand or flower petals Rangoli designs by Aishwarya. Simple rangoli designs with dots Kolam pattern is created on the floor in living rooms or courtyards. Draw the Lines step by step as it is shown in this video and will be awesome Rangoli Design. Chapters: 0:00 Intro
0:05 Simple Design Kolam 4:03 Vinayaka Chavithi Muggulu with dots 😲 The rangoli design for diwali pattern here is one of the amazing latest simple kolam designs.
Simple Rangoli Designs and easy rangoli designs by Aishwarya with dots for beginners and intermediate. 1. Diwali Rangoli 2. Pongal kolams
3. Easy rangoli designs 4. Rangoli design 5. Chukkala muggulu
6. Muggu designs 7. Rangoli for diwali 8. Thai madam rangoli
9. Chukkala muggulu sankranthi 10. Kolam designs 11. Simple rangoli design
Tip: Use chalk to lightly mark your dot grid first — it wipes away cleanly once your rangoli is finished.
The Vinayaka Chavithi Muggulu is a delightful design that celebrates the auspicious festival dedicated to Lord Ganesha. Typically crafted with 6 to 2 dots, this rangoli pattern is not only visually appealing but also symbolizes prosperity and good fortune. Beginners will find the process straightforward, as it involves creating intricate lines and shapes that come together beautifully. For more inspiration, you may explore Sankranthi Pedha Chukkala Muggulu designs that enhance the festive spirit.
Using materials like rice flour or colored sand, this muggulu brings a touch of traditional artistry to homes during Vinayaka Chavithi. The vibrant colors and meticulous designs add to the charm of the celebration and create a warm atmosphere. If you’re interested in expanding your skills, consider trying out Pandaga Muggulu Beautiful Deepam for a different festive occasion. For a deeper understanding of this traditional art form, you can also visit this page on rangoli.
About this design: Chavithi Muggulu With Dots is a beginner-friendly pattern that comes together in just a few minutes. Once you have practised the chavithi muggulu with dots dot grid, you can scale it up for festival mornings or scale it down for a daily doorstep. Many learners on our channel make this chavithi muggulu with dots their go-to design once they get the rhythm of the curves.
Chavithi Muggulu With Dots — Vinayaka Chavithi Muggulu With — Step by Step Guide
These steps are written for absolute beginners. Watch once, draw once, then watch again — that is how the pattern locks in.
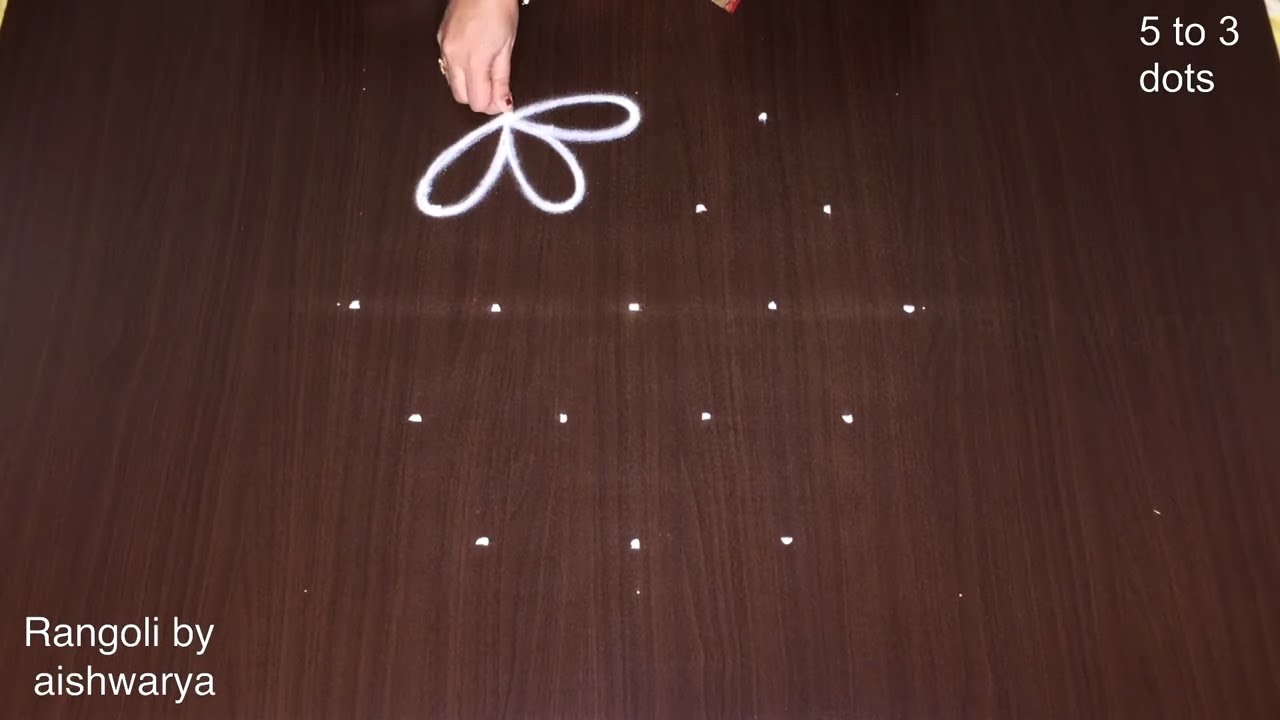
- Clear a flat surface and set down your dot grid using rice flour or chalk.
- Confirm the dot spacing is even — uneven dots are the biggest cause of wobbly curves.
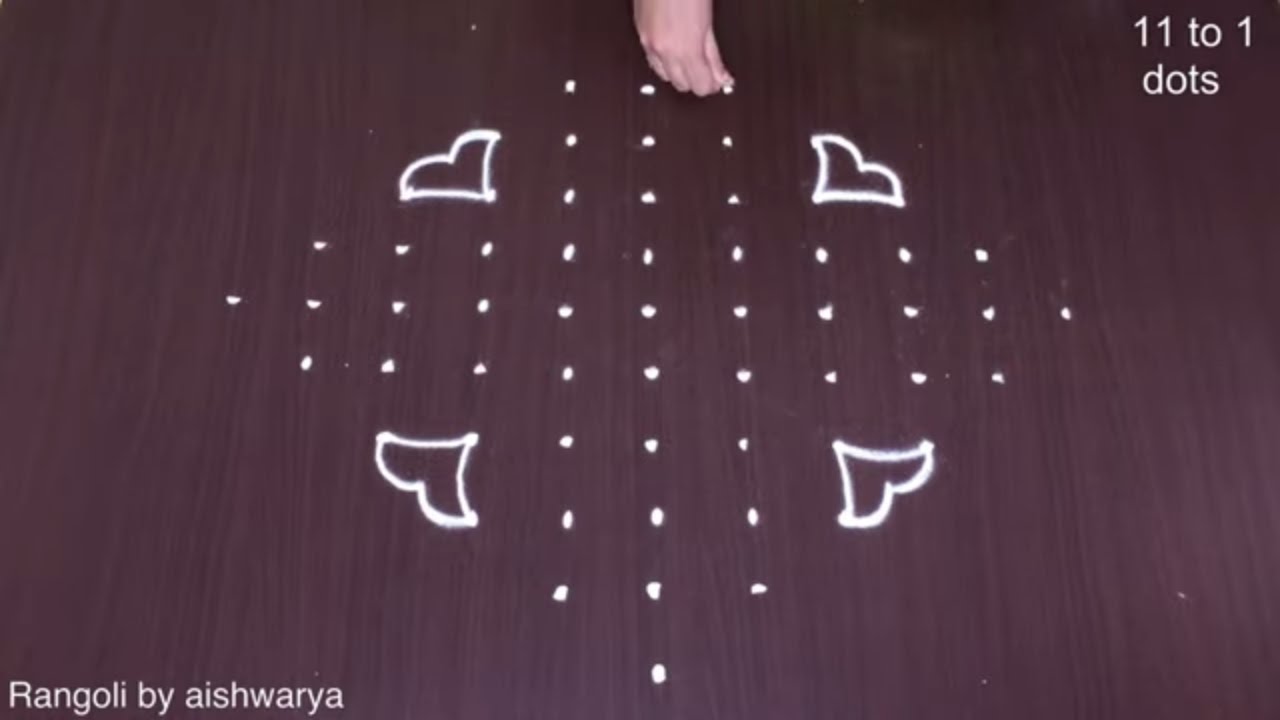
- Begin tracing from the centre outward, following the curves shown in the video above.
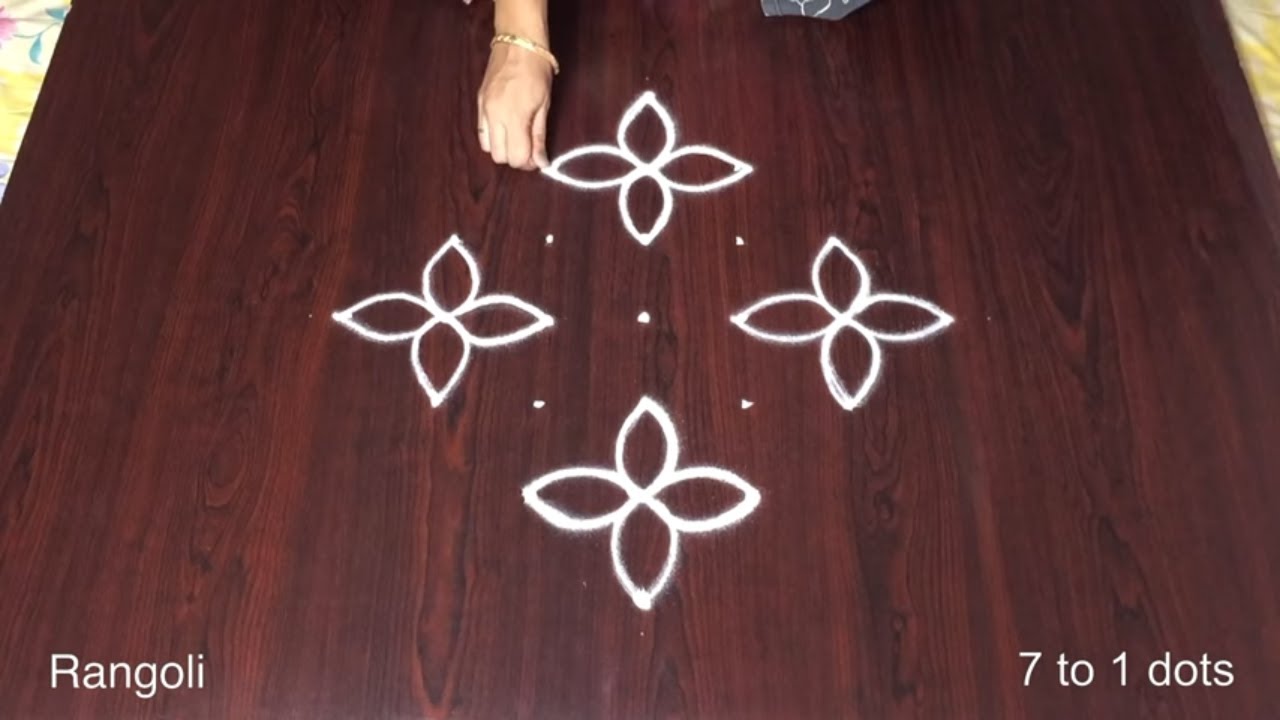
- Fill the petals and sections with your chosen colours, working one area at a time.
- Finish the edges with a fine line for a sharp, photograph-ready result.
What You Will Learn
- Simple Rangoli Designs
- Rangoli
- Muggulu
- Rangoli Designs
- Rangoli Kolam
- Kolam
Frequently Asked Questions
How do I draw this rangoli?
Begin with the dot grid — this is the skeleton of the design. With rice flour or chalk, place each dot at equal intervals. Then trace the curves slowly, one section at a time.
Is this suitable for beginners?
Absolutely. You can pause and rewind the video at every step. The pattern is straightforward once you have the grid down.
What materials do I need?
Powder (white for outlines, colours for filling), a flat surface, and a dot stencil if you want absolute precision. Beyond that, just your hand and a steady pace.
How long does it take?
A 7 min 59 sec video shows the complete sequence. On paper or floor, expect to spend around a quarter of an hour from grid to finished pattern.
Whenever you finish your version, share a photo with us. Seeing your work is the best part of running this channel.


Leave a Reply