Beginners Designs Easy Rangoli combines tradition with simplicity, making it one of the most rewarding designs to practice at home.

For another beginner-friendly variation, try Kolam Pongal Flower.
Learn more about the tradition of Rangoli on Wikipedia.
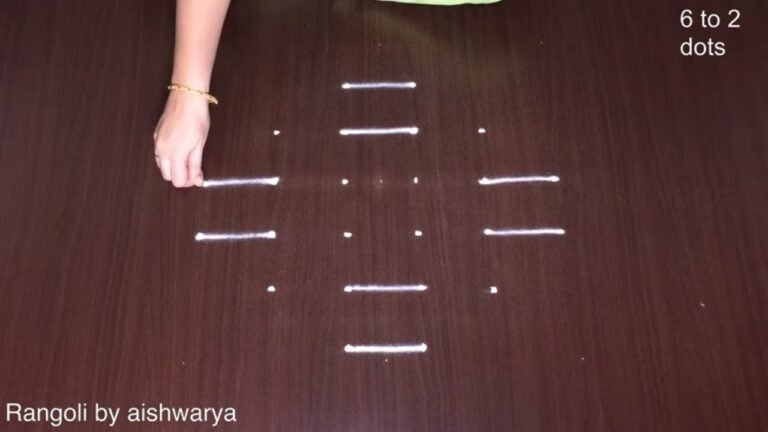
Looking for a clean and easy 6×6 dots kolam that beginners can draw confidently? This simple rangoli design is structured, balanced, and perfect for learning dot symmetry. In this video, we create a 6×6 dots easy beginner kolam, built on a perfectly aligned square grid that ensures smooth curves and equal spacing. The 6 by 6 format is one of the most reliable layouts for maintaining symmetry without making the design complicated.
Proper placement of the 6×6 square dot grid Connecting curves evenly and smoothly Maintaining balance across all four sides
Clean finishing touches for a neat result The 6×6 grid provides a strong foundation for beginners. It helps you understand spacing, alignment, and curve control while keeping the overall design compact and manageable. This format works beautifully for apartment entrances, pooja spaces, and small thresholds where you want a neat and organized kolam.
Watch till the end to see the complete transformation — the final symmetrical reveal highlights how the 6×6 dot structure turns into a beautiful and balanced kolam. If you enjoy square beginner grids, explore other formats like 5×5 and 7-4 to expand your rangoli collection step by step. Save this design and recreate it to enhance your entrance beautifully.
Tip: A slightly damp brush along the edges gives a sharper finish, especially for festival photographs.
This design belongs to the broader tradition of rangoli and kolam art practised across South India. Explore more in our 6 to 6 dots Rangoli Designs collection.
About this design: Beginners Designs Easy Rangoli is a beginner-friendly pattern that comes together in just a few minutes. Once you have practised the beginners designs easy rangoli dot grid, you can scale it up for festival mornings or scale it down for a daily doorstep. Many learners on our channel make this beginners designs easy rangoli their go-to design once they get the rhythm of the curves.
Beginners Designs Easy Rangoli — Step by Step Guide
Each step takes only a moment. The whole design comes together in just a few minutes once the grid is in place.
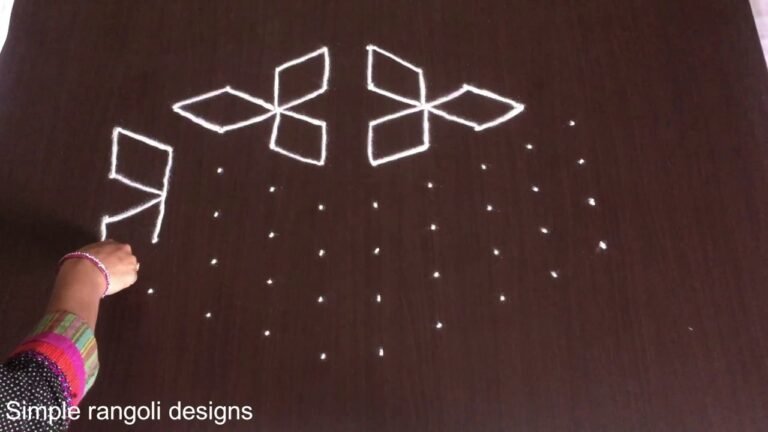
- Clear a flat surface and set down your dot grid using rice flour or chalk.
- Confirm the dot spacing is even — uneven dots are the biggest cause of wobbly curves.
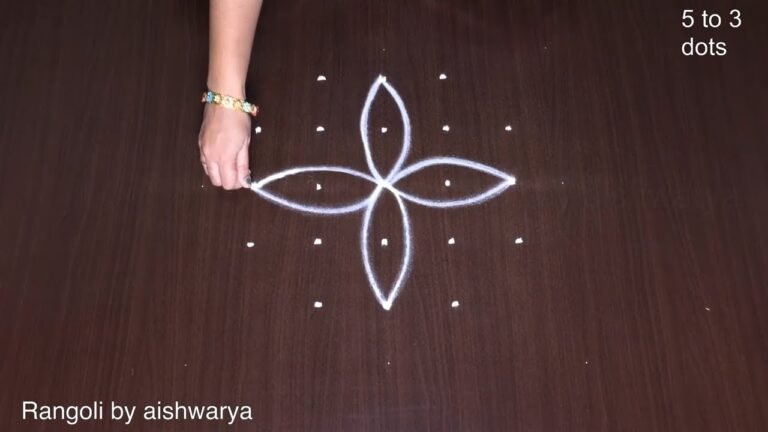
- Begin tracing from the centre outward, following the curves shown in the video above.
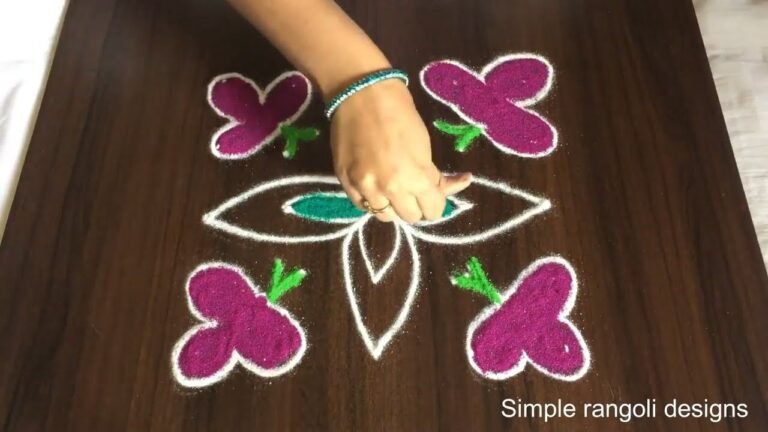
- Fill the petals and sections with your chosen colours, working one area at a time.
- Finish the edges with a fine line for a sharp, photograph-ready result.
What You Will Learn
- 6X6 Dots Easy Beginner Kolam
- Simple Rangoli 6X6 Dots
- Beginner Friendly 6-6 Kolam Design
- 6-6 Dots Kolam Pattern
- Square Grid Rangoli 6X6
- 6X6 Pulli Kolam
Frequently Asked Questions
How do I draw this rangoli?
Begin with the dot grid — this is the skeleton of the design. With rice flour or chalk, place each dot at equal intervals. Then trace the curves slowly, one section at a time.
Is this suitable for beginners?
Absolutely. You can pause and rewind the video at every step. The pattern is straightforward once you have the grid down.
What materials do I need?
Powder (white for outlines, colours for filling), a flat surface, and a dot stencil if you want absolute precision. Beyond that, just your hand and a steady pace.
How long does it take?
The video runs 2 min 25 sec. In practice, most learners take between 10 and 20 minutes — a little longer the first time, faster as the pattern becomes familiar.
After you draw this, take a picture before the day blows it away. Kolam is impermanent by design, but a photo lets you revisit the version you drew.

Leave a Reply