Deepala Muggulu 5 To combines tradition with simplicity, making it one of the most rewarding designs to practice at home.

New Apartment Very Easy Diya Kolam Simple | Deepala Muggulu 5 to 5 Dots Kutti Rangoli | Rangoli Thank you so much for watching Channel
My Rangoli Channel Contains : Rangoli Designs Sankranthi Muggulu
Diwali Rangoli Ratham Muggulu Kolam Designs
Muggulu Designs Chukkala Muggulu Easy Rangoli
Simple Rangoli Easy Rangoli Designs Dhanurmasam Muggulu
Melikala Muggulu Geethala Muggulu Sivarathri Muggulu
Tip: Practice on paper first if you are new to dot kolam. The grid is the same; only the surface changes.
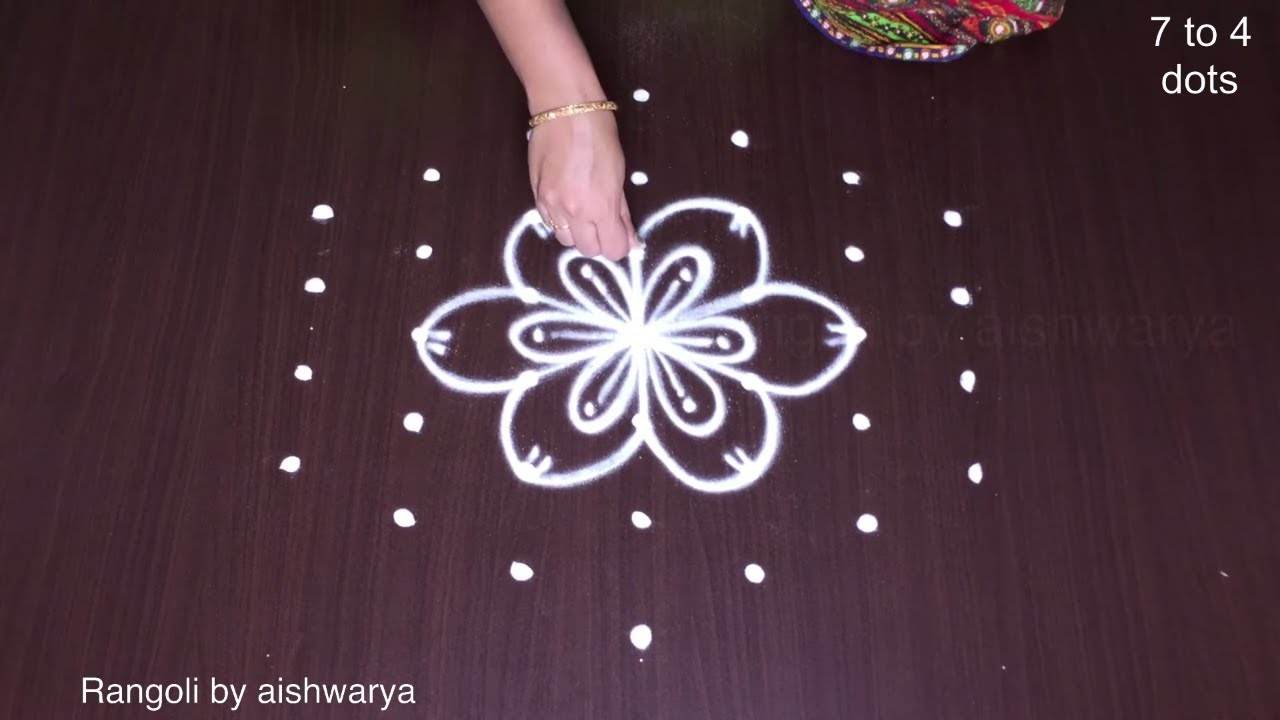
The Deepala Muggulu, designed with a 5 to 5 dot grid, is a charming and simple pattern often created during festivals like Diwali. This design is characterized by its symmetrical structures and intricate patterns, making it a delightful choice for beginners. The use of lamps or diyas in the decor enhances the festive ambiance, as this muggulu is traditionally meant to welcome prosperity and light into homes. For more inspiration, you might enjoy exploring the Pongal Rangoli Designs that showcase a variety of festive themes.
This muggulu style emphasizes creativity while allowing for personal expression through colors and additional motifs. The beauty of creating a Deepala Muggulu lies in its adaptability; it can be customized with floral patterns or geometric shapes to suit individual preferences. If you’re interested in more complex designs, consider checking out the 7 Into 7 Dots Festival Rangoli, which offers a different approach while still remaining beginner-friendly. To learn more about the cultural significance of these designs, visit this link.
Deepala Muggulu 5 To — Step by Step Guide
Below is the step-by-step breakdown. The video covers the same sequence in real time.
- Clear a flat surface and set down your dot grid using rice flour or chalk.
- Confirm the dot spacing is even — uneven dots are the biggest cause of wobbly curves.
- Begin tracing from the centre outward, following the curves shown in the video above.
- Fill the petals and sections with your chosen colours, working one area at a time.
- Finish the edges with a fine line for a sharp, photograph-ready result.
What You Will Learn
- Simple Rangoli Designs
- Rangoli
- Muggulu
- Rangoli Designs
- Rangoli Kolam
- Kolam
Frequently Asked Questions
How do I draw this rangoli?
The grid comes first. Use a soft chalk to dot the surface, count twice to confirm the spacing, then start connecting them following the video. Work from the centre outward.
Is this suitable for beginners?
Absolutely. You can pause and rewind the video at every step. The pattern is straightforward once you have the grid down.
What materials do I need?
Just three things: powder (white plus any colours you want), a flat dry surface, and a few minutes of focus. A small bowl per colour helps keep things tidy.
How long does it take?
The video clocks in at 2 min 20 sec. Allow about quarter of an hour to draw the design at a comfortable pace.
Pin this for later or share with a friend learning kolam — and let us know in the comments which design you would like next.


Leave a Reply