Finest Rangoli By Only is a beautiful kolam pattern you can draw right at your doorstep — perfect for beginners and seasoned rangoli artists alike.
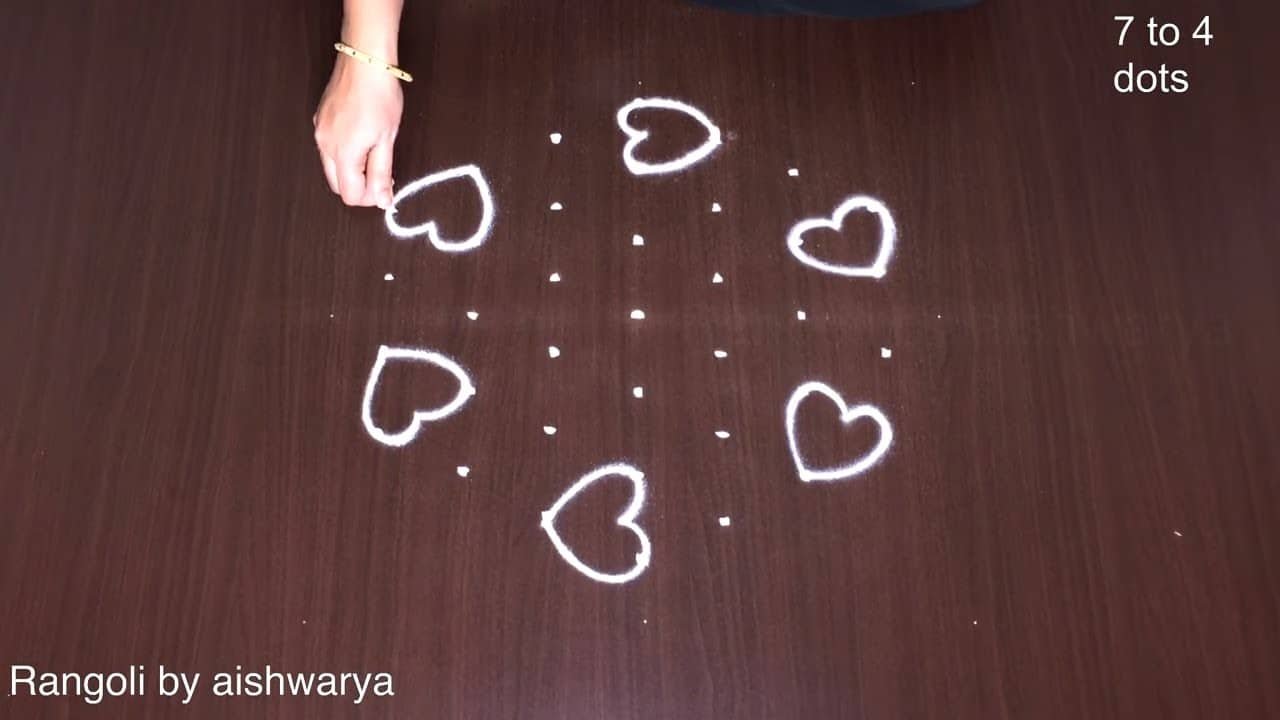
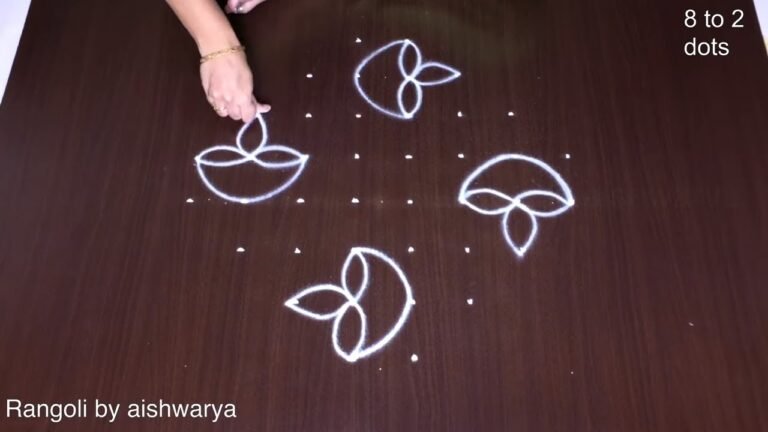
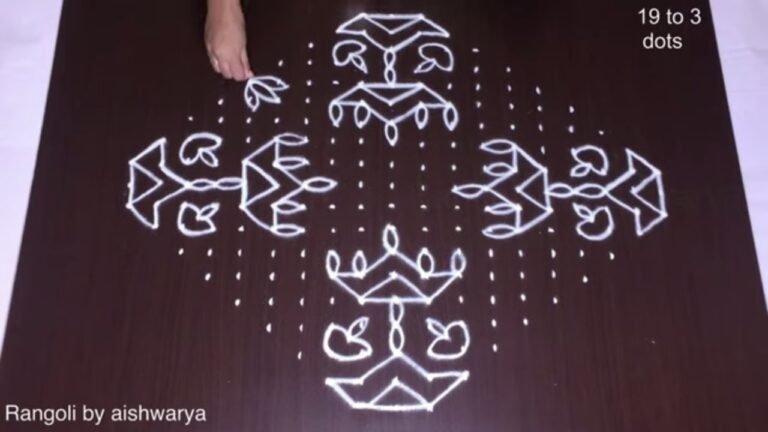
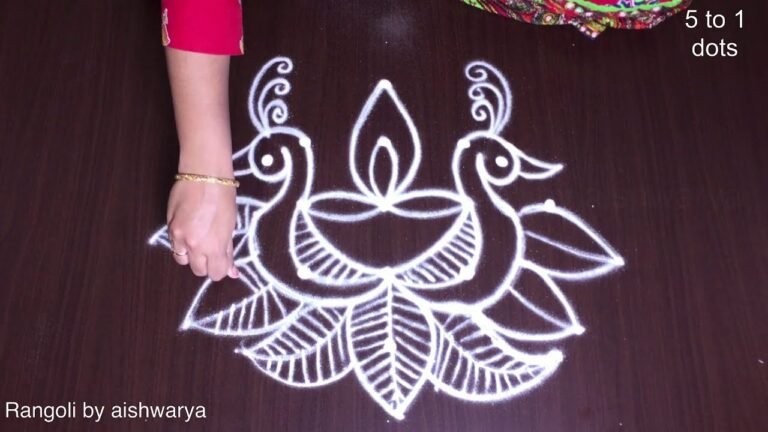
Finest Rangoli by Only 7 * 4 Side Dots | Andhamaina Muggulu Seven Chukki Kolam. This tutorial will show you how to draw Beautiful Indian traditional art Diwali Rangoli patterns using materials such as dry rice flour, colored sand or flower petals Rangoli designs by Aishwarya. Simple rangoli Kutti Kolam pattern is created on the floor in living rooms or courtyards. Draw the Lines step by step as it is shown in this video and will be awesome Rangoli Design. 😲 The Diwali rangoli pattern here is one of the amazing latest kolam designs. Simple Rangoli Designs and easy rangoli designs by Aishwarya with dots for beginners and intermediate.
1. Diwali Rangoli 2. Pongal kolams 3. Easy rangoli designs
4. Rangoli design 5. Chukkala muggulu 6. Dot rangoli designs
7. Dots rangoli 8. Easy rangoli 9. Easy rangoli designs
10. Kolam designs 11. Kolam with dots 12. Muggulu designs
13. Muggulu designs with dots 14. Small rangoli designs 15. Muggulu chukkala muggulu
Tip: A slightly damp brush along the edges gives a sharper finish, especially for festival photographs.
The finest rangoli by only seven dots in a four-sided arrangement is a captivating design that beautifully complements the festive atmosphere of Diwali. This pattern, known as Andhamaina Muggulu, incorporates intricate lines and shapes that can be easily drawn using rice flour or colored powders. As a beginner, you will appreciate the simplicity and elegance of this design, which not only enhances your living space but also showcases your artistic flair during celebrations. For more inspiration, check out the 13 To 7 Chukkalu Deepawali Rangoli for similar festive designs.
This rangoli design is perfect for those looking to create a warm welcome at their homes during special occasions. It serves as a delightful way to express creativity while engaging in a traditional art form that has deep cultural significance in India. The combination of dots and lines makes it versatile, allowing you to personalize your creation as you gain confidence. If you’re interested in exploring more unique designs, you might find the Beautiful Deepam Rangoli Designs 7 to be a wonderful addition to your repertoire. For more about the history and significance of rangoli, visit this Wikipedia page.
Finest Rangoli By Only — Step by Step Guide
The video above shows the full sequence; the steps below summarise each stage so you can glance back as you draw.
- Clear a flat surface and set down your dot grid using rice flour or chalk.
- Confirm the dot spacing is even — uneven dots are the biggest cause of wobbly curves.
- Begin tracing from the centre outward, following the curves shown in the video above.
- Fill the petals and sections with your chosen colours, working one area at a time.
- Finish the edges with a fine line for a sharp, photograph-ready result.
What You Will Learn
- Simple Rangoli Designs
- Rangoli
- Muggulu
- Rangoli Designs
- Rangoli Kolam
- Kolam
Frequently Asked Questions
How do I draw this rangoli?
It looks complex but follows a simple rhythm: dots first, then loops. Mark the grid, take a breath, and trace the curves at a steady pace. The pattern emerges on its own.
Is this suitable for beginners?
Absolutely. You can pause and rewind the video at every step. The pattern is straightforward once you have the grid down.
What materials do I need?
Rice flour, coloured rangoli powders, and a clean stretch of floor or paper. Some draw with chalk first to set the grid before powdering over it.
How long does it take?
The video clocks in at 8 min 45 sec. Allow about quarter of an hour to draw the design at a comfortable pace.
Whenever you finish your version, share a photo with us. Seeing your work is the best part of running this channel.
Leave a Reply