This designs with 8 dots tutorial walks you through every step from the dot grid to the final pattern.
For another beginner-friendly variation, try 9 To 1 Prathi Roju Vese Muggulu.
Learn more about the tradition of Rangoli on Wikipedia.
Drawing Sankranti Rangoli Designs With is a relaxing, almost meditative practice. The dots guide your hand and the design unfolds naturally.
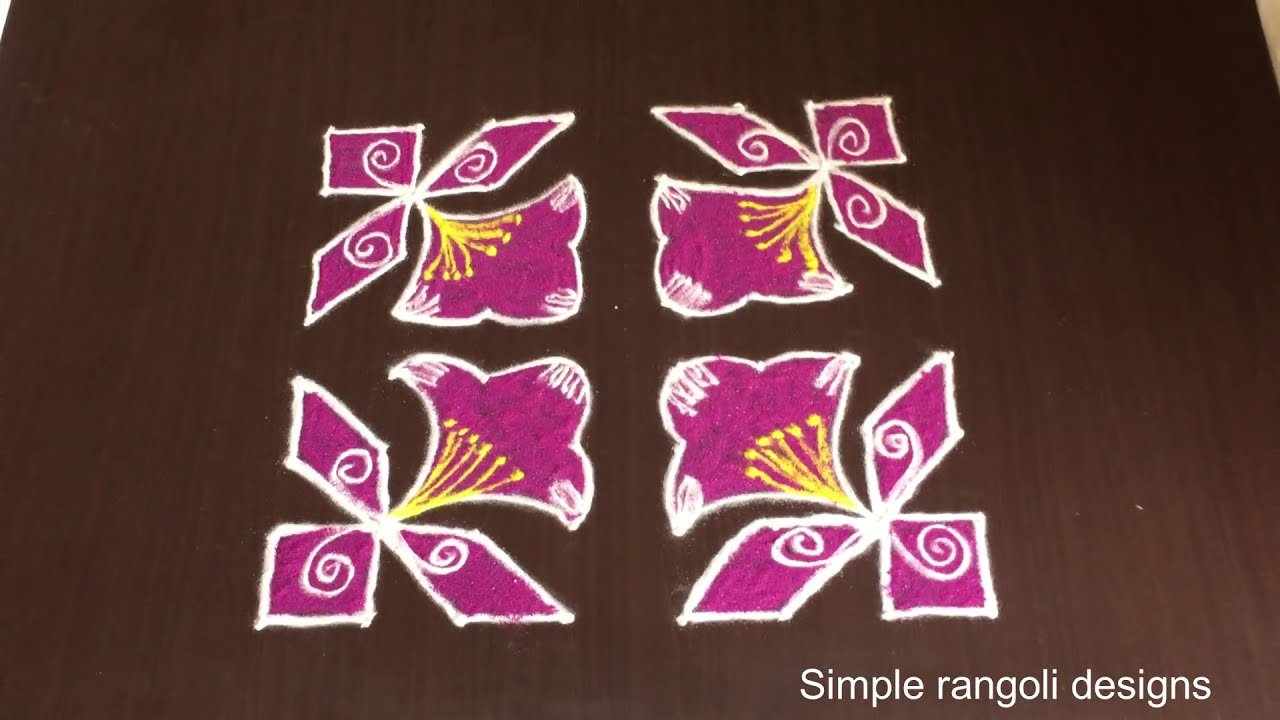
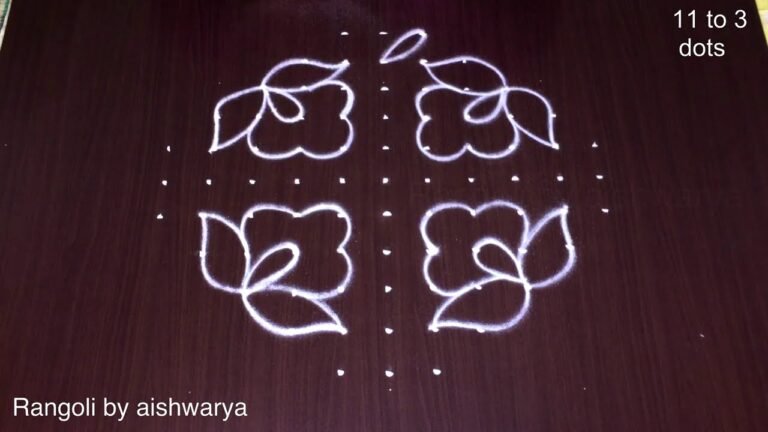
Looking for an easy 8×8 dots kolam that’s perfect for Sankranti decoration? This beginner-friendly design combines festive tradition with clean symmetry. In this video, we create an 8×8 dots Sankranti kolam, using a perfectly aligned square grid. The 8 by 8 format is ideal for medium-sized entrances because it offers strong structure while still being simple enough for beginners to follow.
🌾 What You’ll Learn Step by Step: Correct placement of the 8×8 dot grid Building a symmetrical base pattern
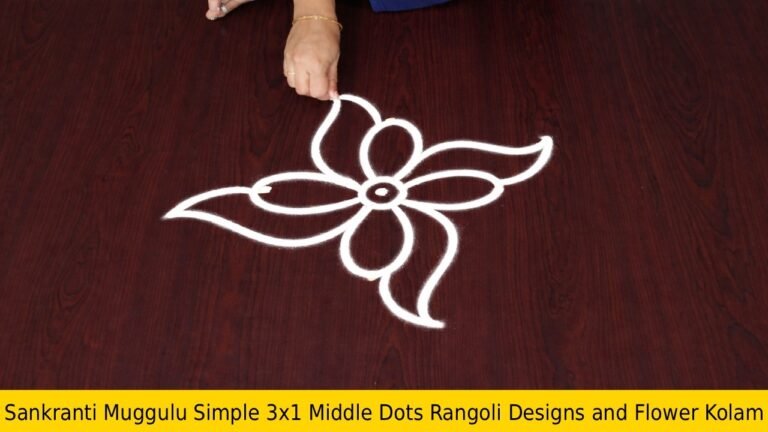
Smooth curve techniques for a neat finish Simple detailing to enhance the festive look Sankranti is a harvest celebration filled with colorful entrances and meaningful decorations. Drawing a structured dot kolam during this festival symbolizes prosperity and new beginnings. The 8×8 layout ensures the design appears balanced and impressive without becoming complicated.
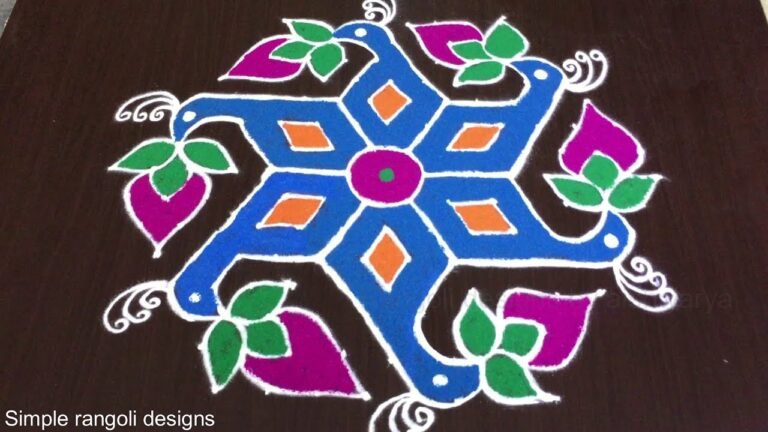
Even if you are new to kolam drawing, this grid makes it easier to maintain equal spacing and proportion. The step-by-step method helps you build confidence while improving curve control. Watch till the end to see the full symmetrical reveal — the completed design highlights how a square dot grid transforms into a festive and elegant kolam. If you enjoy 8×8 dot kolam, explore other Sankranti grids like 6×6 and 9-5 to expand your seasonal rangoli collection.
Save this design and recreate it for your Sankranti celebration.
Tip: Keep your powder bowl close to your dominant hand. Small movements give cleaner curves.
About this design: Designs With 8 Dots is a beginner-friendly pattern that comes together in just a few minutes. Once you have practised the designs with 8 dots dot grid, you can scale it up for festival mornings or scale it down for a daily doorstep. Many learners on our channel make this designs with 8 dots their go-to design once they get the rhythm of the curves.
Designs With 8 Dots — Step by Step Guide
Below is the step-by-step breakdown. The video covers the same sequence in real time.
- Clear a flat surface and set down your dot grid using rice flour or chalk.
- Confirm the dot spacing is even — uneven dots are the biggest cause of wobbly curves.
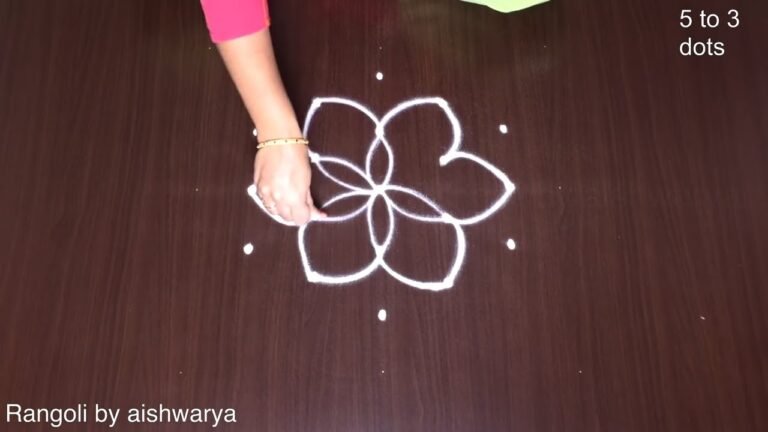
- Begin tracing from the centre outward, following the curves shown in the video above.
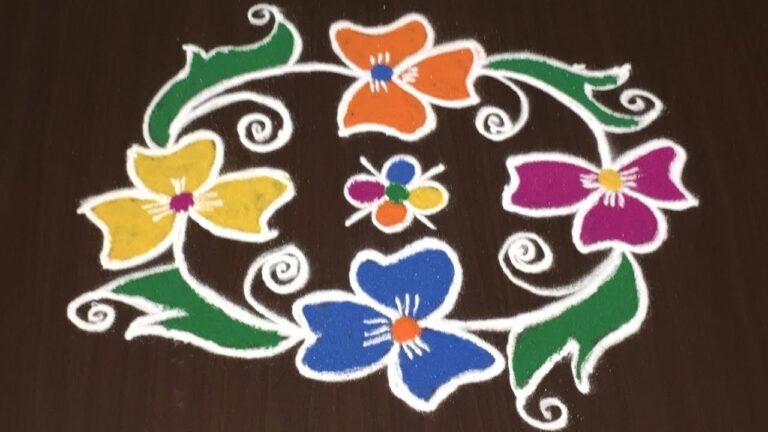
- Fill the petals and sections with your chosen colours, working one area at a time.
- Finish the edges with a fine line for a sharp, photograph-ready result.
What You Will Learn
- 8X8 Dots Sankranti Kolam
- Simple 8X8 Beginner Rangoli
- Sankranti Muggulu With Dots
- 8-8 Dots Kolam Design
- Easy Square Grid Rangoli
- 8X8 Pulli Kolam
Frequently Asked Questions
How do I draw this rangoli?
Begin with the dot grid — this is the skeleton of the design. With rice flour or chalk, place each dot at equal intervals. Then trace the curves slowly, one section at a time.
Is this suitable for beginners?
Yes — this design is shaped specifically with newcomers in mind. The dot grid is small enough to manage, and the curves are gentle. Most learners get it right by the second try.
What materials do I need?
You will need rice flour or rangoli powder (white, plus your choice of colours), a flat surface like a clean floor or courtyard, and optionally a dot stencil if you are new to grid-drawing.
How long does it take?
Roughly 2 min 51 sec to watch end-to-end, and 10–20 minutes to draw yourself depending on grid size and how careful you are with the curves.
After you draw this, take a picture before the day blows it away. Kolam is impermanent by design, but a photo lets you revisit the version you drew.

Leave a Reply