Awesome Rangoli Muggulu Designs has become a favourite among learners on our channel — and once you try it, you will see why.
Awesome rangoli muggulu designs for traditional purpose | Latest simple kolam 8*8 dots | RamRangoli Thank you so much for watching Channel
My Ram Rangoli Channel Contains : Rangoli Designs Sankranthi Muggulu
Diwali Rangoli Ratham Muggulu Kolam Designs
Muggulu Designs Chukkala Muggulu Easy Rangoli
Simple Rangoli Easy Rangoli Designs Dhanurmasam Muggulu
Melikala Muggulu Geethala Muggulu Sivarathri Muggulu
Tip: Keep your powder bowl close to your dominant hand. Small movements give cleaner curves.
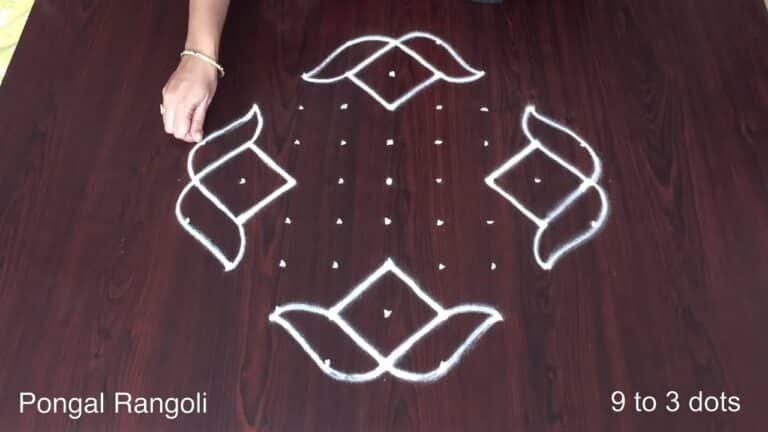
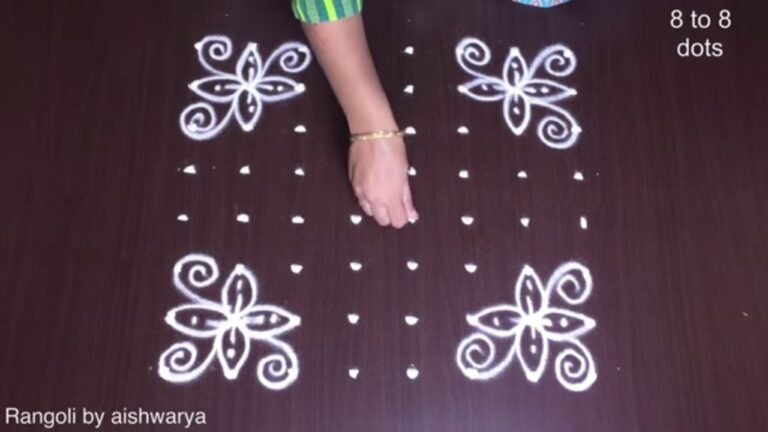
This beautiful 8 to 8 dots rangoli design captures the essence of traditional celebrations, making it perfect for festivals like Pongal and Diwali. The intricate patterns and vibrant colors used in this design not only enhance the beauty of a home but also invite positive energy. Beginners can easily learn to create this stunning muggulu with practice and patience. For more inspiration, you can explore Pongal Panaai Kolam Designs or check out Easy Five Stars Rangoli.
Rangoli, including this awesome design, is a significant part of Indian culture, often created at the entrance of homes to welcome guests and deities. The 8×8 dot pattern provides a solid foundation for exploring various motifs, allowing artists to showcase their creativity. For those interested in learning more about this art form, you can read up on its history and significance on Wikipedia. With each design, the tradition of rangoli continues to thrive, bringing warmth and joy to celebrations.
About this design: Awesome Rangoli Muggulu Designs is a beginner-friendly pattern that comes together in just a few minutes. Once you have practised the awesome rangoli muggulu designs dot grid, you can scale it up for festival mornings or scale it down for a daily doorstep. Many learners on our channel make this awesome rangoli muggulu designs their go-to design once they get the rhythm of the curves.
Awesome Rangoli Muggulu Designs — Step by Step Guide
Here is how to draw it, line by line. Take your time on the corners and the symmetry will take care of itself.
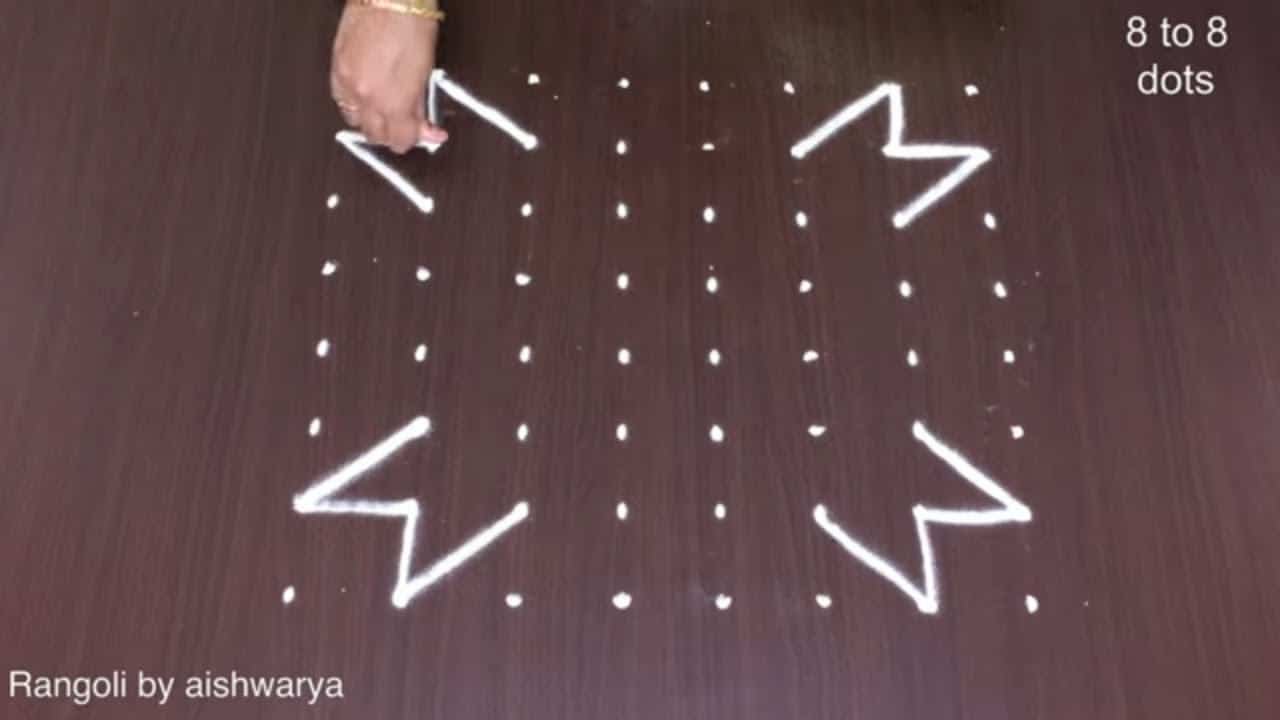
- Mark the 8-to-8 dot grid.
- At the centre draw a small square and fill it with a criss-cross net (hatched lattice) of straight lines.
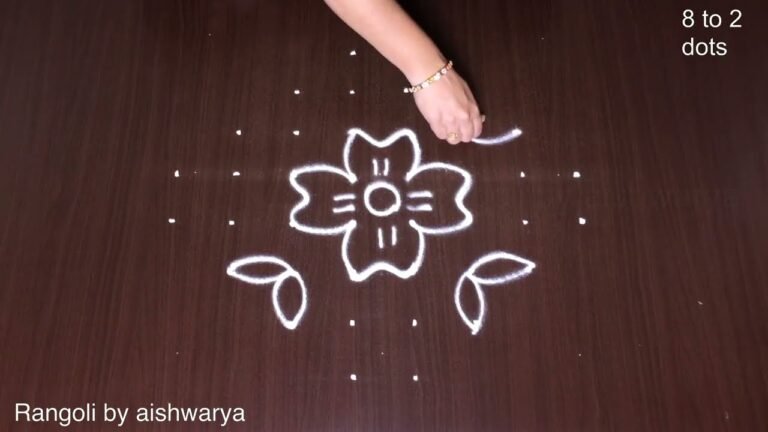
- Around that square draw a four-petal flower, one rounded petal bulging out on each side of the square.
- From the four sides and the diagonals draw long serrated rays – pointed leaf/paddy-ear shapes with comb-tooth edges – radiating outward to the edge dots.
- At the four outer corners add spiral scroll curls that coil inward.
- Keep the whole figure square and symmetric, then trace all lines in white powder.
What You Will Learn
- Simple Rangoli Designs
- Rangoli
- Muggulu
- Rangoli Designs
- Rangoli Kolam
- Kolam
Frequently Asked Questions
How do I draw this rangoli?
Start by marking an even dot grid on a flat, clean surface. Once the grid is in place, connect the dots following the curves shown in the video. Even spacing between dots is the single biggest factor for a clean finish.
Is this suitable for beginners?
Yes, and it is one we recommend to first-timers. The small grid keeps the design manageable while still teaching the core technique.
What materials do I need?
You will need rice flour or rangoli powder (white, plus your choice of colours), a flat surface like a clean floor or courtyard, and optionally a dot stencil if you are new to grid-drawing.
How long does it take?
A 3 min 56 sec video shows the complete sequence. On paper or floor, expect to spend around a quarter of an hour from grid to finished pattern.
This is one of those designs that grows on you. The first attempt is for learning; the second is for muscle memory; the third is when it starts to feel like your own.
Leave a Reply