Looking to learn Rangoli Using Different Shapes? This step-by-step guide walks you through every line, dot, and curve.
Rangoli Using Different Shapes 8 * 8 Dots | Traditional Muggulu New Design Flower Kolam | RamRangoli Thank you so much for watching Channel
For another beginner-friendly variation, try 11 By 6 Simple Kolam.
My Ram Rangoli Channel Contains : Rangoli Designs Sankranthi Muggulu
Diwali Rangoli Ratham Muggulu Kolam Designs
Muggulu Designs Chukkala Muggulu Easy Rangoli
Simple Rangoli Easy Rangoli Designs Dhanurmasam Muggulu
Melikala Muggulu Geethala Muggulu Sivarathri Muggulu
Tip: Use chalk to lightly mark your dot grid first — it wipes away cleanly once your rangoli is finished.
The rangoli design featuring 8 to 8 dots is a delightful representation of creativity using different shapes. This particular design is often created during festivals like Navratri, where the vibrancy of colors and geometric patterns embody the spirit of celebration. The intricate detailing allows for a variety of interpretations, making it a versatile choice for decorators eager to showcase their artistic flair. For those interested in exploring similar themes, check out this Navratri Durga Pooja Kolam.
Utilizing a combination of floral and geometric motifs, this rangoli design not only beautifies the entrance of homes but also symbolizes welcoming and abundance. Beginners will find joy in this design as it encourages experimentation with shapes and colors, making it an excellent starting point for learning the art of kolam. To further enhance your skills, you may also want to explore 9 Dots Chukkala Muggulu for Festivals for additional inspiration. For more information on the history and cultural significance of rangoli, you can visit this link.
About this design: Rangoli Using Different Shapes is a beginner-friendly pattern that comes together in just a few minutes. Once you have practised the rangoli using different shapes dot grid, you can scale it up for festival mornings or scale it down for a daily doorstep. Many learners on our channel make this rangoli using different shapes their go-to design once they get the rhythm of the curves.
Rangoli Using Different Shapes — Step by Step Guide
Use the steps below as a reference card while the video plays. Most learners finish on the second attempt.
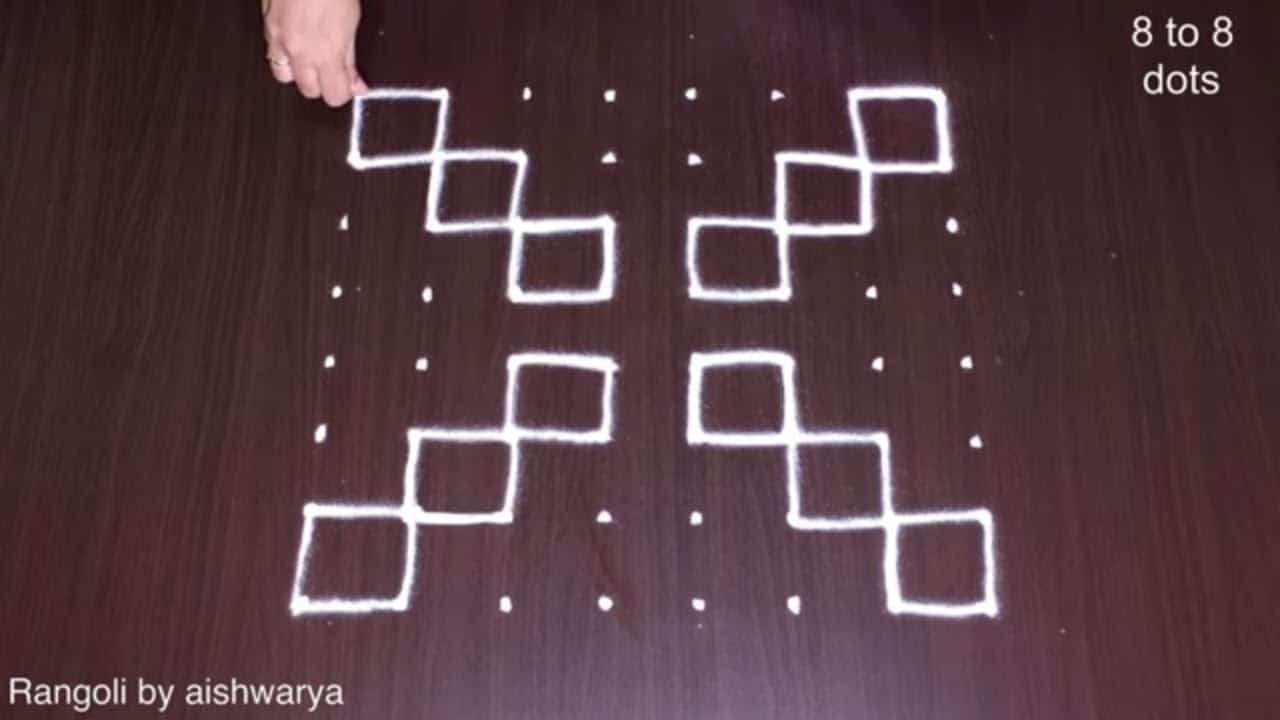
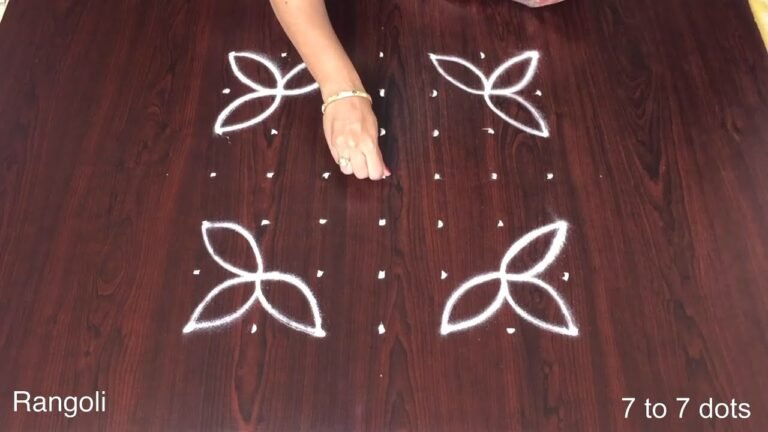
- Mark the 8-to-8 dot grid.
- Divide the grid into four equal quarters, one identical motif going in each.
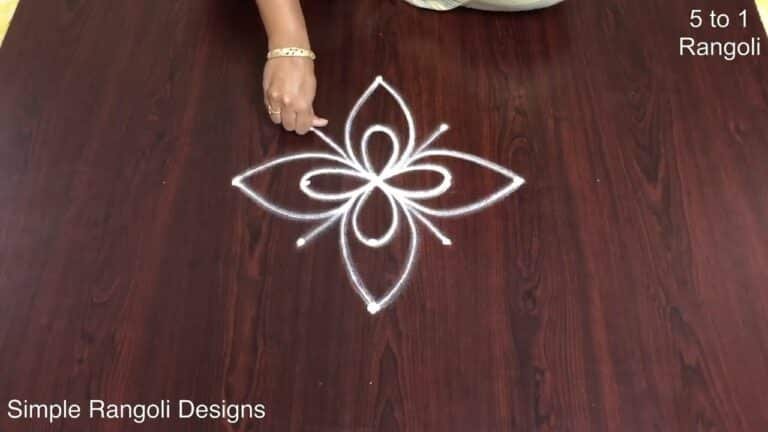
- For one motif draw two squares set corner-to-corner (slightly offset) linked by a diagonal band.
- From the inner corner add a spiral curl that coils inward, forming the eye of the shape.
- Repeat the same square-and-spiral motif in the other three quarters, each turned 90 degrees so the spirals face outward like a pinwheel.
- Even out all the lines so the four shapes match.
What You Will Learn
- Simple Rangoli Designs
- Rangoli
- Muggulu
- Rangoli Designs
- Rangoli Kolam
- Kolam
Frequently Asked Questions
How do I draw this rangoli?
The grid comes first. Use a soft chalk to dot the surface, count twice to confirm the spacing, then start connecting them following the video. Work from the centre outward.
Is this suitable for beginners?
Yes — this design is shaped specifically with newcomers in mind. The dot grid is small enough to manage, and the curves are gentle. Most learners get it right by the second try.
What materials do I need?
White rice flour for the outline, coloured powders for the fill, and a clean dry floor. That is the essentials list — you can add a stencil if you prefer.
How long does it take?
The tutorial is 2 min 43 sec long. With practice the actual drawing settles around 10 minutes; the first time will likely take twice that.
Save this design for your next festival morning. The pattern is small enough to draw quickly but striking enough to make a real impression at the doorstep.

Leave a Reply