This with 7 4 dots tutorial walks you through every step from the dot grid to the final pattern.

If you enjoy dot-grid muggulu, Simple Rangoli Design With is a satisfying pattern that comes together in just a few minutes.
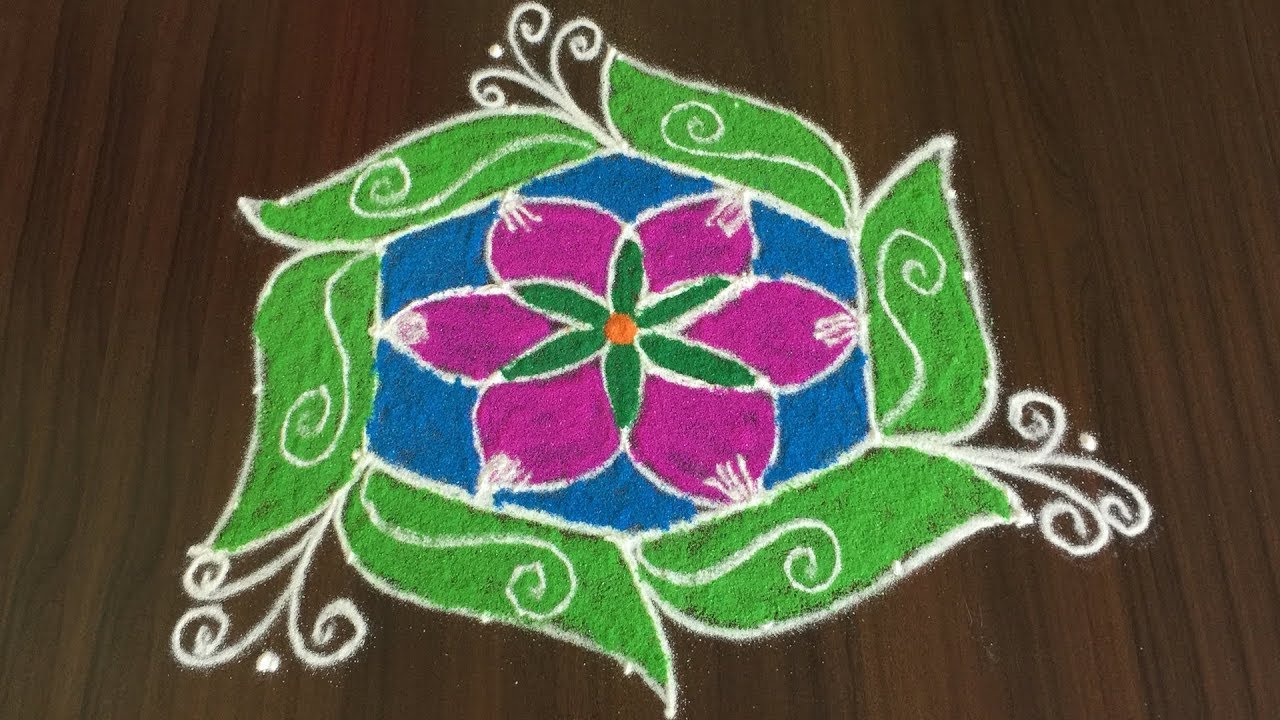
Creating a Simple Rangoli Design with 7-4 Dots
This section delves into crafting a simple rangoli design using the 7-4 dot pattern, perfect for beginners. By placing dots in a 7-4 arrangement, you can create intricate yet easy designs that are suitable for various occasions, such as festivals and housewarming events. Gather your materials like colored powders or rice flour, and embrace the creativity of making a simple rangoli design that adds vibrancy to your space.
Looking for a very easy 7-4 dots kolam that beginners can draw confidently? This simple rangoli design is structured, neat, and perfect for quick entrance decoration. In this video, we create a 7-4 dots very easy kolam, built on a balanced decreasing grid that naturally guides smooth curves and clean alignment. The 7 to 4 format is ideal for small to medium entrances, offering enough space to form a clear and symmetrical layout.
Proper placement of the 7-4 decreasing dot grid Connecting curves evenly and smoothly Maintaining balance along the central axis
Simple finishing touches for a polished look The 7-4 grid is one of the most beginner-friendly formats in dot kolam. It helps you understand spacing, symmetry, and proportion without making the design complex. Even if you are new to rangoli, this structured layout makes it easy to follow and complete with confidence. The step-by-step approach ensures a neat and satisfying final result.
Watch till the end to see the complete symmetrical reveal — the final alignment highlights how the 7-4 dot structure transforms into a beautiful and balanced kolam. If you enjoy easy dot formats, explore other beginner grids like 5-3 and 6-6 to expand your rangoli collection. Save this design and recreate it to enhance your entrance beautifully.
Tip: Practice on paper first if you are new to dot kolam. The grid is the same; only the surface changes.
This simple rangoli design with 7-4 dots is perfect for beginners who want to create an inviting entrance. The balanced decreasing grid of 7 to 4 dots not only makes it easy to follow but also allows for smooth curves and clean lines. This design can be a delightful addition to any festive occasion, showcasing the beauty of symmetry and proportion. For more festive inspiration, check out our 9 Dots Chukkala Muggulu for Festivals post.
Creating this rangoli is not just about the final product; it’s a wonderful way to practice the fundamentals of kolam art. The step-by-step process emphasizes the importance of spacing and balance, making it a rewarding experience for newcomers. Once you master this simple rangoli design, you might want to explore other styles, such as the Birds Kolam Design Simple Steps for a different aesthetic. For a broader understanding of this traditional art form, you can visit this Wikipedia page.
With 7 4 Dots — Step by Step Guide
If you have drawn dot rangoli before, this will feel familiar. If you have not, the dot grid will guide you.
- Clear a flat surface and set down your dot grid using rice flour or chalk.
- Confirm the dot spacing is even — uneven dots are the biggest cause of wobbly curves.
- Begin tracing from the centre outward, following the curves shown in the video above.
- Fill the petals and sections with your chosen colours, working one area at a time.
- Finish the edges with a fine line for a sharp, photograph-ready result.
What You Will Learn
- 7-4 Dots Very Easy Kolam
- Simple Beginner Rangoli 7-4
- Easy Dot Kolam Design 7-4
- 7-4 Dots Kolam Pattern
- Small Entrance Rangoli 7-4
- 7-4 Pulli Kolam
Frequently Asked Questions
How do I draw this rangoli?
Begin with the dot grid — this is the skeleton of the design. With rice flour or chalk, place each dot at equal intervals. Then trace the curves slowly, one section at a time.
Is this suitable for beginners?
Absolutely. You can pause and rewind the video at every step. The pattern is straightforward once you have the grid down.
What materials do I need?
Just three things: powder (white plus any colours you want), a flat dry surface, and a few minutes of focus. A small bowl per colour helps keep things tidy.
How long does it take?
A 2 min 24 sec video shows the complete sequence. On paper or floor, expect to spend around a quarter of an hour from grid to finished pattern.
A reminder that beautiful art does not need expensive materials — just a steady hand, a clean surface, and a few pinches of rice flour.


Leave a Reply