Unique Designs Rangoli On combines tradition with simplicity, making it one of the most rewarding designs to practice at home.
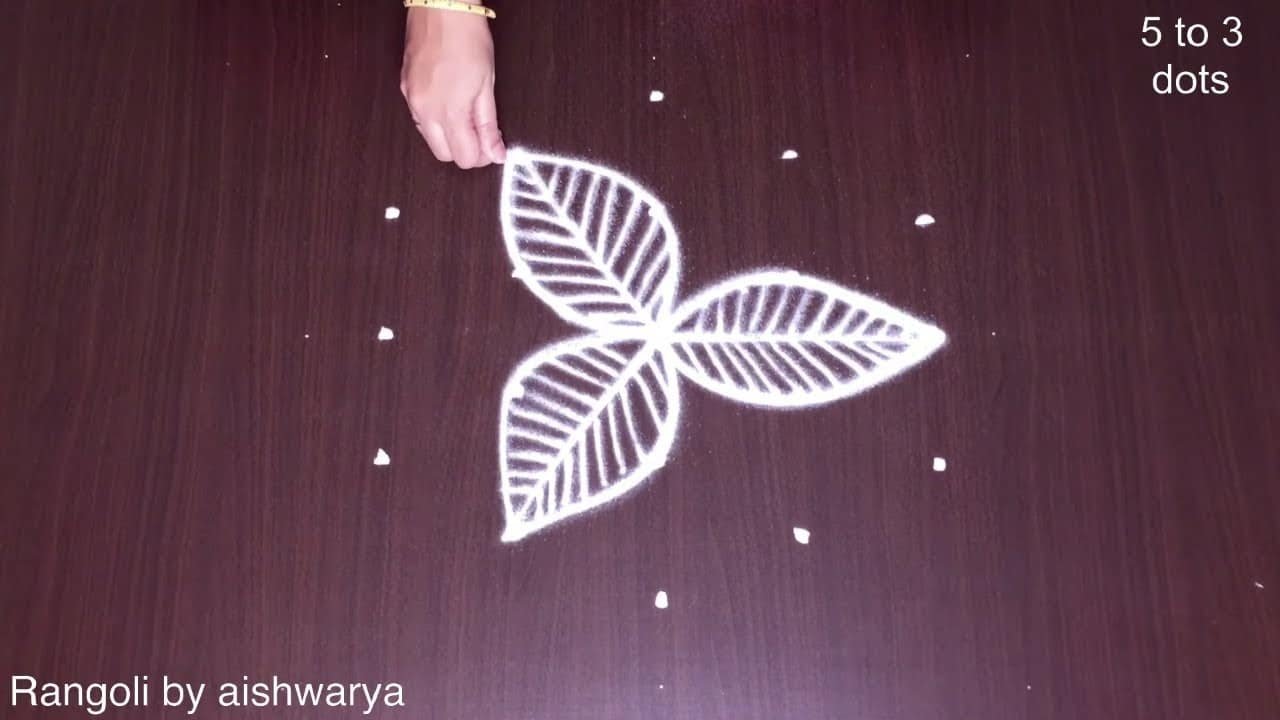
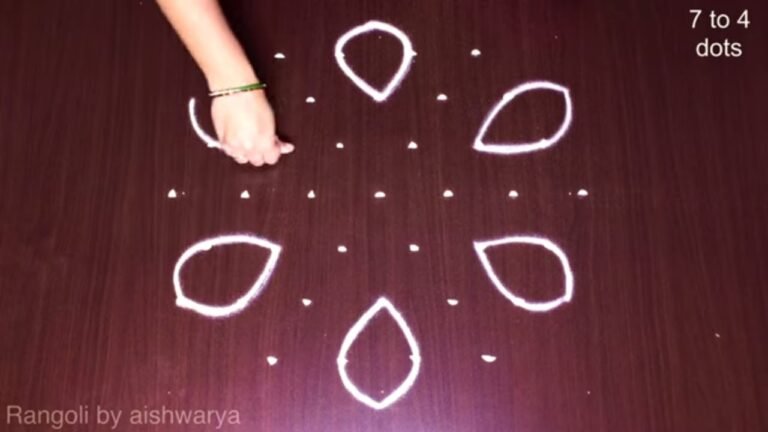
Small Leafs Unique Designs Rangoli on Floor | Kolam Simple & Easy 5×3 Chinna Chukkala Muggu. This tutorial will show you how to draw Beautiful Indian traditional art Diwali Rangoli patterns using materials such as dry rice flour, colored sand or flower petals Rangoli designs by Aishwarya. Simple rangoli Kutti Kolam pattern is created on the floor in living rooms or courtyards. Draw the Lines step by step as it is shown in this video and will be awesome Rangoli Design. 😲 The Diwali rangoli pattern here is one of the amazing latest kolam designs. Simple Rangoli Designs and easy rangoli designs by Aishwarya with dots for beginners and intermediate.
1. Diwali Rangoli 2. Pongal kolams 3. Easy rangoli designs
4. Rangoli design 5. Chukkala muggulu 6. Dot rangoli designs
7. Dots rangoli 8. Easy rangoli 9. Easy rangoli designs
10. Kolam designs 11. Kolam with dots 12. Muggulu designs
13. Muggulu designs with dots 14. Small rangoli designs 15. Muggulu chukkala muggulu
Tip: Work from the centre outward. It keeps the symmetry honest and prevents the design from drifting off-balance.
This design belongs to the broader tradition of rangoli and kolam art practised across South India. Explore more in our 5 to 3 dots Rangoli Designs collection.
This unique designs rangoli on floor showcases a charming pattern featuring small leaves, reflecting the essence of traditional art. With a dot count of 5×3, it’s a perfect choice for beginners aiming to enhance their skills during festive occasions like Diwali. The design emphasizes simplicity while bringing a vibrant touch to any living space or courtyard, making it an ideal option for those looking to create a warm atmosphere. For more inspiration, check out this Perfect Geometrical Shapes Rangoli that adds a different flair to your celebrations.
Crafting this kolam not only engages creativity but also connects with cultural heritage, as rangoli designs have been a part of Indian traditions for centuries. Utilizing materials such as dry rice flour or colored sand enriches the experience, allowing for a tactile connection to the art form. If you’re interested in expanding your repertoire, you might explore the 12 to 4 Dots Flower Pot Rangoli for another delightful pattern. For more about the history and significance of rangoli, you can visit this informative link.
Unique Designs Rangoli On — Step by Step Guide
The video above shows the full sequence; the steps below summarise each stage so you can glance back as you draw.
- Clear a flat surface and set down your dot grid using rice flour or chalk.
- Confirm the dot spacing is even — uneven dots are the biggest cause of wobbly curves.
- Begin tracing from the centre outward, following the curves shown in the video above.
- Fill the petals and sections with your chosen colours, working one area at a time.
- Finish the edges with a fine line for a sharp, photograph-ready result.
What You Will Learn
- Simple Rangoli Designs
- Rangoli
- Muggulu
- Rangoli Designs
- Rangoli Kolam
- Kolam
Frequently Asked Questions
How do I draw this rangoli?
The grid comes first. Use a soft chalk to dot the surface, count twice to confirm the spacing, then start connecting them following the video. Work from the centre outward.
Is this suitable for beginners?
Yes — this design is shaped specifically with newcomers in mind. The dot grid is small enough to manage, and the curves are gentle. Most learners get it right by the second try.
What materials do I need?
You will need rice flour or rangoli powder (white, plus your choice of colours), a flat surface like a clean floor or courtyard, and optionally a dot stencil if you are new to grid-drawing.
How long does it take?
The tutorial is 2 min 56 sec long. With practice the actual drawing settles around 10 minutes; the first time will likely take twice that.
Pin this for later or share with a friend learning kolam — and let us know in the comments which design you would like next.

Leave a Reply