New Year Rangoli 2026 | 14 to 2 Dots Step-by-Step Muggulu
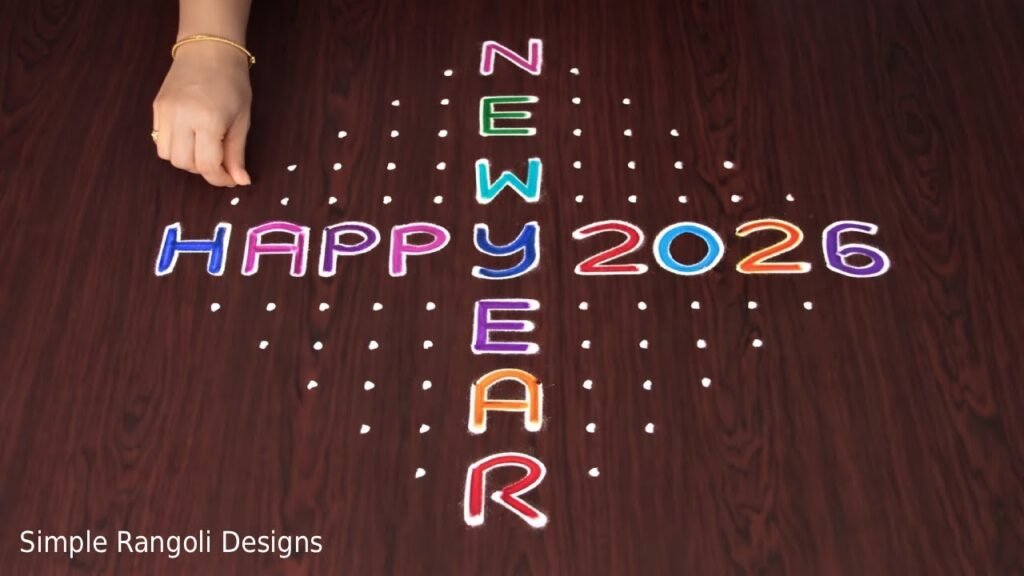
Table of Contents
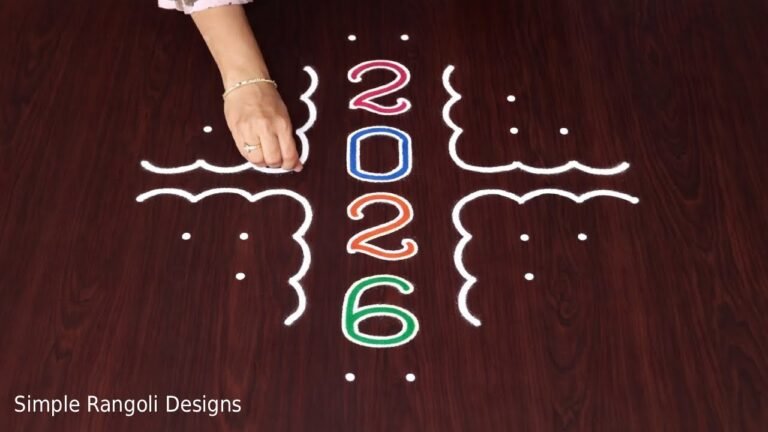
This New Year Rangoli 2026 with 14 to 2 dots is a beautiful and easy step-by-step muggulu design, perfect for decorating your home during New Year celebrations. This dot kolam pattern is simple to follow and ideal for beginners who want to create neat and traditional rangoli designs.
The design is suitable for New Year decoration, festival rangoli, and daily kolam practice, making it a perfect choice for both beginners and experienced artists.
ఈ 14 నుండి 2 చుక్కల న్యూ ఇయర్ ముగ్గులు 2026 సులభంగా గీయగలిగే విధంగా రూపొందించబడింది. పండుగ రోజులలో ఇంటి ముందు అందంగా అలంకరించడానికి ఇది చాలా ఉపయోగపడుతుంది.
This traditional art form belongs to the heritage of rangoli and kolam designs drawn at doorsteps across South India. Explore more in our New Year Rangoli collection. According to Wikipedia, rangoli uses coloured rice, flour, and flower petals and is believed to bring prosperity and good luck.
This tutorial has earned 148,524 views and 665 likes from our community of rangoli enthusiasts.
New Year Rangoli 2026 – Step by Step Guide
In this video you will learn how to draw a new year rangoli 2026 from start to finish. Watch carefully and pause at each step to recreate the pattern at home.
- Clean a flat surface and prepare your rangoli powder or rice flour.
- Mark the dot grid as shown at the start of the video — accurate spacing is key.
- Connect the dots following the curves shown in the tutorial.
- Fill in the petals or sections with your chosen colours.
- Add finishing touches and clean the edges for a neat result.
What You Will Learn
- New year rangoli
- New year muggulu
- New years 2026
- New year rangoli designs
- Creative new year rangoli
- New year rangoli designs 2026
- Happy new year rangoli
- Happy new year rangoli designs
Tips for Drawing This Pattern
Here are some helpful tips to get the best results with this New Year Rangoli design:
- Start small — practice on paper before drawing on the floor.
- Use a dot grid — accurate dots make the curves much easier to connect.
- Work from the centre outward — this keeps the pattern symmetrical.
- Watch at 0.75x speed — slowing the video helps you follow each step clearly.
- Practice daily — even 10 minutes a day builds skill and confidence quickly.
Materials Needed
- Rice flour or white rangoli powder (for the outline)
- Coloured rangoli powder in your chosen shades
- A flat, clean floor surface or drawing board
- A small cup or cone for precise powder dispensing
Frequently Asked Questions
How do I make a new year rangoli 2026?
Start by marking dots in the correct grid pattern on a clean flat surface. Use chalk or rice flour to place the dots evenly, then connect them following the curves shown in the video.
Is this New Year Rangoli suitable for beginners?
Yes! This new year muggulu tutorial is easy to follow even if you are new to kolam or muggulu. Most learners complete the pattern on their first or second try.
What materials do I need?
You will need rice flour or rangoli powder in your chosen colours and a flat clean surface. No special tools are required.
How long does it take?
The tutorial video is 5 minutes 45 seconds long. Most people take between 10 and 20 minutes to complete this drawing.
Can I use this for festivals?
Absolutely. This is a popular New Year Rangoli pattern used during festivals, daily doorstep decoration, and special occasions like Pongal, Diwali, and Ugadi.
Whether you are preparing for a festival or simply enjoying this art, this is a wonderful New Year Rangoli design to add to your collection. Watch the video, follow along, and share your finished creation!
Leave a Reply