Whether you are decorating for a festival or your daily morning ritual, 6 To 6 Dots is an excellent design to keep handy.
Bogi Muggulu 🌹 Pongal Rangoli with dots 🌹 6 to 6 dots Easy Kolam Rangoli Thank you so much for watching Channel
My Rangoli Channel Contains : Rangoli Designs Sankranthi Muggulu
Diwali Rangoli Ratham Muggulu Kolam Designs
Muggulu Designs Chukkala Muggulu Easy Rangoli
Simple Rangoli Easy Rangoli Designs Dhanurmasam Muggulu
Melikala Muggulu Geethala Muggulu Sivarathri Muggulu
Tip: A slightly damp brush along the edges gives a sharper finish, especially for festival photographs.
This design belongs to the broader tradition of rangoli and kolam art practised across South India. Explore more in our 6 to 6 dots Rangoli Designs collection.
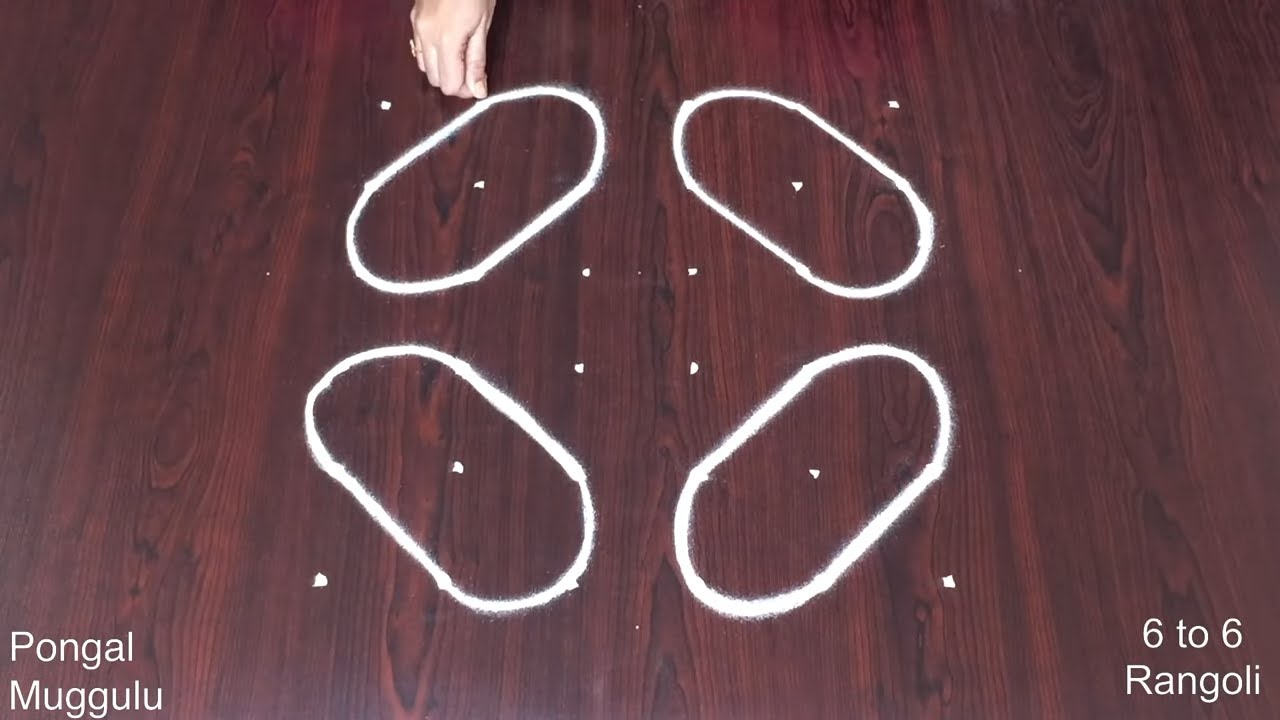
The 6 to 6 dots kolam is a delightful and simple design that is perfect for beginners. Often created during festivals like Pongal, this pattern showcases a symmetrical arrangement that brings harmony to any entrance. The use of six dots in each row allows for a variety of creative expressions, making it versatile for daily or festive occasions. For those looking to explore more traditional designs, the Pongal Pot Kolam Special Rangoli Designs can offer great inspiration.
This kolam style is characterized by its ease of execution, making it accessible to anyone looking to adorn their home with vibrant designs. By using a simple chalk or rice flour, the 6 to 6 dots pattern can be completed quickly, allowing you to focus on enjoying the process. If you’re interested in expanding your repertoire, consider trying the Daily Simple Small Rangoli 6x2x2dots Kolam for more ideas. For more information about the cultural significance of rangoli, you can visit this page.
6 To 6 Dots — Step by Step Guide
The video above shows the full sequence; the steps below summarise each stage so you can glance back as you draw.
- Clear a flat surface and set down your dot grid using rice flour or chalk.
- Confirm the dot spacing is even — uneven dots are the biggest cause of wobbly curves.
- Begin tracing from the centre outward, following the curves shown in the video above.
- Fill the petals and sections with your chosen colours, working one area at a time.
- Finish the edges with a fine line for a sharp, photograph-ready result.
What You Will Learn
- Simple Rangoli Designs
- Rangoli
- Muggulu
- Rangoli Designs
- Rangoli Kolam
- Kolam
Frequently Asked Questions
How do I draw this rangoli?
Set down the dot grid in pencil or chalk, then follow the loops one petal at a time. If a curve goes off, wipe it and retry — kolam is forgiving.
Is this suitable for beginners?
Beginner-friendly is exactly the right description. The video walks through every line clearly and you can match the pace.
What materials do I need?
Rice flour, coloured rangoli powders, and a clean stretch of floor or paper. Some draw with chalk first to set the grid before powdering over it.
How long does it take?
A 4 min 20 sec video shows the complete sequence. On paper or floor, expect to spend around a quarter of an hour from grid to finished pattern.
Try this design tomorrow morning at your doorstep. The compact grid makes it ideal for a daily ritual, not just festival days.


Leave a Reply