7 Se 7 Flower is the kind of design that looks intricate but is genuinely beginner-friendly once you follow the dot grid.
For another beginner-friendly variation, try 8 8 Dots Simple Rangoli Designs.
Learn more about the tradition of Rangoli on Wikipedia.
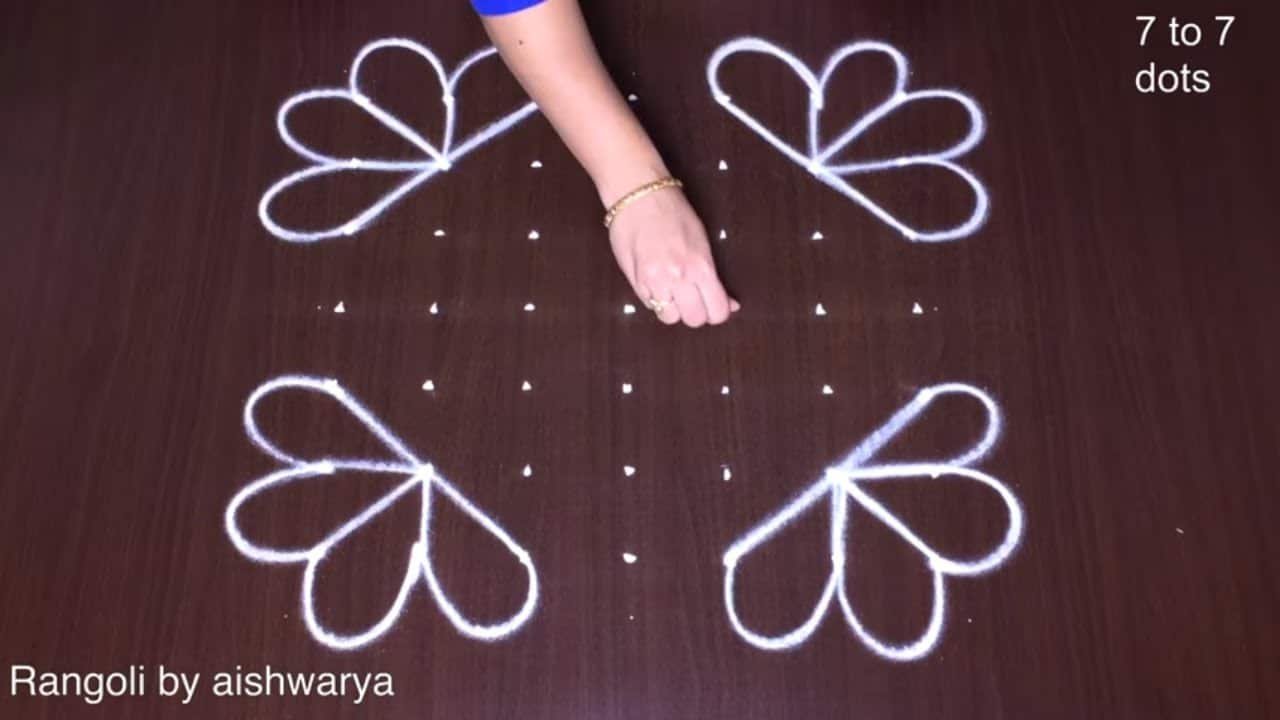
Want to learn how to draw 7×7 dots rangoli step by step? This simple and festive 7 by 7 design is perfect for daily decoration and special occasions. In this video, I guide you through a complete 7×7 dots rangoli tutorial using a clear square dot grid. If you are searching for step by step 7×7 dots rangoli or neat 7×7 chukkala muggulu, this tutorial will help you master symmetry and smooth curves.
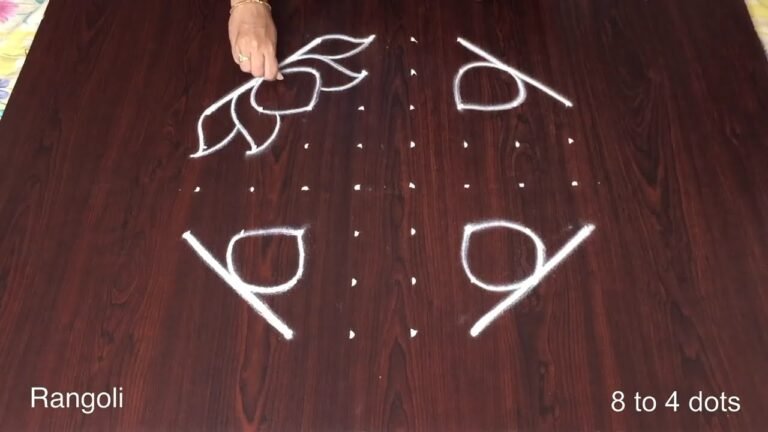
We begin by placing the full 7×7 dot structure carefully to build a strong foundation. Then the outer framework develops gradually into a graceful 7×7 dots floral kolam pattern. This structured approach makes it beginner-friendly and easy to recreate. How to construct a proper 7×7 rangoli designs grid How to draw a simple 7×7 dot rangoli design
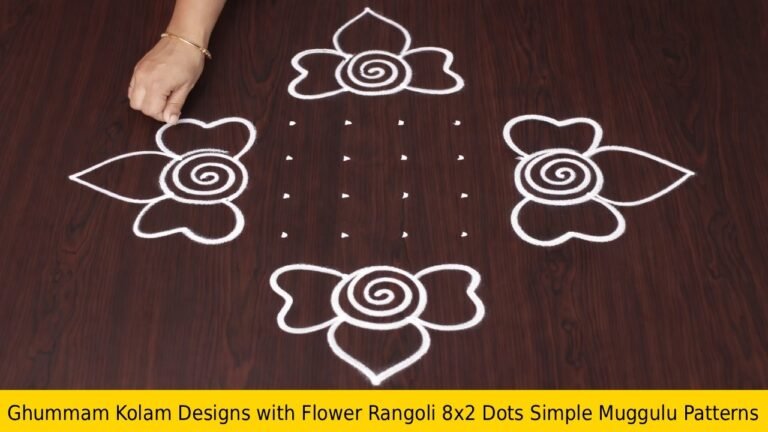
How to refine curves in 7×7 dots floral muggu pattern How to create a neat 7×7 dots creative muggu pattern This design works beautifully as a daily 7×7 dots rangoli and can also be adapted into a festival special 7×7 dots rangoli. It is especially suitable for those searching for dot rangoli designs for diwali 7×7 or elegant festive doorway patterns.
If you enjoy structured dot rangoli designs 7×7 and want a balanced square layout, this method will help you create confident and symmetrical results. Watch till the end to see how the 7×7 grid transforms into a complete 7×7 dots festive rangoli pattern. If you love square-grid kolams, explore more step-by-step dot rangoli tutorials on the channel.
Tip: Keep your powder bowl close to your dominant hand. Small movements give cleaner curves.
About this design: 7 Se 7 Flower is a beginner-friendly pattern that comes together in just a few minutes. Once you have practised the 7 se 7 flower dot grid, you can scale it up for festival mornings or scale it down for a daily doorstep. Many learners on our channel make this 7 se 7 flower their go-to design once they get the rhythm of the curves.
7 Se 7 Flower — Step by Step Guide
Use the steps below as a reference card while the video plays. Most learners finish on the second attempt.
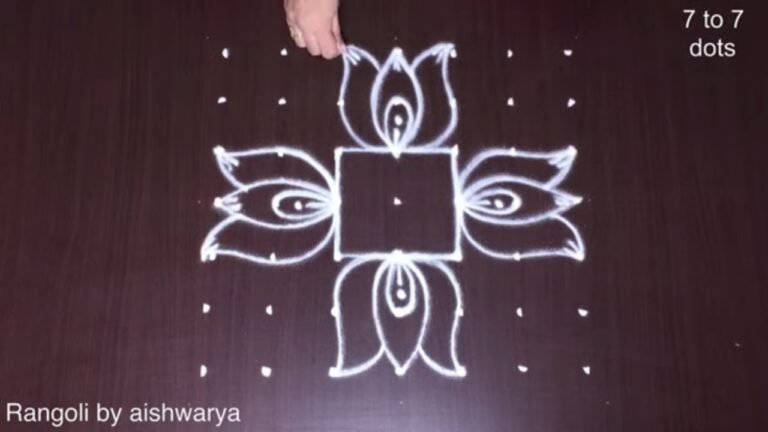
- Mark the 7-by-7 dot grid.
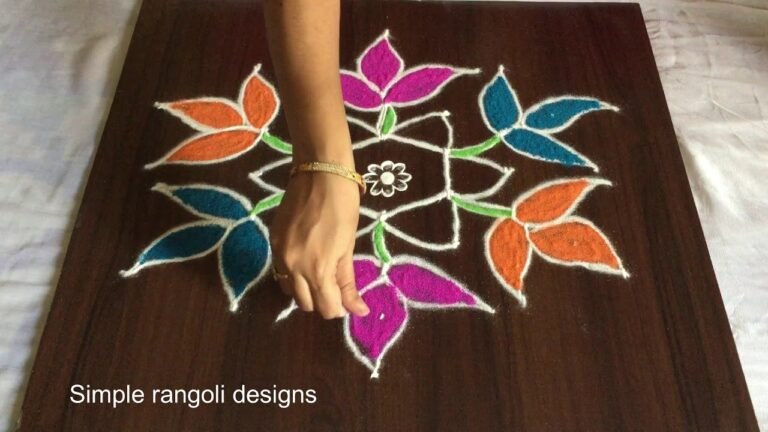
- In the centre, draw a square and fill it with a fine cross-hatch (net) pattern.
- On each side of the square, draw a heart pointing inward, with a small curl inside.
- From each corner of the square, extend a sharp four-point star arm reaching to the corner dots.
- Add a small pointed petal at each outer tip.
- Keep symmetric across both axes and diagonals, then outline in white and colour.
What You Will Learn
- Daily 7X7 Dots Rangoli
- Step By Step 7X7 Dots Rangoli
- 7X7 Chukkala Muggulu
- Festival Special 7X7 Dots Rangoli
- Dot Rangoli Designs For Diwali 7X7
- Dot Rangoli Designs 7X7
Frequently Asked Questions
How do I draw this rangoli?
Set down the dot grid in pencil or chalk, then follow the loops one petal at a time. If a curve goes off, wipe it and retry — kolam is forgiving.
Is this suitable for beginners?
It is one of the more forgiving designs in our collection. Beginners often pick it as a confidence-builder before moving on to larger grids.
What materials do I need?
Rice flour, coloured rangoli powders, and a clean stretch of floor or paper. Some draw with chalk first to set the grid before powdering over it.
How long does it take?
Plan for roughly 7 min 30 sec to watch and 15 minutes to draw. The second attempt is always cleaner than the first — that is the nature of dot kolam.
Once this design feels familiar, switch the colours or rotate the grid by a step. Small tweaks keep daily kolam practice interesting.
Leave a Reply